background image

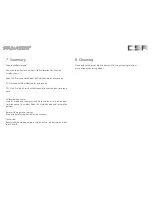
7. Summary

Choose platform mode

Power on the wheel and wait until self calibration has finished. 

Display shows “- - - “.

Xbox 360:

 Press and hold Xbox 360 Guide Button for one second.

PC: 

Press and hold Back Button for one second.

PS3:

 Start PC mode. Press Back Button and Connect button simultane-

ously.

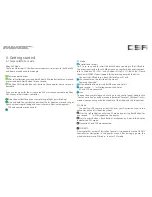
Calibrate wheel center

Start PC mode and then press and hold the lower two red buttons 

simultaneously. Then press Xbox 360 Guide Button and release the 

buttons.

Reset all Tuning Menu settings

Press and hold Tuning Button for ten seconds.

Fan control

Enter stand-by mode and press the lower two red buttons and but-

tons A and B.

8. Cleaning

Clean only with a dry or slightly damp cloth. Using cleaning solutions 

may damage your racing wheel.

Содержание Forza Motorsport CSR Wheel

Страница 1: ...Manual...

Страница 2: ...IMAGE HERE...

Страница 3: ...e most out of and before using your new Forza Motorsport CSR Wheel please read this manual for important information regarding your health and how to safely use this product This manual can also be us...

Страница 4: ...ion of shifters 5 2 Table installation 5 3 Simulator installation 5 4 Installation of pedals 5 5 Xbox 360 Headset Install 5 6 Electrical connection 6 Getting started 6 1 Select platform mode 6 2 Tunin...

Страница 5: ...ry of seizures orepilepsy consult a doctor before playing Use of game controllers keyboards mice or other electronic input de vices may be linked to serious injuries or disorders When playing video ga...

Страница 6: ...nty As with many other electrical devices failure to take the following precau tions can result in serious injury or death from electric shock fire or damage to the racing wheel If you use AC power se...

Страница 7: ...mode clutch and 6 speed shifter with reverse PC This wheel can be used with any computer that meets these minimum system requirements Windows XP SP2 32 Bit Windows Vista 32 Bit 64 Bit Windows 7 32 Bit...

Страница 8: ...4 Description of buttons and accessories 4 1 XBox 360 button layout IMPORTANT This button naming will be used to explain all button combinations A LSB RSB BACK START X Y B A...

Страница 9: ...4 Description of buttons and accessories 4 2 PlayStation 3 button layout X S T C X L2 R2 SELECT START L3 R3...

Страница 10: ...4 Description of buttons and accessories 4 3 Additional functions Left Bumper L1 Right Bumper R1 Xbox 360 Guide button Tuning button...

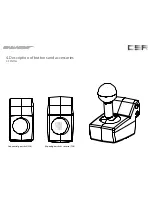
Страница 11: ...4 Description of buttons and accessories 4 3 Shifter 6 Speed gear stick reverse 7GS Sequential gear stick 2GS...

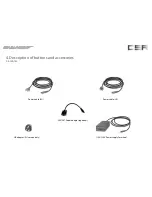
Страница 12: ...4 Description of buttons and accessories 4 4 Cables Power cable EU Power cable US UK adapter EU version only G25 G27 Pedal adapter optional 110V 220V Power supply for wheel...

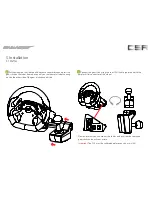
Страница 13: ...e left or right side The tube has to be fully inserted until it comes out of the base on the other side 3 To build up some counterforce use a flat underground and place the wheel vertical on the tubes...

Страница 14: ...e metal tubes coming out on the other side of the gear stick channels side 7 Connect the gear stick using the short PS 2 cable purple end to the purple shifter connector of the wheel Please note that...

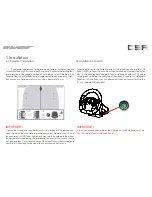
Страница 15: ...ll out the table clamp while the wheel rim is facing the floor 3 Mount the wheel to the table and then push in the table clamp as much as possible Please note that the quick release clamps must be unf...

Страница 16: ...ble so we did not include any screws but you can use standard metric screws with a diameter of 6 mm In combination with the Forza Motorsport CSR wheel you can use the CSR Pedals CSR Elite Pedals Porsc...

Страница 17: ...t Install Turn down the volume by rotating the volume control all the way to the left Insert the 2 5 mm headset jack into the female connector on the left side of your CSR wheel If necessary you can u...

Страница 18: ...5 Installation 5 6 Electrical connection Please plug in the power supply to the right side of the base IMPORTANT Only Use the power supply that came with your CSR wheel...

Страница 19: ...after the start sequence The wheel display shows and waits in Standby Mode Now you can select one of the three separate platform modes to ensure the best functionality on the Xbox 360 PC or Play stati...

Страница 20: ...ck www FANATEC com support for the latest updates on the driver 2 Connect the USB cable to a free USB slot of your PC and to the connector on the left side of the wheel 3 Power on the wheel 4 After se...

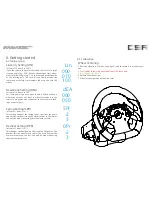
Страница 21: ...rm even during game play directly on the wheel You can adjust the strength of the Force Feedback and Vibration as well as the best sensitivity for your favourite game Additionally you can enable the D...

Страница 22: ...allows you to adjust the two additional vibration motors in the wheel rim that can be controlled by the game if supported It can be adjusted in increments of 10 from 0 to 100 By default the vibration...

Страница 23: ...rger movements the more you turn the wheel Dead Zone Setting DEA In steps of 10 from 0 to 100 For some games you may want to add a little dead zone where the car does not react to wheel movements in t...

Страница 24: ...he shifter is not working properly it might require new calibration as well Please go through the following steps 1 Power on the wheel 2 Choose any platform mode PS3 PC Make sure your shifter is conne...

Страница 25: ...ct button simultane ously Calibrate wheel center Start PC mode and then press and hold the lower two red buttons simultaneously Then press Xbox 360 Guide Button and release the buttons Reset all Tunin...

Страница 26: ...the game Please make sure that the gear stick cable is connected properly Please make sure that the gear stick is calibrated see shifter manual In GranTurismo 5 Prologue you need to press the triangle...

Страница 27: ...s a brand of Endor AG www FANATEC com 12 Trademarks PlayStation 2 PlayStation 3 are trademarks of Sony ComputerEn tertainment Inc Fanatec and Endor are registered trademarks of Endor AG Germany Forza...

Страница 28: ...claims on the basis of various national laws Warranty is subject to return of the defective product with carriage paid within the warranty period including the original receipt that must include date...

Страница 29: ......

Отзывы: