background image

43

DEUTSCH

ENGLISH

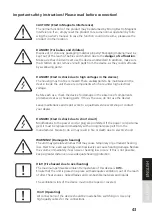
Important safety instructions! Please read before connection!

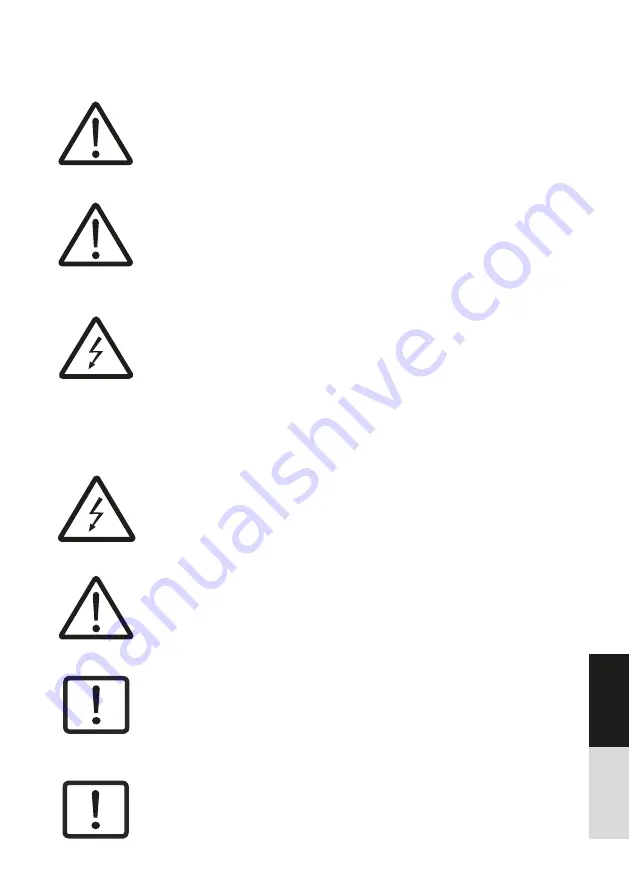
  CAUTION! (Electro Magnetic Interference)

  The normal function of the product may be disturbed by Strong Electro Magnetic     
  Interference. If so, simply reset the product to resume normal operation by follo 
  wing the owner‘s manual. In case the function could not resume, please use the     
  product in other location.

  DANGER! (For babies and children)

  Dispose of or store any packaging material properly! Packaging material must be    
  kept out of the reach of babies and children due to the 

danger of suffocation

.

  Make sure that children never use the device unattended! In addition, make sure    
  that children do not remove (small) parts from the device, as they could suffocate    
  by swallowing parts!

  DANGER! (Electric shock due to high voltages in the device)

  The housing must not be removed! There are 

no

 parts to be maintained in the    

  device. Inside the unit there are components which are under high electrical 
  voltage.

  Before each use, check the device for damage or the absence of components,    
  protective devices or housing parts. If this is the case, do not use the device! 

  Leave maintenance and repair work to a qualified service workshop or contact    
  your dealer.

  DANGER! (Electric shock due to short circuit)

  Modifications to the power cord or plug are prohibited. If the power cord is dama-   
  ged, it must be replaced immediately with an original spare part from the 
  manufacturer. Failure to do so may result in fire or death due to electric shock!

  WARNING! (Damage to hearing)

  The unit may generate volumes that may cause temporary or permanent hearing    
  loss. Over time, even seemingly uncritical levels can cause hearing damage. Reduce     
  the volume immediately if ear noise or hearing loss occurs. If this is not possible,    
  keep a greater distance or use adequate hearing protection.

  Hint! (Fire hazard due to overheating)

  The maximum permissible ambient temperature of this device is

 40°C.  

  Ensure that the unit is placed in a place with adequate ventilation, out of the reach    
  of direct heat sources, naked flames and combustible materials and liquids.

  The ventilation slots of the device must not be taped or covered.
 

Hint! (Operating)


             All connections of the device should be made before switching on. Use only  


             high quality cables for the connections.

Содержание DD6600

Страница 1: ...1617453 Tel 49 221 8884 0 Fax 49 221 8884 2500 info musicstore de Scope of delivery Quantity Content 1x Digital Drum Set 1x Manual Intended use The product FAME DD6600 was designed for use as an elect...

Страница 2: ...ents protective devices or housing parts If this is the case do not use the device Leave maintenance and repair work to a qualified service workshop or contact your dealer DANGER Electric shock due to...

Страница 3: ...ed on a rack it must always be ensured that it is stable and secure Hint Possible damage due to magnetic fields Loudspeakers generate a static magnetic field Please keep an appropriate distance from o...

Страница 4: ...or television reception which can be determined by turning the equipment off and on the user is encouraged to try to correct the interference by one or more of the following measures Reorient or relo...

Страница 5: ...Voice Parameters 54 Saving a User Kit 55 PLAYING ALONG WITH A SONG Playing Along with a Song 55 Muting the Drums in Songs 56 Metronome 56 RECORD Preparing Record 57 Start Stop Recording 57 COACH About...

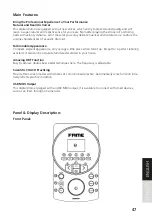
Страница 6: ...the unique characteristics of acoustic drum kit Fashionable Appearance Compact elegant appearance only occupy a little place when fold it up Except for a perfect learning assistant it also can be exqu...

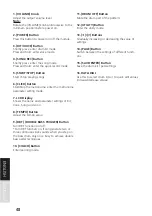
Страница 7: ...nd parameter settings of Kit Voice Song and so on 8 TEMPO Button Adjust the tempo value 9 DBT DOUBLE BASS TRIGGER Button Turn DBT function on off Turn DBT function on It can generate two or three cont...

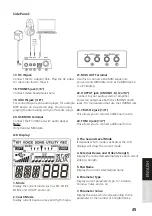
Страница 8: ...em or amplifier For stereo output use both the L MONO and R jacks For monaural output use the L MONO jack 23 CRASH 2 jack 1 4 This allows you to connect additional Crash 2 24 TOM 4 jack 1 4 This allow...

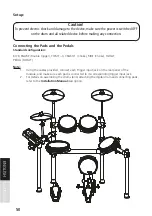
Страница 9: ...nfiguration KICK SNARE Double trigger TOM 1 3 CRASH 1 Choke RIDE Choke HI HAT PEDAL HI HAT Note 1 Using the cables provided connect each Trigger input jack on the rear panel of the module and make sur...

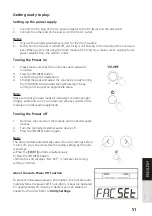
Страница 10: ...direction Keep turning until you get an appropriate value Note Make sure that you have made all necessary connections right trigger audio and so on turn down all volume controls of the module and oth...

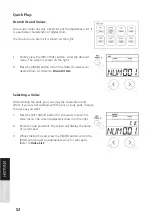
Страница 11: ...t your desired drum kit Refer to Drum Kit List Selecting a Voice While striking the pads you can enjoy the ensemble sound effect If you are not satisfied with the voice of any pads change the voice as...

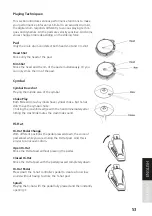
Страница 12: ...middle area of the cymbal Choke Play Both Ride and Crash cymbals have cymbal choke But hi hat don t have the cymbal choke Choking the crash ride edge with the hand immediately after hitting the crash...

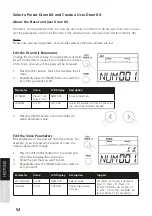
Страница 13: ...ike the pad that you want to edit 3 Repeatedly press the PAGE button to select an item you want DEUTSCH ENGLISH About the Preset and User Drum Kit From No 1 to 30 are preset drum kits and the drum kit...

Страница 14: ...nce experience a variety of styles can be selected Each one offers you to practice Refer to the Song List You can play the drums while listening to one of these songs A song contains Drum part and Acc...

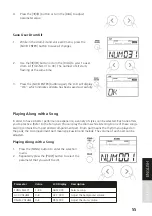
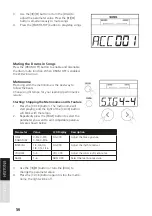
Страница 15: ...he Metronome and Its Feature 1 Press the CLICK button The metronome will start playing and the light of the CLICK button will blink with the tempo 2 Repeatedly press the PAGE button to select the para...

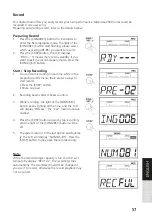
Страница 16: ...ording the light of the SONG REC button keeps lighting all the time and the LCD will display ING xxx the xxx means measure number 4 Press the ST SP button again to stop recording and the light of the...

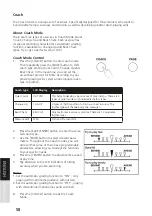
Страница 17: ...apt the functions to your specific needs 4 Press the TEMPO button to adjust practice speed at any time 5 Pay attention to the LCD indicators of hitting accuracy when you are practicing Note 1 Set the...

Страница 18: ...ticing Parameter Range Display Description QUT 1 5 QUT XXX Use the button or turn the DIAL to select a suitable quiet type CNT 1 1 2 2 1 3 CNT XXX Use the button or turn the DIAL to select a suitable...

Страница 19: ...ronome basic beat type If the score func tion is on system will display your practicing score after you have finished 1 Repeatedly press the PAGE button to select beat check mode 2 Press the SAVE ENTE...

Страница 20: ...The DBT button lights up The screen will display DBT 1 x 2 Use or the DIAL to adjust the second trigger time This setting can be remained even turn the module off 3 As you play the bass drum it can p...

Страница 21: ...easing the distance between the two mounted pads For example If you hit the snare pad and the tom 1 also sounds While striking the snare pad gradually increase the XTALK value for the tom 1 pad until...

Страница 22: ...urve 1 strong dynamics produce a greater change Curve 4 5 Compared to Curve 1 a soft playing pro duces a greater change Curve 6 Very little dynamic response making it easy to maintain strong volume le...

Страница 23: ...oximately 30 minutes 60 Automatically turns the power off if no buttons or func tions are operated for approximately 60 minutes OFF The power will not power off automatically The Drum Module Settings...

Страница 24: ...ENGLISH Setup Manual WARNING Drum key can be pinched when adjusting clamps with drum key Operate carefully Be careful around pipe ends inside the pipe screw ends and metal shavings etc May injure you...

Страница 25: ...66 DEUTSCH ENGLISH...

Страница 26: ...67 DEUTSCH ENGLISH...

Страница 27: ...68 DEUTSCH ENGLISH...

Страница 28: ...ong Tempo 30 280 Display Backlit LCD Connectors TRIGGER INPUT Connector DB25 PHONES LINE OUT R L MONO TOM4 CRASH2 MIDI OUT AUX IN USB MIDI Control Buttons Power on off Master Volume Click Kit Voice Sa...

Страница 29: ...lled The Auto Power Off function will shut down the digital drum in 30 minutes if it is not used To disable this function hold down START STOP button then turn on the power No sound Make sure the mast...

Страница 30: ...of dust and dirt Suitable compressed air sprays are recommended for this application Manufacturer MUSIC STORE professional GmbH Istanbulstr 22 26 51103 Cologne Germany Disposal of packaging Ensure th...

Страница 31: ...72 DEUTSCH ENGLISH Prompt Messages Drum Kit List...

Страница 32: ...73 DEUTSCH ENGLISH Drum Voice List...

Страница 33: ...74 DEUTSCH ENGLISH...

Страница 34: ...75 DEUTSCH ENGLISH...

Страница 35: ...76 DEUTSCH ENGLISH Song List...

Страница 36: ...77 DEUTSCH ENGLISH GM Drum Kit List...

Страница 37: ...78 DEUTSCH ENGLISH...

Страница 38: ...79 DEUTSCH ENGLISH GM Backing Instrument List...

Страница 39: ...67 80 81 91 93 120 121 123 X X X X X X X X X X X X X X X X X O O O O O O O O O O O O O O O O O Modulation Portamento Time Data Entry Volume Pan Expression Sustain Pedal Portamento on off Sostenuto Ped...

Страница 40: ...81 DEUTSCH ENGLISH Dokument ID MS DRU0038849 000 09 2019 Notes...

Отзывы: