background image

17

ENGLISH

• 

With external exhaust (suction) versions, it is possible to insert extension (

H

) with the slots facing downwards so that they are not visible when 

the installation height allows it.

Phase 

F

 page 5

• 

Slide the extension (

H

) until it is positioned at the desired height (Fig. 

1

).

• 

Following what is indicated in Fig. 

2

, draw a line on the wall that will be used to position the bracket (

L

) correctly. 

• 

Place the bracket (

L

)  on the wall by following the line drawn on it. With a spirit level, check the horizontal alignment and mark the 2 drilling points 

at the ends (Fig. 

3

). 

• 

Drill the holes, insert 2 expansion plugs (ø 6mm) and fasten the bracket (

L

) with the relative screws (

V4

) (Fig. 

4

).

• 

Tighten the extension (

H

) to the bracket (

L

) using screws (

V5

) (Fig. 

5

).

• 

Electrically power the hood in accordance with regulations in force.

OPERATION

WHEN SHOULD THE HOOD BE SWITCHED ON AND OFF?

Switch on the hood at least one minute before starting to cook: this enhances the airlow to convey fumes and vapours towards the suction surface. 
After cooking, leave the hood operating until complete extraction of all vapours and odours. If required, by means of the Timer function, it is possible 
to set hood auto switch-of after 15 minutes of operation.

WHICH SPEED IS TO BE SELECTED?

The 

irst

 speed is a low consumption energy-saving way of keeping the air clean, the 

second

 speed is used in normal conditions, and the 

third


speed is used when there are strong odours and vapours. 

WHEN SHOULD THE FILTERS BE WASHED OR REPLACED?

The hood is assembled with two diferent types of ilters: metal ones (washable) and active carbon ones (non-washable). The former must be 
cleaned every 30 hours of use (the ixed red light 

 indicates that they need to be washed), the latter are to be replaced every 3-4 months, de-

pending on the use of the hood. For further information, please read the chapter regarding "

Maintenance"

 on page 

18

.

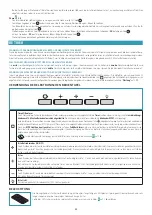
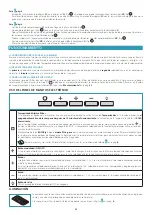
USE OF ELECTRONIC PUSH BUTTON CONTROL PANEL

Timer/Filters alarm

Pressing the key with the motor active at any speed activates the 

Timer

 function: this function determines the 

auto switch-of of the 

hood after 15 minutes of operation

. Activation of the function is signalled by a 

RED lashing

 light. 

With the Timer function active, the hood can still be switched of by the user at any time by pressing the key 

: the function will be 

automatically disabled and the RED light will turn of. Should the speed be changed with the Timer function active, the latter will be 
automatically disabled.
On the other hand, ignition of the 

ixed RED

 light indicates a 

grease ilter alarm

: this alarm notiies that it is time to wash the metal 

anti-grease ilters (the alarm is triggered after approximately 30 hours of use). After cleaning the ilters, disable the alarm and reset the 
counters by keeping the key pressed for 3 seconds.

To disassemble and assemble the anti-grease metal ilters, refer to the instructions on drawing 

H

 on page 

6

Mode button (ON/OFF)

Pressing the key switches on (or of ) the hood motor: it starts at the previously selected speed prior to switching it of (desired speed 
function).  Should you wish to use a diferent speed, set if by using the + and - keys.

By pressing the key, the motor speed increases. Speeds 1, 2 and 3 are displayed by the number of LEDs switched on, excluding the light 
and timer LEDs.
The + key in the version with 4 speeds has an intermittent light: the 4th speed or intensity is timed and after approximately 7 minutes the 
motor automatically switches to 3rd speed.

Button -

By pressing the key, the motor speed reduces. Speeds 1, 2 and 3 are displayed by the number of LEDs switched on, excluding the light
and timer LEDs.


Light button

ON: light on (lit button)    OFF: light of

LIGHTING

The range hood is equipped with high eiciency, low consumption LED spotlights with extremely long duration under 

normal use conditions.
Should the LED spotlight need to be replaced, proceed as shown in the igure


L


on page 

6

.

Содержание PLANE

Страница 1: ...all LIBRETTO ISTRUZIONI INSTRUCTIONS BOOKLET GEBRAUCHSANWEISUNG MODE D EMPLOI MANUAL DE INSTRUCCIONES INSTRUKCJA OBS UGI GEBRUIKSHANDLEIDING MANUAL DE INSTRU ES BRUGSANIVSNINGER INSTRUKTIONSBOK OHJEKI...

Страница 2: ...2 8 mm 6 mm PLANE TOP 90 19 KG PLANE TOP 120 25 KG 600 m3 h 800 m3 h 60 261 520 max 500 263 898 1198 490 258 max 1080 260 115...

Страница 3: ...3 600 m3 h 800 m3 h 150 mm min 600 mm 60 mm 340 mm 95mm 322 mm 27 mm 265 mm 1 5 0 m m 1 2 0 m m 75 mm 265 mm min 480 mm 60 mm 340 mm 322 mm 171 mm 120 mm...

Страница 4: ...4 1 2 3 4 M 15 12 600 m3 h 150mm 122mm 800 m3 h B C 1 2 V2 x2 3 A C B D 322 mm 60 mm 630 mm min H 1 4 8 mm V1 x2 2 S 322 mm 3 800 m3 h...

Страница 5: ...5 5 L H V5 x2 3 L L H 4 6 mm 6 6 V4 x2 1 2 E F G H V3 x6 1 2...

Страница 6: ...6 1 2 3 4 5 MAGNETE MAGNET G 1 2 3 1 2 2 12V 1 2 3 H I L...

Страница 7: ...sull interruttore generale SICUREZZA SCARICO FUMI Non collegare l apparecchio a condotti di scarico dei fumi prodotti dalla combustione ad es caldaie caminetti ecc Prima dell installazione della capp...

Страница 8: ...apparecchio sono riportati su delle targhette posizionate all interno della cappa POSIZIONAMENTO La distanza minima fra la parte pi alta dell apparecchiatura per la cottura e la parte pi bassa della c...

Страница 9: ...iclata nell ambiente cucina Controllare che i iltri al carbone attivo siano montati sulla cappa in caso negativo applicarli come indicato nelle istruzioni Ia pag 6 Se la cappa viene predisposta in ver...

Страница 10: ...anutenzione a pag 11 UTILIZZO PULSANTIERA ELETTRONICA Timer Allarme iltri La pressione del tasto con motore attivo a velocit qualsiasi attiva la funzione Timer tale funzione determina l autospegniment...

Страница 11: ...potrebbe creare imbrunimenti al materiale dei iltri per ridurre questo inconve niente utilizzare lavaggi a basse temperature 55 C max Per l estrazione dei iltri metallici antigrasso aprire il pannell...

Страница 12: ...elle parti che risultino difettose per vizi delle stesse imputabili a Falmec S p A Non sono coperte dalla presente garanzia tutte le parti che dovessero risultare difettose danneggiate e o viziate a c...

Страница 13: ...i Assistenza Tecnica autorizzato tenenendo a portata di mano i dati sotto indicati Matricola Serial Number vedere ultima pagina libretto o targhetta dei dati tecnici posta all interno della cappa ASSO...

Страница 14: ...e plug or switching of the main switch FUMES DISCHARGE SAFETY Do not connect the equipment to discharge pipes of fumes produced from combustion for example boilers ireplaces etc Before installing the...

Страница 15: ...equipment for cooking and the lowest part of the hood is indicated in Fig Aon page 4 Generally when the hood is placed on gas cookers this distance must be at least 65 cm 25 6 However according to an...

Страница 16: ...vi ronment Check that the active carbon ilters are assembled onto the hood if not install them as indicated in the in structions Ion page 6 If the hood is set up with a iltering version the check valv...

Страница 17: ...g Maintenance on page 18 USE OF ELECTRONIC PUSH BUTTON CONTROL PANEL Timer Filters alarm Pressing the key with the motor active at any speed activates the Timer function this function determines the a...

Страница 18: ...dishwasher is permitted however it may cause the ilter material to darken to reduce the possibility of this problem from happening use low temperature washes 55 C max Open the external suction panel t...

Страница 19: ...rten Kundendienst f r die Reparatur kontaktieren W hrend der Installation der Abzugshaube muss das Ger t durch Ziehen des Netzsteckers oder Bet tigung des Hauptschalters abgeschaltet werden SICHERHEIT...

Страница 20: ...s Kap Sicherheitsvorschriften und Hinweise auf S 19 aufmerksam gelesen werden TECHNISCHE MERKMALE Die technischen Daten des Ger ts sind auf dem Typenschild im Inneren der Abzugshaube angegeben POSITIO...

Страница 21: ...ls m ssen sie angebracht werden wie in der Anleitung Iauf S 6 angef hrt Bei der Filterausf hrung der Abzugshaube darf die R ckstauklappe nicht montiert werden Sollte sie dennoch auf dem Mo torauslass...

Страница 22: ...rtung auf S 11 VERWENDUNG DER ELEKTRONISCHEN BEDIENTAFEL Timer Filteralarm Durch Dr cken dieserTaste wird bei laufendem Motor unabh ngig von der Geschwindigkeitsstufe die Timer Funktion aktiviert mit...

Страница 23: ...e zu einer Braunf rbung des Materials kommen Um dies zu vermeiden einen Sp lgang mit niedriger Temperatur max 55 C w hlen Um die Metallfettilter entnehmen zu k nnen die Randabsaugungsplatte fnen siehe...

Страница 24: ...r ex chaudi res chemin es etc Avant l installation de la hotte s assurer que toutes les normes en vigueur sur l vacuation de l air l ext rieur du local soient respect es MISES EN GARDE POUR L UTILISAT...

Страница 25: ...tie la plus basse de la hotte de cuisine est indiqu e dans la ig A la page 4 En g n ral quand la hotte de cuisine est situ e au dessus d un appareil au gaz cette distance doit tre d au moins 65 cm 25...

Страница 26: ...ltres au charbon actif pour tre purii et est recycl dans l environnement cuisine Contr ler que les iltres au charbon actif soient mont s sur la hotte sinon les appliquer comme indiqu dans les ins truc...

Страница 27: ...UE Timer Alarme iltres La pression de la touche avec le moteur n importe quelle vitesse active la fonction Timer cette fonction entra ne l arr t automatique de la hotte au bout de 15 minutes de foncti...

Страница 28: ...isselle est permis mais il pourrait ternir le mat riau des iltres pour r duire cet inconv nient utiliser des lavages basses temp ratures 55 C max Pour l extraction des iltres m talliques anti graisse...

Страница 29: ...asistencia autorizado para la reparaci n Durante la instalaci n de la campana desconecte el equipo quitando el enchufe o accionando el interruptor general SEGURIDAD DESCARGA DE HUMOS No conecte el eq...

Страница 30: ...advertencias en la p g 29 CARACTER STICAS T CNICAS Los datos t cnicos del equipo se indican en las placas colocadas en el interior de la campana COLOCACI N La distancia m nima entre la parte m s alta...

Страница 31: ...b n activo para ser puriicado y reenviado hacia el ambiente de la cocina Controle que los iltros de carb n activo est n montados en la campana si no es as m ntelos como se indica en las instrucciones...

Страница 32: ...campana Para mayor informaci n lea el cap Mantenimiento en la p g 33 USO DEL PANEL DE MANDOS ELECTR NICO Temporizador Alarma iltros Si se presiona el bot n con el motor activo con cualquier velocidad...

Страница 33: ...urecer el material de los iltros para reducir este inconve niente l velos con bajas temperaturas 55 C m x Para quitar el iltro met lico antigrasa abra el panel de aspiraci n perimetral vea las instruc...

Страница 34: ...34 2 10 Il l 8...

Страница 35: ...35 1 5 34 A 4 65 25 6 EN60335 2 31 11 07 2002 TC61 7 12 1 15 10 11 70 C III...

Страница 36: ...36 800 3 C 4 I 6 4 4x10 5 I 6 C 4 A 4 S H 1 2 2 3 2 8 V1 4 2 B 4 1 2 B C V2 3 C D 4 800 3 M C I 6 C 4 E 5 H G 1 V3 2 H...

Страница 37: ...37 F 5 H 1 2 L L 3 2 6 L V4 4 V5 H L 5 15 30 3 4 38 15 30 3 H 6 1 2 3 4 4 7 3 1 2 3 L 6...

Страница 38: ...38 15 Fasteel G 6 1 55 C G 6 H 6 3 4 G 6 H 6 I 6 E C WEEE...

Страница 39: ...e przy cza urz dzenia do kana w spustowych dymu spalin powstaj cego przy spalaniu kot y kominki itp Przed instalacj okapu nale y si upewni e przestrzegane s wszystkie przepisy dotycz ce odprowadzania...

Страница 40: ...lna odleg o mi dzy najwy sz cz ci urz dzenia do gotowania a najni sz cz ci okapu kuchennego zosta a wskazana na Rys Ana str 4 Og lnie gdy okap kuchenny znajduje si na kuchence gazowej odleg o ta powin...

Страница 41: ...nym razie nale y je za o y zgodnie z instrukcjami Ina str 6 Je li okap jest przystosowany do wersji iltruj cej zaw r zwrotny nie powinien by zamontowany nale y go usun je li wyst puje na z czce wylotu...

Страница 42: ...iu przycisku w cza si Timer taka funkcja oznacza automatyczne wy czanie okapu po 15 minutach dzia ania Aktywacja funkcji wskazywana jest CZERWONYM migaj cym wiat em Nawet gdy funkcja Timer jest aktywn...

Страница 43: ...witego wyschni cia mycie w zmywarce do naczy jest dozwolone ale mo e doprowadzi do powstania zaczernie na materiale iltr w aby zmniejszy si tego problemu korzysta z program w o niskich temperaturach m...

Страница 44: ...het installeren van de kap moet u het toestel uitschakelen door de stekker uit het stopcontact te halen of via de hoofdschakelaar VEILIGHEID ROOKAFVOER Sluit het toestel niet aan op afvoerleidingen v...

Страница 45: ...u de kap gaat installeren TECHNISCHE KENMERKEN De technische kenmerken van het toestel vindt u op de plaatjes die vanbinnen in de kap zijn aangebracht PLAATSING De minimale afstand tussen het hoogste...

Страница 46: ...Controleer of de actieve koolstoilters op de kap gemonteerd zijn Als dit niet het geval is moet u ze aanbrengen zoals aangegeven in de instructies Iop pag 6 Indien de kap in ilterversie wordt voorzien...

Страница 47: ...et gebruik van de kap Lees het hfdst Onderhoud op pag 48 voor meer informatie GEBRUIK VAN HET ELEKTRONISCHE TOETSENBORD Timer Alarm ilters Wanneer u op deze toets drukt terwijl de motor op een willeke...

Страница 48: ...s losgekoppeld METALEN VETFILTER De metalen vetilters dienen om vetdeeltjes in suspensie tegen te houden deze deeltjes die zich op de ilters afzetten voeden eventuele vlammen die tijdens het koken vri...

Страница 49: ...kunnen ontstaan door een ongeschikte verwijdering van afvalstofen Gelieve met de plaatselijke instanties contact op te nemen voor meer details over het dichtstbijzijnde punt voor verwijdering Er kunne...

Страница 50: ...m condutos de descarga de fumos produzidos pela combust o caldeiras lareiras etc Antes da instala o da coifa certiicar se de que sejam respeitadas todas as normativas em vigor sobre a descarga do ar p...

Страница 51: ...tro da coifa POSICIONAMENTO A dist ncia m nima entre a parte mais alta da aparelhagem para o cozimento e a parte mais baixa da coifa est indicada na ig Ap g 4 Geralmente quando a coifa de cozinha inst...

Страница 52: ...ambiente da cozinha Controlar se os iltros de carv o ativado est o montados na coifa e em caso contr rio aplic los como indicado nas instru es descritas Ina p g 6 Se a coifa for predisposta na vers o...

Страница 53: ...na p g 54 UTILIZA O DA BOTOEIRA ELETR NICA Temporiza o Alarme dos iltros Este bot o com o motor ativo em qualquer velocidade ativa a fun o Temporizador esta fun o determina o desligamento autom tico d...

Страница 54: ...s novamente permitido lavar na m quina de lavar mas pode ocorrer manchas escuras no material dos iltros para reduzir este inconveniente utilizar lavagens com baixas temperaturas 55 C m x Para extrair...

Страница 55: ...ratet fra ved at tage stikket ud eller trykke p hovedafbryderen under installation af emh tten SIKKERHED FOR R GKANALEN Forbind aldrig apparatet til udsugningskanaler med r g fra forbr nding f eks ked...

Страница 56: ...iske data er angivet p skilte der er anbragt i selve emh tten PLACERING Minimumsafstanden fra den h jeste del af kogepladerne og den laveste del af emh tten er anf rt i ig Ap side 4 Almindeligvis skal...

Страница 57: ...emh tten i modsat fald monteres de som angivet i vejled ningens punkt Ip side 6 Hvis emh tten er forberedt i den iltrerende version skal kontraventilen ikke monteres Demonter den hvis den eventuelt e...

Страница 58: ...r i kapitlet Vedligeholdelse p side 59 BRUG AF DET ELEKTRONISKE BETJENINGSPANEL Timer Alarm iltre Tryk p tasten for aktive motor ved en hvilken som helst hastighed aktiverer funktionen Timer Denne fun...

Страница 59: ...e ulempe reduceres ved at an vende vaskeprogrammer med en lav temperatur 55 C max Fedtiltrene af metal tages ud ved at bne udsugningspanelet se anvisningerne G p side 6 og herefter indvirke p h ndtage...

Страница 60: ...lation skall du koppla bort apparaten genom att dra ur kontakten eller genom att verka p huvudstr mbrytaren S KERHET R KKANAL Anslut inte apparaten till kanaler f r r k som bildas vid f rbr nning fr n...

Страница 61: ...LACERING Det minsta avst ndet mellan den h gsta delen p matlagningsutrustningen och den l ga delen av k ksk pan anges i ig Ap sid 4 Vanligtvis n r en k ksk pa r monterad p en gasapparat m ste detta av...

Страница 62: ...Kontrollera att de aktiva koliltren r monterade p k pan om inte installera dem som beskrivs i anvisning arna Ip sid 6 Om k pan f rbereds i iltrerande version skall inte backventilen monteras avl gsna...

Страница 63: ...ligare information l s kap Underh ll p sid 64 ANV NDNING AV DEN ELEKTRONISKA KONTROLLPANELEN Timer Larm ilter Ett tryck p knappen med motorn aktiv vid vilken hastighet som helst aktiverar Timer funkti...

Страница 64: ...onterar dem igen Tv tt i diskmaskin r till ten men kan orsaka brunf rgning av iltren f r att minska detta problem skall du tv tta vid l ga temperaturer max 55 C F r uttaget av metallfettiltren skall d...

Страница 65: ...N TURVALLISUUS l yhdist laitetta palamisesta muodostuvien savujen poistoputkiin l mmityslaitteet takat jne Varmista ennen kuvun asennusta ett kaikkia voimassa olevia savujen ulkotiloihin poistoa koske...

Страница 66: ...SIJOITUS Minimiet isyys keitinlaitteen ylimm n kohdan ja liesikuvun alimman kohdan v lill on osoitettu kuvassa Asivulla 4 Yleisesti kun liesikupu sijoitetaan kaasulaitteen yl puolelle t m n et isyyden...

Страница 67: ...ivulla 6 Jos kupu on asennettu suodattavalla versiolla vastaventtiili ei saa olla asennettuna poista venttiili jos se on asennet tuna moottorin ilmanpoistoliitokseen suorita p invastaiset toimenpiteet...

Страница 68: ...tin toiminnon t m toiminto ajastaa kuvun automaattisen sammutuksen 15 minuutin p h n Toiminnon p lle kytkeytyminen osoitetaan PUNAISEN valon vilkkumisella Ajastin toiminnon ollessa p ll k ytt j voi ku...

Страница 69: ...ukoneessa on sallittua mutta voi aiheuttaa tummentumia suodattimien materiaalille t m n v ltt miseksi k yt pesua matalassa l mp tilassa maks 55 C Metallisen rasvanpoistosuodattimen irrottamiseksi avaa...

Страница 70: ...Ikke koble apparatet til avtrekkskanaler for r yk produsert av forbrenning dampkjeler kaminer osv F r installasjon av ventilatorhetten forvisse seg om at alle gjeldende forskrifter om luftutslipp p u...

Страница 71: ...v apparatet for matlaging og den nederste delen av ventilatorhetten er indikert i ig Ap side 4 Vanligvis n r kj kkenhetten er plassert p et apparat drevet p gass skal denne distansen v re p minst 65 c...

Страница 72: ...se p som angitt i instruksjonene Ip side 6 Dersom ventilatorhetten forberedes i ilterversjon m ikke tilbakeslagsventilen monteres jern den dersom den eventuelt innes p luftuttakskoplingen til motoren...

Страница 73: ...or yt terligere informasjon les kap Vedlikehold p side 74 BRUK AV ELEKTRONISK BETJENINGSPANEL Timer Filter alarm Trykking p tasten med aktiv motor p alle hastigheter aktiverer funksjonen timer denne f...

Страница 74: ...elt t rre f r de monteres Vasking i oppvaskmaskinen er mulig men kan danne bruning av iltermaterialet for redusere dette problemet bruk vask p lave temperaturer 55 C maks For uttak av metallfettiltere...

Страница 75: ......

Страница 76: ...FALMEC S p A 31029 VITTORIO VENETO Treviso ITALY Zona Industriale Via dell Artigianato 42 www falmec com Cod 110031002 ED 00 2014 Codice Code Matricola Serial Number...

Отзывы: