

Model
kW (net)
Btu/hr (gross)
G1006X O/T
40
150,100
G1006BX S/T
19.5
73,000
G1026X O/T
30
112,500
G1026BX S/T
9.5
35,600
G1060X O/T
45
169,000
G1006FX T/B
21
78,800
G1016/1
10
37,500
G1016/2
20
75,000
G1066X O/T
55
206,500
Configuration
Open Top
Oven
Solid Top
Twin Bullseye
Oven
SIT No. 36 SIT No. 19
Twin Bullseye
G29.2
G24.1
P I L O T B U R N E R S
Natural Gas Propane Gas
é 2.3mm
é 1.4mm
é 2.6mm
Amal 360
é 2.6mm
Amal 360
6x é1.4mm 6x é0.66mm
Solid Top
N26
L11
mbar
inches w.g.
6
14.8
15
37
Natural
Propane
Configuration
Open Top
Oven
Solid Top
Twin Bullseye
kW (net)
Btu/hr (gross)
7.5
28,100
10
37,500
9.5
35,600
5.5
20,600
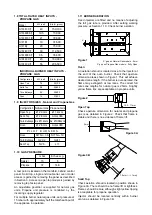
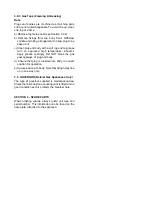
0mm
X
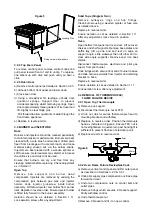
Figure 1
10.5 - 11mm
7.5mm (+/- 1mm)
1.8 TOTAL RATED HEAT INPUTS -
PROPANE GAS
INDIVIDUAL BURNER HEAT INPUTS -
PROPANE GAS
1.9 INJECTOR SIZES - Natural and Propane Gas
1.10 GAS PRESSURE
A test point is located on the manifold, behind control
panel. Solid top, single and double tier oven model
access is gained by removing the panel as described
in Section 3. Access on open top models is gained by
removing top facia panel.
An adjustable governor is supplied for natural gas
units. Propane unit pressure is controlled by the
incoming supply regulator.
For multiple burner natural gas units, set pressure at
15 mbar with approximately half the total heat input of
the appliance in operation.
1.11 BURNER AERATION
Fixed injectors are fitted and no means of adjusting
the full gas rate is provided. After setting working
pressure as Section 1.10. Check burner aeration.
'X' gap on Natural Gas models - 5mm
'X' gap on Propane Gas models - Fully Open
Oven
An aeration shroud is located close to the injector at
the end of the oven burner. Check that aperture
dimension areas shown in Figure 1. This will achieve
desired cone length. If the burner is over-aerated, the
flame may extinguish at low rates. The correct full
rate cone lengths for natural gas is 25mm. Slightly
yellow flame tips are acceptable on propane units.
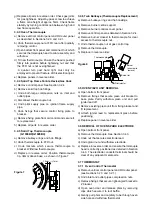
Figure 2
Open Top
Check aperture dimension for natural and propane
gas is as detailed in Figure 2. Check that flame is
stable and there is no evidence of flame lift.
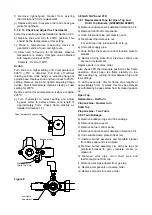
Figure 3A
Figure 3B
Solid Top
Check aeration shroud is located in position shown in
Figure 3A. There should be no flame lift or lightback.
Flames should be blue although slight yellow tipping
is acceptable for propane operation.
Injector should be located centrally within burner
venturi as detailed in Figure 3B.


