


38
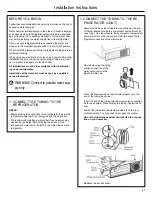
CLEARANCES
Allow the following clearances for ease of installation, proper
air circulation and plumbing and electrical connections:
4 mm
25 mm
13 mm
• Sides
• Top
• Back
BEFORE YOU BEGIN
Read these instructions completely and carefully.
•
IMPORTANT –
Save these instructions for local
inspector’s use.
•
IMPORTANT –
Observe all governing codes and ordi-
nances.
•
Note to Installer –
Be sure to leave these instructions with
the Consumer.
•
Note to Consumer –
Keep these instructions for future
reference.
• Skill level – Installation of this appliance requires basic me-
chanical skills.
• Completion time – Refrigerator Installation 15 minutes.
• Proper installation is the responsibility of the installer.
• Product failure due to improper installation is not covered un-
der the Warranty.
REFRIGERATOR LOCATION
• Do not install the refrigerator where the temperature will go
below 16°C because it will not run often enough to maintain
proper temperatures.
• Do not install the refrigerator where the temperature will go
above 43ºC because it will not perform properly.
• Install it on a floor strong enough to support it fully loaded.
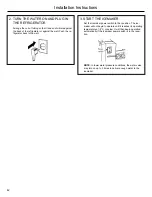
WATER SUPPLY TO THE ICEMAKER
(ON SOME MODELS)
If the refrigerator has an icemaker, it will have to be connected
to a cold water line. An approved water supply kit is available at
extra cost from your local distributor.
Maximum permissible inlet water pressure–8.2 bars. Minimum
permissible inlet water pressure–2.8 bars.
Installation of the icemaker must be done by a qualified service
technician.
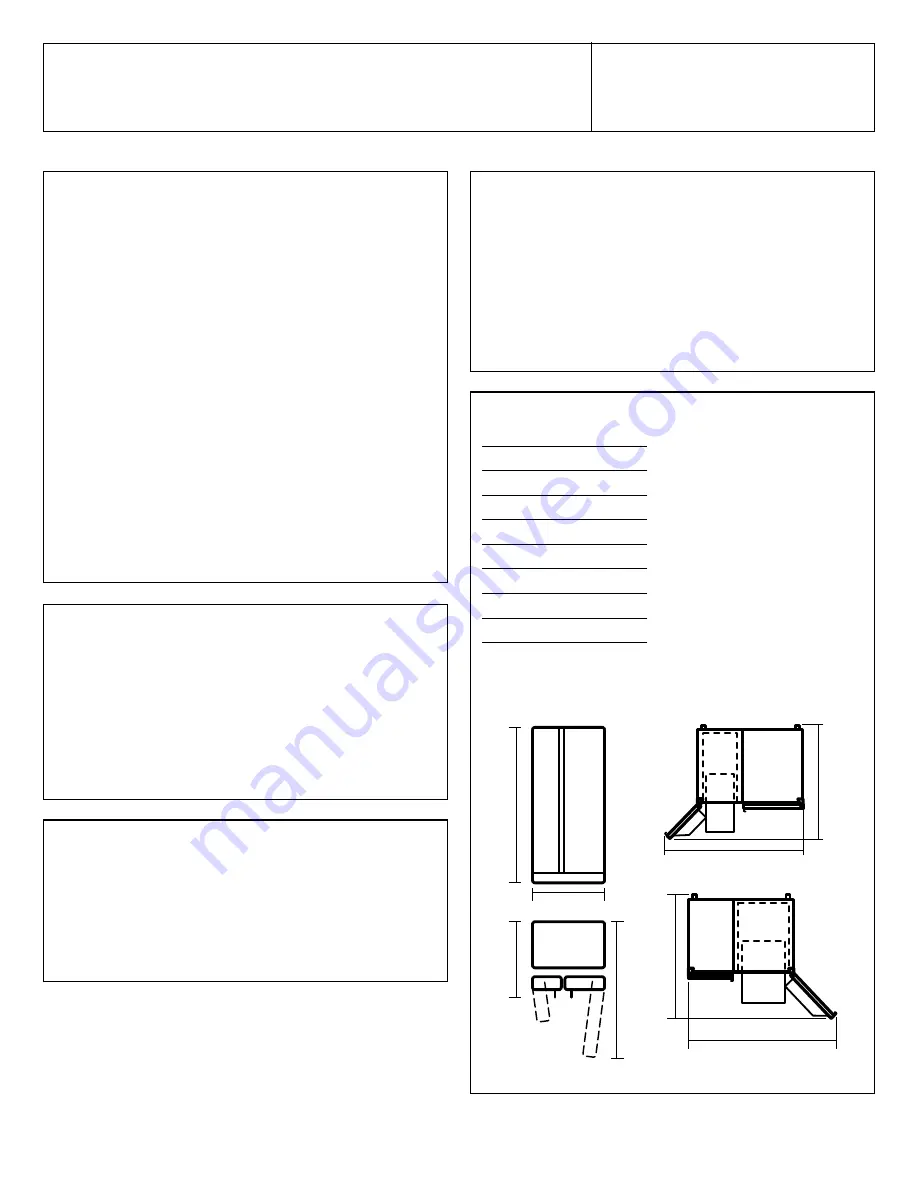
A
B
C
D
H
G
E
F
Installation
Instructions
Refrigerator
Models 21, 23, 25, 27 & 29
*Height does not include hinge.
**Depth includes handle.
DIMENSIONS
A*
B
C**
D
E
F
G
H
1733 mm
908 mm
738 mm
1156 mm
1214 mm
986 mm
1355 mm
994 mm
Содержание FQ8925X
Страница 1: ...1 225D3076P002 rev 3...
Страница 17: ...17 Instrucciones de instalaci n DIMENSIONES Y ESPECIFICACIONES...
Страница 40: ...40 Installation Instructions DIMENSIONS AND SPECIFICATIONS...
Страница 47: ...47...
Страница 48: ...48...


