


JP
2
2
22
使用のしかた
A
B
C
D
E
F
G
H
操
作
盤
ボ
タ
ン
機
能
ディ
スプレイ
A
モ
ー
タ
ーのスイッチの
オ
ン
/
オ
フを切り
替
えます。
モ
ー
タ
ーは最
新
の
選択
ス
ピ
ードで
回
ります。
外
部
換気設
備
が接続されている場合、このボ
タ
ンを
押
すとその
モ
ー
タ
ーのスイッチの
オ
ン
/
オ
フの切り
替
えが
おこなわれます。
選択
ス
ピ
ードが表示されます。
B
吸引
ス
ピ
ードを減少させます。
モ
ー
タ
ーとライトが
オ
フになっているとき、このボ
タ
ンを
3
秒
間
押
すことで
操
作
盤ロ
ックをしたり、
解
除した
りすることができます。
Lo
の表示がされます。
.
C
吸引
ス
ピ
ードを
増大
させます。
D
このボ
タ
ンを
押
すことで、前のス
ピ
ードに
関係
なく、
強力ス
ピ
ードにすることができます。強力ス
ピ
ードは
モ
ー
タ
ーが
オ
フになっている
状態
からも作動されるこ
とができます。このス
ピ
ードの
時
間は
5
分に
決
められて
います。
5
分が経
過
すると、
自
動的にその前のス
ピ
ード
にもどります。この
機
能は、
料
理中に
蒸
気とにおいが
最
大
に出ている
状況
での使用に適しています。
HI
の表示がされます。
.
右
下のス
ポ
ットが
1
秒
に
1
回
の
割
合で
点滅
します。
E
このボ
タ
ンを
押
すことで、
モ
ー
タ
ーの
吸引
ス
ピ
ード
140
m3/h
で
24
時
間の間
1
時
間
ご
とに
10
分間続けて作動させる
ことができます。
このボ
タ
ンを
3秒
間
押
すと、フ
ィルタ
ー
洗浄
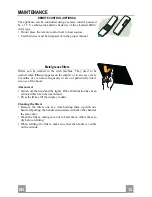
お知らせ
アラー
ム
(
FF
)を
リセ
ットすることができます。
24-
function
を表示します。
モ
ー
タ
ーが
オ
ンになっ
ている間、
右
下のス
ポ
ットが
点滅
します。
プ
ロセ
スがいったん
終了
すると
24-
function
という前の表示が
消
えます。
FF
金属製
グ
リ
ースフ
ィルタ
ー目
詰
まりアラー
ム
が出て、フ
ィルタ
ーが
洗浄
されなければならな
いことを示します。このアラー
ム
はレンジフー
ドが
実質
的に
100
時
間作動した
後
に出されます。
EF
活性炭
フ
ィルタ
ー目
詰
まりアラー
ム
が作動し
、フ
ィルタ
ーが
交
換されなければならないこと
を示します。
金属製
グ
リ
ースフ
ィルタ
ーも
洗浄
する必要があります。このアラー
ム
はレンジフ
ードが
実質
的に
200
時
間作動した
後
に出されます
。
F
このボ
タ
ンを
押
すことで器具が
10
分
後
に
停止
するよう
に
タ
イ
マ
ー
セ
ットできます。この
機
能はにおいを
完
全
に除去したい場合に適しています。この
機
能はどの
状
態
からでも作動させることができます。また、ボ
タ
ン
を
再度押
すか、
モ
ー
タ
ーのスイッチを
オ
フにすること
でこの
機
能を
停止
させることができます、
レンジフードの
選択
ス
ピ
ードとフードが
停止
す
るまでの
時
間を
交互
に表示します。
右
下のス
ポ
ットが
点滅
します。
G
ライトを
オ
ン
/
オ
フにします。
H
弱
い明るさのライトを
オ
ン
/
オ
フにします。
モ
ー
タ
ーとライトは
24h-function
が
オ
ンになっていない
限
り、
5
時
間
後
に
停止
します。
Содержание Stilo Isola
Страница 1: ...Stilo Isola...
Страница 3: ...JP 3 3 15 16 18 22 23...
Страница 5: ...EN 5 5 CHARACTERISTICS Dimensions...
Страница 15: ...JP 1 5 15 120mm 2...
Страница 16: ...JP 1 6 16...
Страница 18: ...JP 1 8 18 21 20mm 10mm 11 7mm 10mm 2 4 5mm 20mm 12h 12g 22 23...
Страница 19: ...JP 1 9 19 2 2 2 8 8 2 2 1 1 150mm 150mm 10 10 150 25...
Страница 20: ...JP 2 0 20 6 7 Vx A B 8 C 9 A B 10 Vx A B C Vx...
Страница 23: ...JP 2 3 23 LR03 AAA 1 5V FF 2 24h function E...
Страница 24: ...JP 2 4 24 20 W 2 2 2...
Страница 25: ...JP 2 5 25 Ca Lb Ca Lb...
Страница 26: ......
Страница 27: ......