background image

INITIAL ASSEMBLY

In order to avoid shipping damage, the batteries and the seat unit are not separately packaged, so you
will need to assemble them onto the main frame of your scooter.

OPENING THE PACKING BOX

Open the packing box of your new scooter and remove all of the protective materials, then carefully
remove the scooter and separated components from the box.

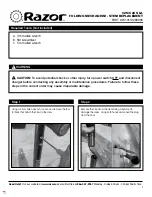
ADJUSTING ANGLE OF TILLER (Figure 4.)

• Loosen the tiller adjustment knob located at the base of the tiller
• Lift the tiller up to a proper angle for yourself
• Tighten the tiller adjustment knob

ASSEMBLING THE SEAT POST (Figure 5.)

• Insert the chrome seat post into the seat post frame located on the rear section
• Align the adjustment pin hole
• Insert the adjustment pin into the aligned holes and out through the opposite side

Figure 4                                Figure 5

7

Содержание EZ5S

Страница 1: ...EZ5S EZ6S Mobility Scooters Owners Manual EZee Life Products 220 Wildcat Road Toronto ON M3J 2N5 ...

Страница 2: ... CARE AND MAINTENANCE 16 9 SAFETY 18 10 ELECTROMAGNETIC INTERFERENCE 23 11 TROUBLESHOOTING 24 12 WARRANTY INFORMATION 25 MY DEALER __________________________________________________ DEALER TELEPHONE _________________________________________ MODEL NUMBER _______________________________________________ PRODUCT SERIAL ____________________________________________ 2 ...

Страница 3: ...TION Caution indicates a potentially hazardous situation which if not avoided could result in product damage or malfunction DANGER Danger indicates a probably hazardous situation which if not avoided will result in personal injury product damage or malfunction PROHIBITED Prohibited indicates that such actions should not be performed at any time Performing a prohibited action can cause personal inj...

Страница 4: ...S 37 4 L x 19 5 W x 32 4 H 950 x 495 x 825mm SEATING 15 L x 16 5 W x 17 5 H Folding foam filled DRIVE SYSTEM Single motor drive BATTERIES 12V 12 AH x 2 Sealed deep cycle MOTOR POWER 24v 180w PER CHARGE RANGE 10 miles 16 1 kilometres CHARGER 24V 2A portable WEIGHT CAPACITY 200 lbs 91 kg maximum CLIMBING SLOPE 8 maximum CHARGING TIME 10 hours WEIGHT REAR SECTION 31 lbs 14 kg WEIGHT FRONT SECTION 21 ...

Страница 5: ...ainly consists of four parts The front section rear section seat and battery case The tiller console handle bars and footplate are located on the front section The motor brake system and controller are located in the rear section See Figure 1 5 ...

Страница 6: ...SPECIFICATIONS AND STRUCTURE TILLER CONSOLE Figure 2 CHARGING SYSTEM Figure 3 6 ...

Страница 7: ...efully remove the scooter and separated components from the box ADJUSTING ANGLE OF TILLER Figure 4 Loosen the tiller adjustment knob located at the base of the tiller Lift the tiller up to a proper angle for yourself Tighten the tiller adjustment knob ASSEMBLING THE SEAT POST Figure 5 Insert the chrome seat post into the seat post frame located on the rear section Align the adjustment pin hole Ins...

Страница 8: ...y case metal contacts electrodes clean Dirty contacts can lead to the malfunction of the batteries ASSEMBLING SEAT UNIT Figure 7 Lower the seat onto the chrome seat post Pull up on the seat lock lever located under the seat adjust seat to the position and release then release the lever The seat will lock into position Insert the armrests into seat frame and tighten the armrest locking knobs locate...

Страница 9: ...ty lock cap Figure 6 1 and remove battery case from scooter Figure 6 Remove the front to rear wire harness connection Figure 10 Lift up on the yellow plastic ring latch until the scooter is sitting on its rear end Figure 11 With both hands remove the front section of the scooter from the rear section Figure 12 Loosen the tiller adjustment knob lower the tiller and retighten the tiller adjustment k...

Страница 10: ...on the seat lock lever and pull the seat off of the seat post Remove the seat post adjustment pin Choose the appropriate seat height and re insert the seat post adjustment pin Re install the seat SEAT ROTATION Figure 13 Pull up on the seat lock lever Rotate the seat to the desired position Release the lock lever in place ARMREST WIDTH ADJUSTMENT Figure 14 Loosen the armrest adjustment knobs locate...

Страница 11: ... knob to the lowest position turtle THROTTLE CONTROL LEVER Figure 2 This lever allows you to control the forward speed and the reverse speed of your scooter up to the maximum speed you preset with the speed adjustment knob Press the right lever to go forward and press the left lever to go in reverse Release the lever to engage the brake and bring your scooter to a stop WARNING If your scooter shou...

Страница 12: ... MANUAL FREEWHEEL LEVER Figure 15 The freewheel lever located at the rear of your scooter engages the motor and can be released to manually push the scooter Push the lever to the rear position to engage the drive motor and operate the scooter Important Note The scooter will not operate if the key is inserted while adjusting the lever Remove the key push the lever to the rear position and re insert...

Страница 13: ...r is powered off Lift the charging port cover on the battery case Plug the output connector of the off board charger into the 3 pin charger power receptacle Plug the input connector of the off board charger into the wall outlet The red light on the charger turns on to indicate the charger is on When charging is complete the light turns green It is recommended that you charge your batteries for 10 ...

Страница 14: ...infrequently once a week or less then you should charge the batteries at least once per week for 10 12 hours QUESITON How can I get maximum range per charge ANSWER Rarely do you have an ideal driving situation such as smooth flat hard terrain with no hills or curves More often you are presented with hills sidewalk cracks uneven and loosely packed surfaces and curves All of these factors will affec...

Страница 15: ...rged deep cycle battery will provide a reliable performance and extended battery life Keep your scooter s batteries fully charged whenever possible Batteries that are regularly and deeply discharged infrequently charged or stored without a full charge may be permanently damaged causing unreliable operation and limited battery life QUESTION How should I store my scooter and batteries ANSWER If you ...

Страница 16: ...ll Temperatures above 100 degrees may cause your scooter to operate at a reduced speed This reduced speed is a safety feature built into the controls that helps prevent damage to the motor and other electrical components GENERAL GUIDELINES Avoid knocking or bumping the console and console components Keep the tiller console clean Check all connectors to ensure that they are tight and secured proper...

Страница 17: ...If tread is minimally visible then replace the tires Keep your scooter clean and free of foreign material such as hair food drink dust and mud etc YEARLY CHECK Take your scooter to a mobility device service centre for yearly maintenance This helps ensure that your scooter is functioning properly and helps prevent future complications STORAGE Your scooter should be stored in a dry place free from t...

Страница 18: ...skills on your scooter When climbing an incline try to keep your scooter moving If you must stop to start up again you should accelerate slowly and cautiously When driving down an incline do so by setting the speed to the slowest position and pushing the forward throttle control lever If your scooter starts to move down the incline faster than you anticipated or desired allow it to come to a compl...

Страница 19: ...t Tall grass that can become tangled in the motor Loosely packed gravel and sand FREE WHEEL MODE Your scooter is equipped with a manual free wheel lever that allows the scooter to be manually pushed by an attendant For more information see OPERATION WARNING Any attempt to climb or descend a slope steeper than 8 degrees may put your scooter in an unstable position and cause it to tip resulting in p...

Страница 20: ...levator when the doors begin to close push on the rubber door edge or allow the rubber door edge to contact the scooter and the door will reopen Take care that pocketbooks packages or scooter accessories do not become caught in elevator doors ELECTROMAGNETIC INTERFERENCE Radio waves from mobile phones radio receivers or other transmitters such as radio and TV stations could affect your scooter s p...

Страница 21: ...tips when getting on or off your scooter Ensure that the power is turned off see OPERATION Ensure that your scooter is not in free wheel mode The seat armrests are flipped up or moved out to make getting on or off the scooter easier Keep the front wheel facing forward WARNING Always be sure your scooter and its batteries are properly secured while it is being transported Failure to do so may cause...

Страница 22: ... the user consumes alcohol or is taking medication that affects their sense of reactive ability never use the scooter WARNING It is strongly suggested for these users to consult their medical professionals before operating their scooter as some medications will affect their sense of reactive ability bringing a hidden danger in operating their scooter WARNING Do not operate your scooter while under...

Страница 23: ...ter The location whether it is on level ground or on an incline and direction of the scooter Whether or not your scooter is in motion So if the unexpected incidents described below occur with your scooter you should consider whether or not there is a radio wave source nearby Your scooter may come to a sudden stop in an uncontrolled manner Your scooter may suddenly move in an uncontrolled manner Th...

Страница 24: ...eel lever Brake fault Remove key push the brake freewheel lever to the rear position reinsert key TROUBLESHOOTING GUIDE Symptom Possible Cause Solution 1 Scooter has no power Batteries Battery Case Ignition Insert key check seating of battery case test batteries inspect all power source wiring 2 Scooter has power but will not move Brake Motor Throttle Control ler Remove key place freewheel lever t...

Страница 25: ...e pads are a wear item and are not warranted ABS Plastic shroud all plastic components other than the controller unit and wire harness covers Brake pads wear items Motor brushes Fuses Upholstery and seating Tires wear items Circumstances beyond the manufacturer s control Labor service calls shipping and other charges incurred for repair of the product unless specifically authorized Do not return f...

Отзывы: