INSTRUCTION MANUAL
SWD® Starter Kit
Page
25
on
30
V-EN_20072022_SWD® Starter Kit
8.
Starting the
SWD® Starter Kit
8.1.
Power on
Setting up the kit
Put the kit on the floor on a stable and flat surface.
Battery
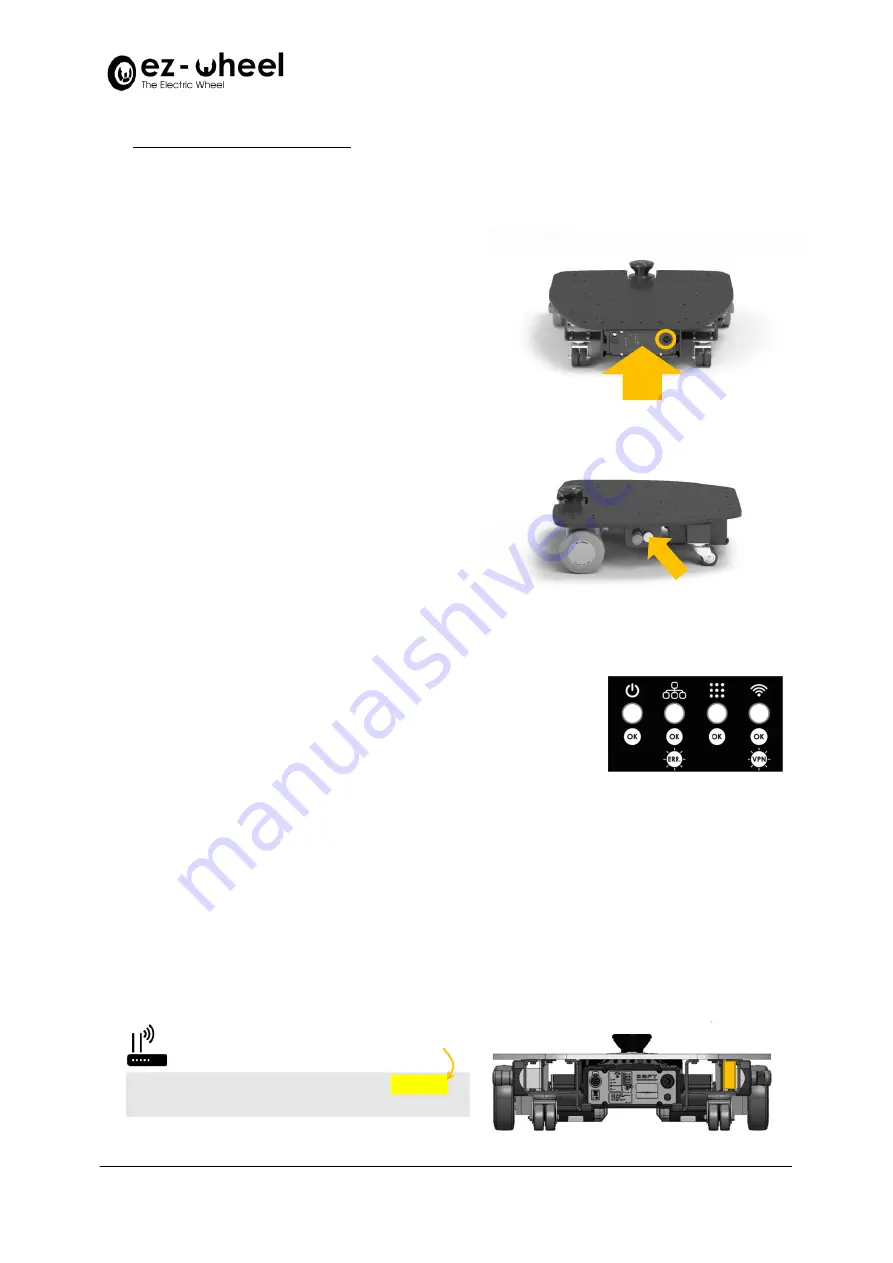
Install and plug the battery power connector on the rear
side of the robot.
Start button
Press the white ON/OFF button on the left side of the
robot, nearby the Emergency Stop.
The iMX6 PC and safety laser scanner lights turn on, and
the kit starts booting for a few tens of seconds.
Emergency Stops
To start safely, you can engage one of the Emergency
Stops while the robot is powering on.
8.2.
Display and status
When powered, the embedded PC shows the status of each service started on the side 4-LED display.
•
Power LED: green when the battery power is available.
•
Devices LED: green when the connection to the
SWD® Core
and to the
safety laser scanner is active, flashing if the connection cannot be
established.
•
ROS LED: green when the ROS environment is active.
•
Wi-Fi LED: green when the Wi-Fi connection is established, flashing
when the VPN connection is activated (only for support).
8.3.
Connection to Control Page
Once started, the
SWD® Starter Kit
generates its own Wi-Fi access point to connect third-party devices. Any
device with a navigator can connect to the
SWD® Starter Kit
, to access the web Control Page, hosted on the
embedded iMX6 PC.
To connect to the Wi-Fi hotspot, the SSID and initial password are indicated on the front plate beside the safety
laser scanner.
SSID:
SWD-StarterKit-880756
Password:
swd_starterkit
Upon MAC address
of each hardware kit


