EYEZONE P102-5m Скачать руководство пользователя страница 4


4


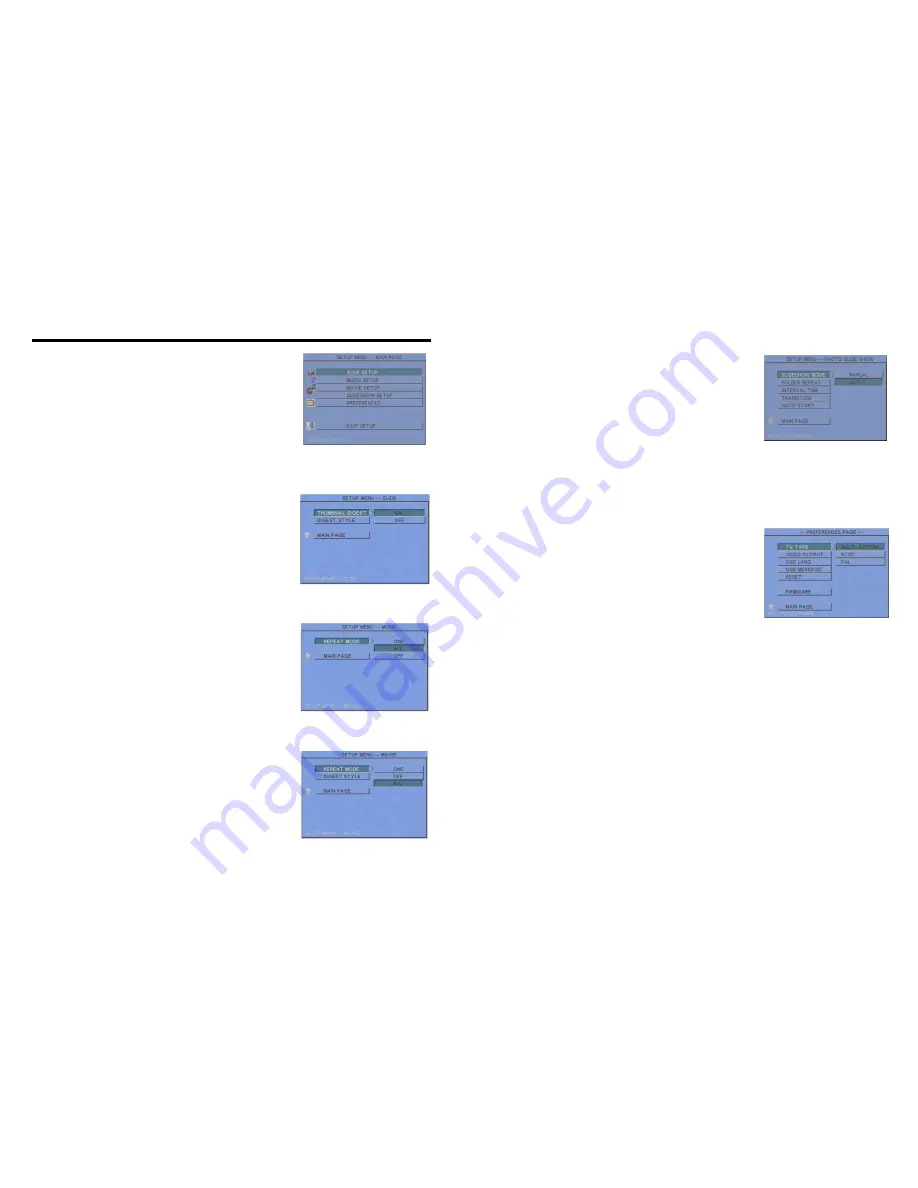
Press the “SETUP” button on the remote control to open the 

“SETUP MENU – MAIN PAGE” shown in the following 

figure. There are five groups of sub-menu in the setup menu. 


Use the “

” buttons to select an item or to 

adjust values, and use the “ENTER” button to go into the 

function or to confirm the command. 


6.1 SLIDE SETUP 


THUMBNAIL DIGEST

Thumbnails load faster and 

allow you to browse photos easily.   


DIGEST STYLE

Choose the slide preview mode. (2x2 / 

3x3) 


6.2 MUSIC SETUP 


REPEAT MODE   

        • ONE

Repeat the selected song.   

        • ALL

Repeat all the songs on the memory card. 

        • OFF

Turn off the repeat function. 


6.3 MOVIE SETUP 


REPEAT MODE 

        • ONE

Repeat the selected movie.     

        • OFF

Turn off the repeat function. 

        • ALL

Plays all the movies on the memory card. 


DIGEST STYLE

Choose the movie preview mode. (2x2 / 3x3) 

6. SETTING UP 


5

6.4 SLIDESHOW SETUP 


SLIDESHOW MODE

Set the slideshow to start automatically. 


FOLDER REPEAT

Set all files (picture, music or movie) in 

the folder to show only once or continuously (loop). 


INTERVAL TIME

Set the time each photo is shown to 1, 3, 

5, 10, 30 or 60 seconds. 


TRANSITION (EFFECT)

Set the transition effect and auto 

slide with sequential or random playback. 


AUTO START

Enable/ disable auto playing media files on the memory card when the device 

is turned on. 


6.5 PREFERENCE 


TV TYPE: Choose the TV TYPE. 

        • MULTI . SYSTEM

Set the TV type automatically

.


        • NTSC: Set the TV type to NTSC. 

        • PAL: Set the TV type to PAL. 


VIDEO OUTPUT

Select the video output mode. 


OSD LANG: Select the OSD language (ENGLISH, 

FRENCH, GERMAN, ITALIAN, JAPANESE, PORTUGUESE, SPANISH and 

NEDERLANDS). 


OSD MESSAGE: Turn the OSD message function on/ off. 


RESET: Reset all settings to the original (factory) settings. 


FIRMWARE : New F/W can upgraded from the memory card. 

        • EDITION : Show the F/W versions. 

        • UPDATE : Used to update the F/W. 


Содержание P102-5m

Страница 1: ...nd used in accordance with the instruction manual may cause harmful interference to radio communications However there is no guarantee that interference will not occur in a particular installation If...

Страница 2: ...onal 15 10 Troubleshooting 16 CONTENTS 1 1 P102 5m 4 Power Adapter DC 12V 2A 2 User Manual 5 Protect Cover 3 Remote Control The Eyezone P102 5m is a digital signage with a touch screen that plays pict...

Страница 3: ...URES 3 1 2 3 4 5 6 7 8 9 10 11 12 13 14 15 16 17 18 19 20 21 22 23 24 25 26 27 28 29 30 Power on off Mute sound Open the setup menu Memory card selection Open the calibrate window Volume up down Move...

Страница 4: ...NG UP 5 6 4 SLIDESHOW SETUP SLIDESHOW MODE Set the slideshow to start automatically FOLDER REPEAT Set all files picture music or movie in the folder to show only once or continuously loop INTERVAL TIM...

Страница 5: ...e file Step 3 If the SLIDESHOW MODE is disabled press the NEXT button to play the next picture file the PREV button to play the previous file 7 USING THE P102 5m 7 7 2 PLAY MUSIC FILE Step 1 Press the...

Страница 6: ...on the remote control from any menu Step 2 You can see all the files including picture music and movie on the left panel of the FILE LIBRARY Press the buttons to select a file and the information of...

Страница 7: ...AUTO START TOUCH PANEL 8 TOUCH SCREEN FUNCTION 11 Play File Touch the button area to play the corresponding file Button Functions There are three buttons below on the screen while broadcasting files H...

Страница 8: ...e the files 07_xxx xxx 22_xxx xxx Step 5 Copy all the files 22 files on the memory card 8 2 2 Play a File on the Touch Screen Make sure the TOUCH PANEL function is enabled first SLIDESHOW SETUP AUTO S...

Страница 9: ...llow Step 3 Finish the calibration steps from point 1 5 twice then the CALIBRATION OK will appear on the screen The calibration window will now exit 15 9 1 TIMER FUNCTION optional NOTE Make sure the i...

Страница 10: ...h cards gently and securely 2 If the card does not insert easily check the direction 3 Confirm format of the card The P102 5m supports CF SD MMC and MS Pro memory card No sound 1 Check if the mute fun...

Отзывы: