background image


- 55 - 

eyeheight 


Unit 34 Park House Watford Business Park Greenhill Crescent Watford Herts GB WD18 8PH

Reg. No. 2855535  Telephone: +44 (0) 1923 256 000  Fax: +44 (0) 1923 256 100  email: [email protected]


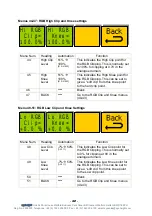
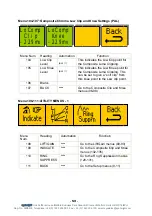
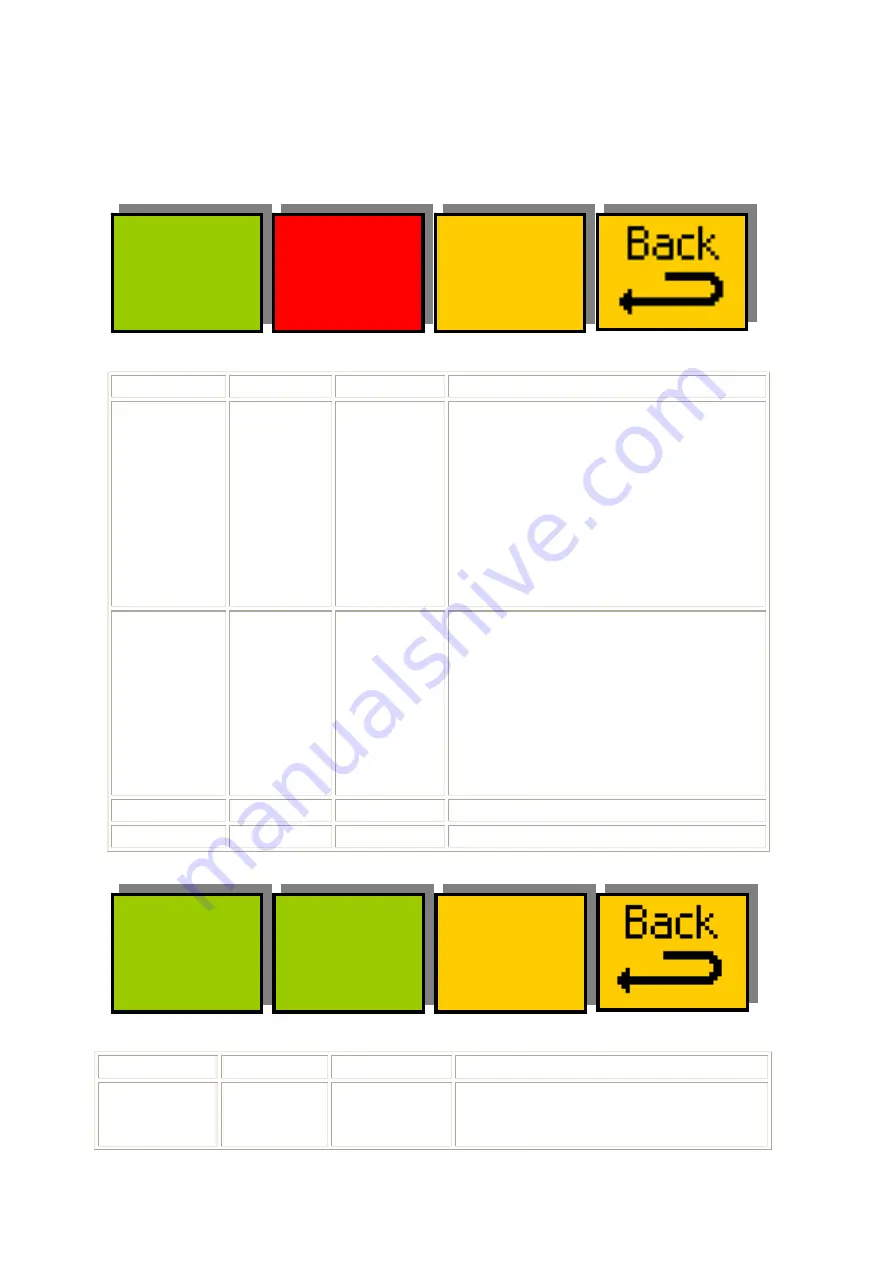
Menus 120-123: Out of Gamut Colour 


MonOP= 
 Red 

Steady 

Tally: 
Box=1 

Tal=12 


Menu Num. 

Heading 

Automation

                      Function 

120 MonOP 


RedSteady 
GreenSteady  
BlueSteady  
WhiteSteady 
RedFlash 
GreenFlash  
BlueFlash  
WhiteFlash 
RawOut 
LegalOut 
 [0

Æ

9]


This is the colour used to indicate the 
areas of the picture currently being 
processed by the legaliser. 
 

Raw Out, means this output is 
effectively configured as an acive 
input loopthrogh 

Legal Out means that this becomes 
the same as the main outputs. 

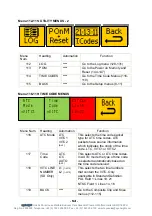
121 

Tally 
(Etherbox) 

Level A = Box 
number. 0

Æ

16 

Level B = Tally 
number. 11

Æ

13. 


This configures a tally on the 
etherbox (FB-9E) to respond to the 
legaliser being “ON” or “OFF” 
Box=Set to Box number, set to zero 
is this is not to be used. 

Tal=Tally number on the etherbox. 
Set to either 11,12 or 13. See FB-9E 
manual. 

122 

Blank 

none 


123 

BACK 

none 

Go to the Utility - 1 menus (108-111) 

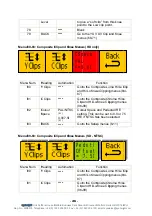
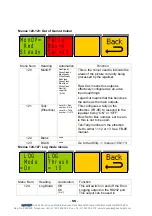
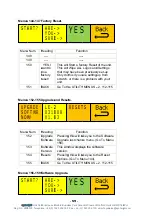
Menus 124-127: Log mode menus 


LOG 
Thresh
= 10 


 LOG 
 Mode 
=On  


Menu Num. 

Heading 

Automation 

Function 

124 Log 

Mode 

Off 
On 

[0

Æ

1] 

This will switch on and off the Error 
Logging output on the RS232 port. 
This output can be used in 

Содержание LE-2n

Страница 1: ...LE 2n Multimode SDHDI Legaliser in a desktop chassis with software control application user manual eyeheight ...

Страница 2: ...B WD18 8PH Reg No 2855535 Telephone 44 0 1923 256 000 Fax 44 0 1923 256 100 email eyesales eyeheight com User Manual Versions Versions Changes Date Build 1 0 First Version for LE 2 in nanobox chassis 5 6 2009 V113 1 1 Improved Driver installation clarity 05 08 09 V113 LE 2 Product History ...

Страница 3: ... Granting a user permission to open a COM Port in Mac OS X 11 2 2 6 USB to Serial Drivers 12 2 3 Screen Layout 13 2 3 1 Toolbar 13 2 3 2 Device Info 14 2 3 3 Status Bar 15 2 3 4 Display Buttons 15 2 3 5 Rotary Controls 15 2 3 6 Next Previous Buttons 16 2 4 Menu Navigation 16 2 4 1 Go To Another Menu 16 2 4 2 Single Parameter Adjustment 16 2 4 3 Double Or Triple Parameter Adjustment 17 2 4 4 Inform...

Страница 4: ... 23 4 3 Monitoring Output Generation 25 5 Other Features Messaging 26 5 1 Messaging with the soft java panel 26 5 2 Messaging with an FP 9 26 5 3 Memories 27 5 3 1 Power on memory 27 5 3 2 User Memories 27 5 3 3 Naming User Memories 27 5 4 Tamper Locking the LE 2 27 5 5 GPI Tally Set up 28 5 5 1 On Board GPI s 28 5 5 2 Configuring tallies on the etherbox 28 5 6 The LE 2n Menu Set 28 6 Technical Ap...

Страница 5: ...nnection using an FP 9 17 Figure 2 3 Flexipanel FP 9 controls 18 Figure 2 4 Types of menus showing their characteristic colours 18 Figure 3 1 LE 2n connections 20 Figure 3 2 LE 2n Typical connections 20 Figure 4 1 Basic Legaliser Structure 21 Figure 4 2 Composite Legaliser Structure 22 Figure 4 3 RGB Legaliser Structure 22 Figure 4 4 YUV Legaliser Structure 23 Figure 4 5 Illegal Source 24 Figure 4...

Страница 6: ...rd connected within a nanobox desktop chassis 1 1 The nanobox chassis The nanobox chassis has been designed to provide a low cost way of operating a single legaliser card for stand alone use without the complex and more expensive infrastructure of an etherbox 1RU rack mount chassis FB 9E and 1RU operational panel FB 9 The LE 2n legaliser card is operated by a java software application for PC or MA...

Страница 7: ...t specifically The LE 2n is a full featured multi mode legaliser system The main features of the LE 2n legalisers are as follows Provides Legalisation of the SDI Input signal with full 10 bit processing throughout Composite YUV and RGB colour spaces Two Independent SDI outputs for Legalise and user controllable Legal Indicate Adjustable Clipping Levels Adjustable soft clipping knee levels RGB and ...

Страница 8: ... 34 Park House Watford Business Park Greenhill Crescent Watford Herts GB WD18 8PH Reg No 2855535 Telephone 44 0 1923 256 000 Fax 44 0 1923 256 100 email eyesales eyeheight com Figure 1 2 LE 2n rear 1 3 Front of nanobox ...

Страница 9: ...d a standard ethernet cable cable with RJ 45 connectors user supplied is also required to connect the FP 9 panel to the LE 2n The LE 2n will always be shipped in mode 1 Soft Panel unless the customer specifies otherwise DO NOT CONNECT THE SUPPLIED USB RJ45 CABLE TO THE FRONT RJ45 LABELLED PANEL THIS COULD RESULT IN DAMAGE TO THE UNIT You cannot operate the softpanel and an FP 9E Flexipanel at the ...

Страница 10: ...tware The software is provided on a supplied eyeheight USB flash drive The softPanel application requires no installation itself Simply run softpanel jar 2 2 2 System Requirements This software requires Java Runtime Environment version 1 5 0 Java 5 or later This is compatible with Windows and MAC machines See www java com for the latest version of Java USB port USB to serial cable is supplied Inst...

Страница 11: ...rectory called RxTx Inside the RxTx directory you will find 2 files one for each supported OS You should copy the file for your OS into the Installation Location shown below OS File Installation Location Windows rxtxSerial dll C Windows Mac OS librxtxSerial jnilib Library Java Extensions Users of Mac OS X may receive PortInUseException errors reported by the RxTx drivers when attempting to open a ...

Страница 12: ...p var lock sudo chmod ug rw var lock ls al var lock total 0 drwxrwxr x 3 username _uucp 102 14 Oct 10 05 drwxr xr x 26 root wheel 884 14 Oct 10 05 2 2 6 USB to Serial Drivers Drivers for the USB cable are available for Windows and Mac from the manufacturer s website at http www ftdichip com Drivers VCP htm Once you have successfully installed the USB to Serial cable you will need to confirm what p...

Страница 13: ...ise listed as USB Serial Port The example above shows COM9 2 3 Screen Layout 2 3 1 Toolbar File o Exit Options o COM Port Tick the name of the COM Port that you want to use The application will enumerate this list of your COM Ports when it starts up o Baud Rate This is the speed of the serial comms You will need to use 115200 o Large Displays If you find the Display Buttons too small then you can ...

Страница 14: ...eight panel e g FP 9 the softPanel acquires control of a product and retains a lock to prevent other panels from controlling the same device To release that lock and allow other panels to control the device use this tool o Search for products Scans the Eyeheight system for available products and adds them to the Devices list For more info see Error Reference source not found Help Help o About Show...

Страница 15: ...splay Buttons The four buttons labelled A B C and D act both as separate menu displays and as larger combined displays depending on context They also act as buttons performing an action when clicked This action will depend on what is displayed on the button at the time For more info see Menu Navigation 2 3 5 Rotary Controls In normal use the four rotary controls correspond directly with the four D...

Страница 16: ...eter Adjustment Double Or Triple Parameter Adjustment Information Display 2 4 1 Go To Another Menu A common menu item used for navigating tree structured menus 2 4 2 Single Parameter Adjustment A green menu is one in which there is one adjustable parameter There are two ways to adjust the parameter in a green menu Press the green Display Button This will increment the value in that window This is ...

Страница 17: ...nding parameter 2 4 4 Information Display A yellow menu is one in which only information is displayed 2 5 Connecting the LE 2n using an FP 9 The LE 2n is normally shipped for operation with a soft panel If you have specifically asked for the system to operate with a flexipanel then it will be shipped this way The control and power connections are shown in the diagram below After power up the Statu...

Страница 18: ...elected processing cards installed in the etherbox It is also possible to select cards in another chassis if the I Bus is connected to the other chassis 2 5 3 Menu Navigation There are two ways to navigate from menu to menu 1 Using the NEXT and PREV buttons These are for Flat menu structures The NEXT and PREV LEDS will flash while further menus are available 2 Using a GOTO ANOTHER MENU LCD button ...

Страница 19: ...er in the respective LCD window A B C or D The direction and speed of rotation enable numeric values to be set easily 2 5 5 Parameter adjustment of a red menu A red menu is one in which there is two or three adjustable parameters In this case it is necessary to first select the menu by pressing the red button When the red button is pressed it will turn green and either two or three of the rotary d...

Страница 20: ...the BNC connectors Connections on the LE 2n product Figure 3 1 LE 2n connections The main video connections to the LE 2n are shown above The Main OP1 and Main OP2 are the main legaliser outputs They are functionally identical to each other The Indicate output can go to a preview monitor which will indicate the illegal parts of the picture by colouring and or flashing the illegal areas Two GPI s ca...

Страница 21: ... accessed via the Picture menu 4 2 Legaliser The legaliser operates in one of three modes RGB YUV or Composite The mode is selected via the top level mode menu Each mode is discussed below In all modes the legaliser is transparent to pixels within the legal range 4 2 1 Composite Mode The basic form of the composite legaliser is shown in Figure 4 2 In composite mode the legaliser restricts the Y U ...

Страница 22: ...olour space The RGB data is then soft clipped according to the settings for RGB High Clip Knee and RGB Low Clip Knee Finally the clipped RGB data is converted back to the YUV colour space The RGB legal colour space is a subset of the composite legal colour space so an RGB legal signal is also composite legal but the reverse is not true Figure 4 3 RGB Legaliser Structure 4 2 3 YUV Mode The basic fo...

Страница 23: ...rameters specify the maximum and minimum values the system legaliser will allow to pass Figure 4 5 shows an illegal input to the clipper with detail in the illegal highlight and lowlight areas of the signal When the knee values are set to the same value as their respective Clips the legaliser operates as a hard clipper as shown in Figure 4 6 show shows the now legal signal but the detail in the hi...

Страница 24: ...rk House Watford Business Park Greenhill Crescent Watford Herts GB WD18 8PH Reg No 2855535 Telephone 44 0 1923 256 000 Fax 44 0 1923 256 100 email eyesales eyeheight com Figure 4 5 Illegal Source Figure 4 6 Hard Clipped Output ...

Страница 25: ... being processed by the legaliser The MonOp menu provides control of this feature and allows the user to select which colour is used to represent the processed picture area When used as an indicate output the selected colour is keyed over the legal output with the opacity of the colour indicating how illegal the area is Because signals are typically only slightly illegal the gain on the keyer can ...

Страница 26: ...sage up to 32 characters in length Click the Send button to send the message The Status Bar will display a confirmation or error message to acknowledge success or failure Click the Cancel button to return to the normal menu window 5 2 Messaging with an FP 9 Plug in a PS 2 Keyboard into a Flexipanel and select the appropriate processor card with a device button See Figure 2 3 for connector location...

Страница 27: ... the Save menu for the user memory to be used and save the values Then navigate to the Recall menu for the user memory to be used and recall the values Once the user memory has been recalled it will be automatically restored each time that video standard is re input 5 3 3 Naming User Memories The user memories can be named with up to 6 characters To name memory 1 MyLeg1 1 Use the appropriate messa...

Страница 28: ...e Watford Busine 923 256 000 et up oduct The ave 2 GPI he user me nal mode ndards r Memory 1 r Memory 2 or logic 0V ies on the box tally to three usab ox number et the box Menu Se defines th h RED men enus 28 ess Park Gree Fax 44 0 e geNETics s These G emories do Memories 1 625 7 2 625 8 V See App e etherbo o indicate t le tallies T and tally n number to et he operatio nu number enhill Crescent 19...

Страница 29: ...his menu displays the product and the video status 01 MODE OFF RGB YUV COMP RGB COMP 0Æ4 Selects the legaliser modes 02 PRESET none Go to the main Preset menus 4 7 03 SETUP none Go to the main Setup menus 8 11 Menu 04 07 Preset Menus Menu Num Heading Automation Function 04 STND PRESET none Go to the User Preset menus 12 15 05 USER PRESET none Go to the Standard Preset menus 20 23 06 none 07 BACK n...

Страница 30: ...ts PAL NTSC NORMAL BYpass All PAL NORMAL Menu Num Heading Automation Function 12 PAL NORMAL Preset Setting 1 Recall Variable 1 Pressing this will Set The system to Composite Clipping Hi Luma Clip 700mv Hi Chroma Clip 932mv Lo Luma Clip 0mv Lo Chroma Clip 229mv Hi Luma Knee 700mv Hi Chroma Knee 932mv Lo Luma Knee 0mv Lo Chroma Knee 229mv 13 NTSC NORMAL Preset Setting 1 Recall Variable 1 Pressing th...

Страница 31: ...ord Business Park Greenhill Crescent Watford Herts GB WD18 8PH Reg No 2855535 Telephone 44 0 1923 256 000 Fax 44 0 1923 256 100 email eyesales eyeheight com All Variable 1 Legaliser to OFF 15 BACK none Go back to the main Preset menus 4 7 ...

Страница 32: ...GB Knee 100 Lo RGB Knee 0 0 17 EBU 103 Tight Setting 1 Recall Variable 1 Pressing this will Set The system to RGB Clipping Hi RGB Clip 103 Lo RGB Clip 1 0 Hi RGB Knee 103 Lo RGB Knee 1 0 18 EBU 103 Optimum Setting 1 Recall Variable 1 Pressing this will Set The system to RGB Clipping Hi RGB Clip 101 Lo RGB Clip 0 0 Hi RGB Knee 101 Lo RGB Knee 0 0 19 BACK none Go back to the main Preset menus 4 7 Me...

Страница 33: ...a Knee 132 4 IRE Lo Luma Knee 0 0 IRE Lo Chroma Knee 30 2 IRE Pedestal 7 5 IRE 13 NTSC NORMAL Preset Setting 1 Recall Variable 1 Pressing this will Set The system to Composite Clipping Hi Luma Clip 100 IRE Hi Chroma Clip 120 IRE Lo Luma Clip 7 5 IRE Lo Chroma Clip 24 IRE Hi Luma Knee 100 IRE Hi Chroma Knee 120 IRE Lo Luma Knee 7 5 IRE Lo Chroma Knee 24 IRE Pedestal 7 5 IRE 14 Bypass All 1 Recall V...

Страница 34: ... RGB Knee 100 Lo RGB Knee 0 0 17 EBU 103 Tight Setting 1 Recall Variable 1 Pressing this will Set The system to RGB Clipping Hi RGB Clip 103 Lo RGB Clip 1 0 Hi RGB Knee 103 Lo RGB Knee 1 0 18 EBU 103 Optimum Setting 1 Recall Variable 1 Pressing this will Set The system to RGB Clipping Hi RGB Clip 101 Lo RGB Clip 0 0 Hi RGB Knee 101 Lo RGB Knee 0 0 19 BACK none Go back to the main Preset menus 4 7 ...

Страница 35: ... Luma Knee 0mv Lo Chroma Knee 230 Colour Space PAL Pedestal 0 0IRE 13 NTSC NORMAL Preset Setting 1 Recall Variable 1 Pressing this will Set The system to Composite Clipping Hi Luma Clip 99 9IRE Hi Chroma Clip 120IRE Lo Luma Clip 0 0IRE Lo Chroma Clip 24IRE Hi Luma Knee 99 9IRE Hi Chroma Knee 120IRE Lo Luma Knee 0 0IRE Lo Chroma Knee 24IRE Colour Space NTSC Pedestal 7 5IRE 14 Bypass All 1 Recall Va...

Страница 36: ... RGB Knee 100 Lo RGB Knee 0 0 17 EBU 103 Tight Setting 1 Recall Variable 1 Pressing this will Set The system to RGB Clipping Hi RGB Clip 103 Lo RGB Clip 1 0 Hi RGB Knee 103 Lo RGB Knee 1 0 18 EBU 103 Optimum Setting 1 Recall Variable 1 Pressing this will Set The system to RGB Clipping Hi RGB Clip 101 Lo RGB Clip 0 0 Hi RGB Knee 101 Lo RGB Knee 0 0 19 BACK none Go back to the main Preset menus 4 7 ...

Страница 37: ... Lo Luma Knee 0mv Lo Chroma Knee 230 Colour Space PAL Pedestal 0 0 13 NTSC NORMAL Preset Setting 1 Recall Variable 1 Pressing this will Set The system to Composite Clipping Hi Luma Clip 99 9IRE Hi Chroma Clip 120IRE Lo Luma Clip 0 0IRE Lo Chroma Clip 24IRE Hi Luma Knee 99 9IRE Hi Chroma Knee 120IRE Lo Luma Knee 0 0IRE Lo Chroma Knee 24IRE Colour Space NTSC Pedestal 7 5 14 Bypass All 1 Recall Varia...

Страница 38: ...ee 0 0 17 EBU 103 Tight Setting 1 Recall Variable 1 Pressing this will Set The system to RGB Clipping Hi RGB Clip 103 Lo RGB Clip 1 0 Hi RGB Knee 103 Lo RGB Knee 1 0 18 EBU 103 Optimum Setting 1 Recall Variable 1 Pressing this will Set The system to RGB Clipping Hi RGB Clip 101 Lo RGB Clip 0 0 Hi RGB Knee 101 Lo RGB Knee 0 0 19 BACK none Go back to the main Preset menus 4 7 Menus 20 23 Memory Cont...

Страница 39: ...mber 2 22 MEM3 HD MEM15 1 Recall Variable 1 Pressing this will recall Memory number 3 23 BACK none Got to the Main Preset menus 4 7 Menus 24 27 Memory Controls See User Memories 5 3 2 Mem 6 Recall Mem 4 Recall Mem 5 Recall next BACK prev Menu Num Heading Automation Function 24 MEM4 HD MEM16 1 Recall Variable 1 Pressing this will recall Memory number 4 25 MEM5 HD MEM17 1 Recall Variable 1 Pressing ...

Страница 40: ...e Pressing this will Save Memory number 1 29 SAVE MEM2 HD MEM14 1 Save Pressing this will Save Memory number 2 30 SAVE MEM3 HD MEM15 1 Save Pressing this will Save Memory number 3 31 BACK none Go to the main Preset menus 4 7 Menu 32 35 Memory Controls See User Memories 5 3 2 Mem 5 Save Mem 6 Save Mem 4 Save next BACK prev Menu Num Heading Automation Function 32 SAVE MEM4 HD MEM16 1 Save Pressing t...

Страница 41: ...UV Setup Menus Menu Num Heading Automation Function 36 RGB Setup none Go to the RGB Setup menus 40 43 37 YUV Setup none Go to the YUV Setup menus 52 55 38 Blank none 39 BACK none Go to the Setup menus 6 8 Menu 40 43 RGB Clip and Knee Menus Menu Num Heading Automation Function 40 Hi none Go to the RGB Hi Clip and Hi Knee Clipping menus 44 47 41 Lo none Go to the RGB Lo Clip and Lo Knee Clipping men...

Страница 42: ...12Æ1023 This indicates the High Knee point for the RGB Clipping This can be set to give a soft clip from this knee point to the hard clip point 46 none Blank 47 BACK none Go to the RGB Clip and Knee menus 40 43 Menu 48 51 RGB Low Clip and Knee Settings Lo RGB Knee 0 0 Lo RGB Clip 0 0 Menu Num Heading Automation Function 48 Low Clip Level 7 Æ 50 1Æ511 This indicates the Low Clip point for the RGB C...

Страница 43: ...6 59 53 UV Clips none Go to the UV Clip and Knee menus 68 71 54 none Blank 55 BACK none Go to the RGB YUV menus 36 39 Menu 56 59 YUV Y Clip and Knee Menus Menu Num Heading Automation Function 56 Hi none Go to the YUV Y Hi Clip and Hi Knee Clipping menus 60 63 57 Lo none Go to the YUV Y Lo Clip and Lo Knee Clipping menus 64 67 58 none Blank 59 BACK none Go to the YUV menus 52 55 Menus 60 63 YUV Y H...

Страница 44: ... the hard clip point 62 none Blank 63 BACK none Go to the YUV Y Clip and Knee menus 56 59 Menu 64 67 YUV Y Low Clip and Knee Settings Lo YUV Y Knee 0 0 Lo YUV Y Clip 0 0 Menu Num Heading Automation Function 64 Low Clip Level 7 Æ 50 1Æ511 This indicates the Low Clip point for the YUV Y Clipping This is normally set to 0 for clipping at 0V in the analogue domain 65 Low Knee Level 7 Æ 50 1Æ511 This i...

Страница 45: ...gh Clip point for the YUV UV Clipping This is normally set to 100 for clipping at 0 7V in the analogue domain 73 High Knee Level 51 Æ 109 512Æ1023 This indicates the High Knee point for the YUV UV Clipping This can be set to give a soft clip from this knee point to the hard clip point 74 none Blank 75 BACK none Go to the RGB Clip and Knee menus 68 71 Menu 76 79 YUV UV Low Clip and Knee Settings Lo...

Страница 46: ... tion Go t and 87 Go t Clip 96 CSp PAL P 0 enhill Crescent 1923 256 100 ive a soft nt to the Lo nk to the YUV nus 68 71 us HD onl to the Com Hi Lo Kne to the Com p and Hi Lo 99 our Space ing This c if NTSC h to the Setu us SD NT dstl ffset 7 5I to the Com Hi Lo Kne to the Com p and Hi Lo 99 pace L 0 0I t Watford Hert 0 email eyesa clip from t ow clip poin V UV Clip a ly Function mposite Lum ee Cli...

Страница 47: ...uma Hi Clip and Hi Knee Clipping menus 88 91 85 Lo none Go to the Composite Luma Lo Clip and Lo Knee Clipping menus 92 95 86 Blank 87 BACK none Go to the Setup menus 80 83 Menus 88 91 Composite Luma High Clip and Knee settings NTSC High Y Knee 100 I High Y Clip 100 I Menu Num Heading Automation Function 88 High Clip Level 8 511 This indicates the High Clip point for the Composite Luma Clipping 89 ...

Страница 48: ... point for the Composite Luma Clipping 93 Low Knee Level 8Æ511 This indicates the Low Knee point for the Composite Luma Clipping This can be set to give a soft clip from this knee point to the hard clip point 94 Blank 95 BACK none Go to the Composite Clip and Knee menus 84 87 Menu 96 99 Composite Chroma Clip and Knee Menus NTSC Menu Num Heading Automation Function 96 Hi none Go to the Composite Ch...

Страница 49: ... High Knee point for the Composite Chroma Clipping This can be set to give a soft clip from this knee point to the hard clip point 102 Blank 103 BACK none Go to the Composite Clip and Knee menus 96 99 Menu 104 107 Composite Chroma Low Clip and Knee Settings NTSC LoComp Knee 23 9I LoComp Clip 23 9I Menu Num Heading Automation Function 104 Low Clip Level 8Æ511 This indicates the Low Clip point for t...

Страница 50: ...he Composite Chroma Hi Lo Clip and Hi Lo Knee Clipping menus 84 87 81 C Clips none Go to the Composite Chroma Hi Lo Clip and Hi Lo Knee Clipping menus 96 99 82 Blank 83 BACK none Go to the Setup menus 8 11 Menu 84 87 Composite Luma Clip and Knee Menus PAL Menu Num Heading Automation Function 84 Hi none Go to the Composite Luma Hi Clip and Hi Knee Clipping menus 88 91 85 Lo none Go to the Composite...

Страница 51: ...tes the High Knee point for the Composite Luma Clipping This can be set to give a soft clip from this knee point to the hard clip point 90 Blank 91 BACK none Go to the Composite Clip and Knee menus 84 87 Menu 92 95 Composite Luma Low Clip and Knee Settings PAL Low Y Knee 0 mv Low Y Clip 0 mv Menu Num Heading Automation Function 92 Low Clip Level 8Æ511 This indicates the Low Clip point for the Comp...

Страница 52: ...mposite Chroma Lo Clip and Lo Knee Clipping menus 104 107 98 none Blank 99 BACK none Go to the Setup menus 80 83 Menus 100 103 Composite Chroma High Clip and Knee settings PAL HiComp Knee 932mv HiComp Clip 932mv Menu Num Heading Automation Function 100 High Clip Level 8 511 This indicates the High Clip point for the Composite Chroma Clipping 101 High Knee Level 8 511 This indicates the High Knee p...

Страница 53: ... Gree Fax 44 0 Low Clip p v ation This the This the can this Go men mation Go Go m Go 1 Go enhill Crescent 1923 256 100 and Knee s indicates Composite s indicates Composite n be set to s knee poin to the Com nus 96 99 o to the Lif o to the Co enus 132 o to the Ri 28 131 o to the Se t Watford Hert 0 email eyesa e Settings Function s the Low C e Luma Cl s the Low K e Luma Cl give a sof nt to the Lo ...

Страница 54: ...nu Num Heading Automation Function 116 ATC Mode LTC VITC1 VITC2 0Æ2 This selects the time code packet type for ATC time codes ATC packets have source information which indicates the origin of the time code LTC VITC1 or VITC2 117 Time Code ATC LTC AUTO 0Æ2 This selects ATC or LTC time codes In AUTO mode the type of time code is selected automatically based on the time code received 118 VITC LINE NU...

Страница 55: ...er Raw Out means this output is effectively configured as an acive input loopthrogh Legal Out means that this becomes the same as the main outputs 121 Tally Etherbox Level A Box number 0Æ16 Level B Tally number 11Æ13 This configures a tally on the etherbox FB 9E to respond to the legaliser being ON or OFF Box Set to Box number set to zero is this is not to be used Tal Tally number on the etherbox ...

Страница 56: ... RING SUPPRESSION MODE Off Auto Manual 0Æ2 Off No overshoot or undershoot suppression is employed Auto The Overshoot and Undershoot suppresser automatically tracks the Settings for the High and Low clip on the Legaliser section Manual The user can set the High and low Ring suppression thresholds manually 09 HIGH RING SUPPRESSION THRESHOLD 51 Æ 109 512Æ1023 When Ring Suppression Mode is in Manual T...

Страница 57: ...AIN MENUS Menu Num Heading Automation Function 132 Lift Gain Hue and Black Control On Off 0Æ1 Active Proc amp is processing gain hue and black controls are active Bypass Unity Gain and no black offset 133 HUE none Go To the Hue menus 136 139 134 LIFT GAIN none Go To the Luma Chroma and Black menus 140 143 135 BACK none Go to the Utility Menus 1 108 111 Menus 136 139 Hue Control Hue Degree 15 Menu ...

Страница 58: ... power Pressing Reset La 44 Go To th Automati 0Æ200 0Æ511 0Æ200 0Æ511 20 Range 255Æ255 none oot s t 58 ess Park Gree Fax 44 0 fier status a Bl Li 0 On Memo Func g this will se efault settin up lies a warm ftware equ g this will ta ast Chance he UTILITY on Lumi Chro Black Go to FACTR RESET enhill Crescent 1923 256 100 s lack ift 0 0 I ry ction et the curre ngs when t m restart to uivalent of r ake ...

Страница 59: ... Only do t scratch unit Go To th and Reset Pressing Upgrade 156 This wind version Pressing Options Go To th Upgrade E 2 008 03 E 59 ess Park Gree Fax 44 0 Func Start a fac Wipe ALL y have bee this if you a or there is he UTILITY ts Func g this will ta last chanc dow displa g this will ta Go To Me he UTILITY YES RESET YES enhill Crescent 1923 256 100 ction ctory Reset Logos and n previous are setti...

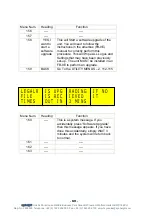
Страница 60: ...ctions in the etherbox FB 9E manual to correctly perform this procedure This will Wipe ALL Logos and Settings that may have been previously set up The unit MUST be installed in an FB 9E to perform an upgrade 159 BACK Go To the UTILITY MENUS 2 112 115 Menu Num Heading Function 160 This is a system message If you accidentally press Software Upgrade then this message appears If you have done this acc...

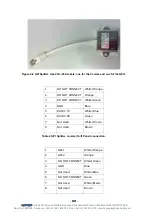
Страница 61: ...n below 1 GPI 1 White Orange 2 Not Used Orange 3 GPI 2 White Green 4 GND Blue 5 RS232 TX White Blue 6 RS232 RX Green 7 Not Used White Brown 8 Not Used Brown Table 1 GPI and RS232 pin out on RJ 45 6 1 1 GPI Inputs Figure 6 1 Typical GPI Input 6 1 2 GPI Splitter The soft panel comms and GPI connections are on the same RJ45 connector Eyeheight provide a GPI Splitter block which enables simultaneous u...

Страница 62: ... Sockets one for the Comms and one for the GPI s 1 DO NOT CONNECT White Orange 2 DO NOT CONNECT Orange 3 DO NOT CONNECT White Green 4 GND Blue 5 RS232 TX White Blue 6 RS232 RX Green 7 Not Used White Brown 8 Not Used Brown Table 2 GPI Splitter comms Soft Panel connection 1 GPI 1 White Orange 2 GPI 2 Orange 3 DO NOT CONNECT White Green 4 GND Blue 5 Not Used White Blue 6 DO NOT CONNECT Green 7 Not Us...

Страница 63: ...ivated by a short to ground The GPI has its own internal pull up resistor If the user is interfacing with logic then Vhigh 12V Vin 3V Vlow 0 3V Vin 0V 6 1 3 RS232 Interface This loosely follows the pin convention of EIA 561 which is a standard for RS232 on an RJ45 cable Only TX RX and Signal ground pin 4 are implemented For the LE 2n the following RS232 parameters apply 115Kbaud 8 Bits no parity 1...

Страница 64: ...ght Unit 34 Park House Watford Business Park Greenhill Crescent Watford Herts GB WD18 8PH Reg No 2855535 Telephone 44 0 1923 256 000 Fax 44 0 1923 256 100 email eyesales eyeheight com 6 2 Technical Specification ...

Отзывы: