


XMP 240 C AT • Configuration Tools
77
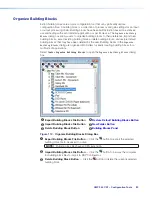
Device List Panel
— Lists the devices and folders in Live and Emulate mode. From
this panel, devices can be clicked and dragged into folders, placed in custom order, and
folders can be renamed. If the device is connected via LAN, the device IP is displayed.
Double-clicking a device in this list will initiate a pull (see
The color of the icon next to a device name indicates Live or Emulate status, as well as
whether the device is configured as a Primary or Secondary EXP device. Devices with
color icons are in Live mode. Devices with grayed icons are in Emulate mode. Devices
with blue icons are configured as Secondary units (see
Managing Devices in Device Manager
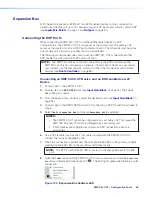
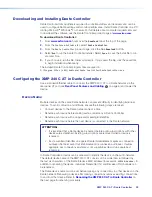
To add a device:
1.
Click
Tools > Device Manager
to open the
Device Manager
dialog box.
2.
Click the
Add Device
1
).
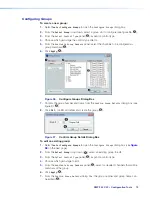
Figure 103.
Adding a Device
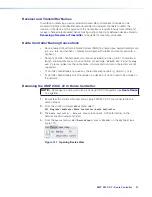
3.
From the DSP Configurator splash screen drop-down, select the device to be added
to Device Manager (see figure 104,
2
). Select
Connect...
to open the
Connect to
device...
dialog box and directly connect with a device. When connecting directly,
DSP Configurator performs a pull of the newly connected device configuration.
4.
Click
OK
(
3
).
Figure 104.
Selecting a Device to be Added
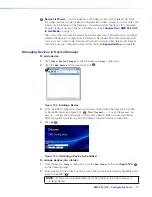
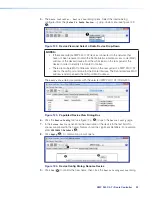
To arrange devices into a folder:
1.
From the
Device Manager
dialog box, click the
New Folder
button (see
1
on the following page).
2.
Enter a name for the folder. The text for the folder name is automatically highlighted and
ready to be edited (
2
).
NOTE:
Folders can be renamed later by clicking twice on the folder name and
editing the text.
figure 58. Adding a Device
figure 59. Selecting a Device to be Added