Preparing MAAP or AAP Modules
If required, MAAPs or AAPs must be purchased separately. Go to
to see the
full range of products that are available. The MAAP module is used with the TLP Pro 525C series
only. The AAP module can be used with either touchpanel series. AAP and MAAP modules are
assembled by slightly different methods.
Assembling the 525C MAAP Module
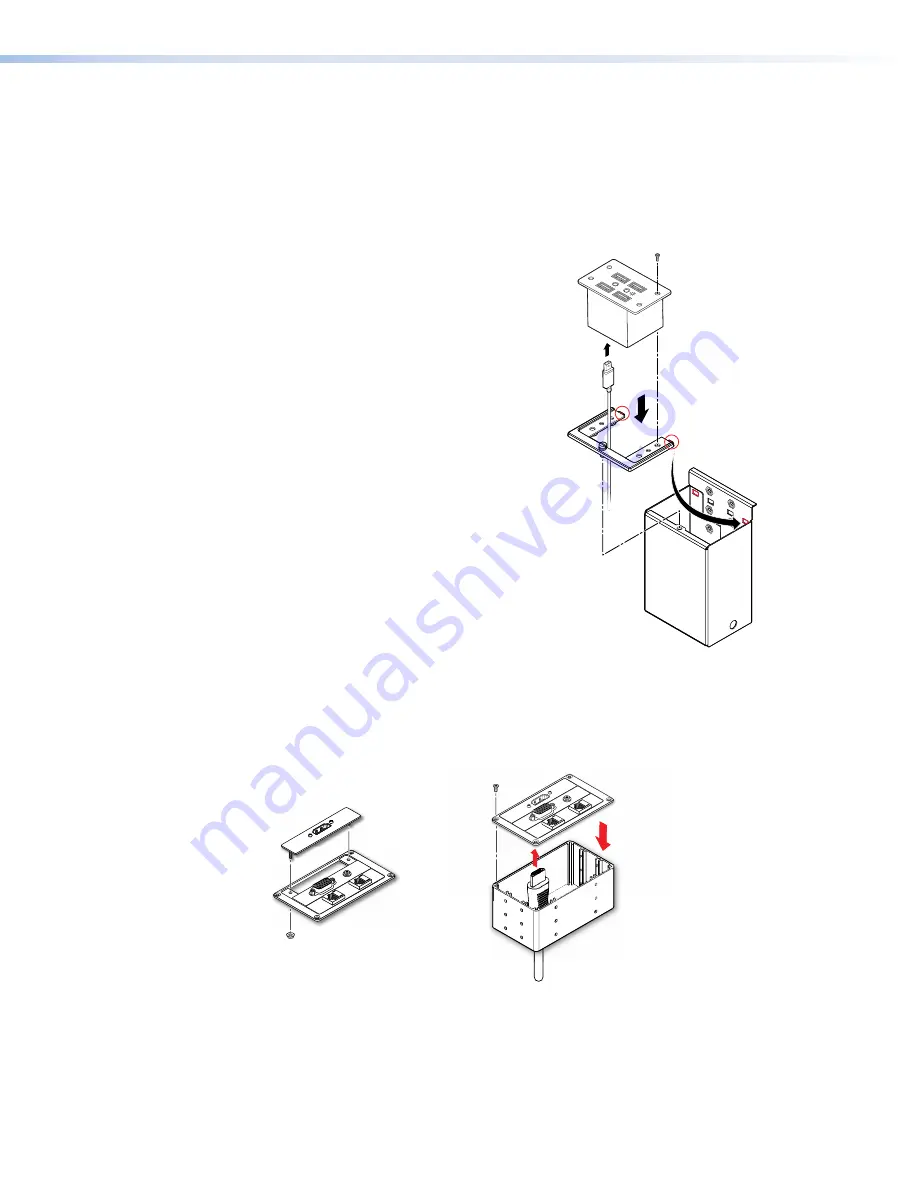
Figure 12 shows how to mount a double-space
MAAP. Mount single-space MAAPs in a similar
way.
1.
Insert cables through the bottom of the
connectivity bracket and connect them to
the MAAP (see figure 12,
1
).
2.
Secure two single-space or one double-
space MAAPs in the provided MAAP frame,
using the provided #4-40 screws (
2
).
If you are using one single-space MAAP, fill
the unused space with a blank MAAP plate.
3.
Slot the two tabs of the MAAP frame into
the two outside holes at the top of the
connectivity bracket (
3
).
4.
Secure the MAAP frame to the connectivity
bracket, using the captive screw (
4
) that is
provided with the MAAP frame.
5.
Insert the assembled MAAP module into
the touchpanel enclosure (see
USB HU
B4
M
AAP
AC
TIVI
TY
Mini Type
B
USB
Extron
USB HUB4 MAAP
USB Hub
(4) #4 - 40 Screws
1
1
1
2
2
2
3
3
3
4
4
4
Figure 12.
Assembling a MAAP Module
Assembling the AAP Module
1.
Secure up to three single space AAPs in the AAP Frame, using the #4-40 nut with captive
washer provided with the AAP (figure 13,
1
).
If required, fill any unused spaces with blank AAP plates.
3
2
#4-40 Nut with
Captive Washer
1
AAP
AAP Frame
Connectivity
Bracket
3
3
3
3
Figure 13.
Assembling an AAP Module
2.
Insert cables through the bottom of the connectivity bracket and connect them to the
bottom of the AAPs (
2
).
3.
Secure the AAP frame to the connectivity bracket, using the four provided #4-40 screws
(
3
).
4.
Insert the assembled AAP module into the Cable Cubby (see
figure 12
TLP Pro 525C and 725C Series Touchpanels • Mounting
17


