FOX II T HD 4K Transmitter • Installation and Operation
8
Front Panel Configuration Port
Configuration port
— Connect a controlling device, such as a PC,
CONFIG
CONFIG
PORT
to this mini USB B port for control of all functions of the transmitter
(see
on page 14 for SIS commands and software
control).
This mini USB B port serves a similar communications function as the
rear panel Remote RS-232 port (see
to access than the rear port after the transmitter has been installed and
cabled.
NOTE:
A front panel Configuration port connection and a rear panel Remote RS-232
port connection can both be active at the same time. If commands are sent
simultaneously to both, the command that reaches the processor first is handled first.
Connection Considerations
HDMI connections
HDMI signals run at a very high frequency and are prone to errors caused by bad
connections or excessive cable length. To avoid the loss of an image or jitter, follow these
guidelines:
•
Do not exceed 6.5 feet (2 meters) on the input or buffered loop-through of the
FOX II T HD 4K transmitter.
•
Use only the cable specifically designed and intended for high speed digital signals
that is supplied by Extron. Use of non-HDMI cables or modified cables can result in a
missing video output.
LockIt Lacing Bracket
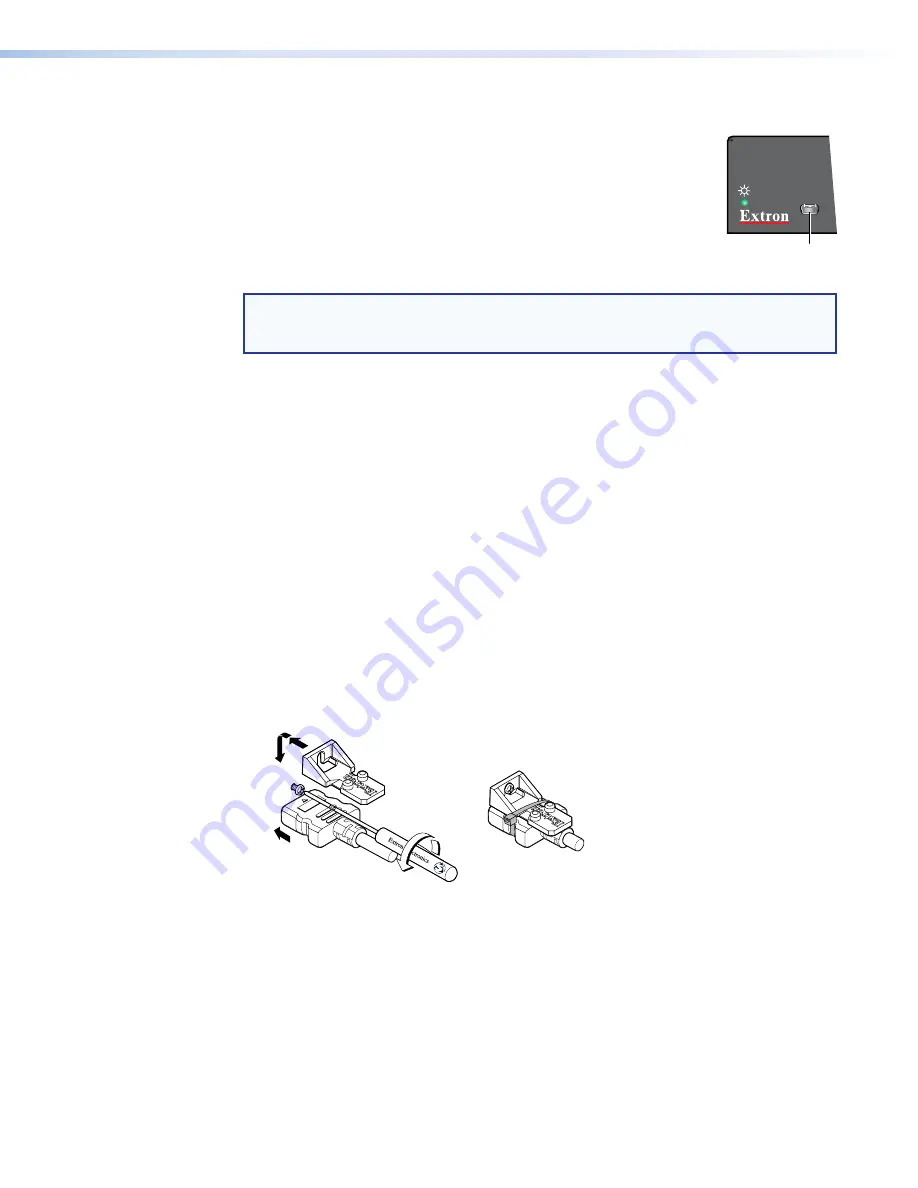
Use the LockIt Lacing Brackets, supplied with the transmitter, to securely fasten HDMI
cables to the device as follows:
1.
Plug the HDMI cable into the panel connection (see figure 3,
1
).
3
3
3
1
1
4
4
5
5
2
2
Figure 3.
Installing the LockIt Lacing Bracket
2.
Loosen the HDMI connection mounting screw from the panel enough to allow the LockIt
Lacing Bracket to be placed over it (
2
). The screw does not have to be removed.
Содержание FOX II T HD 4K
Страница 6: ......
Страница 8: ...FOX II T HD 4K Transmitter Contents viii ...


