9
Product Category
Changing Buttons
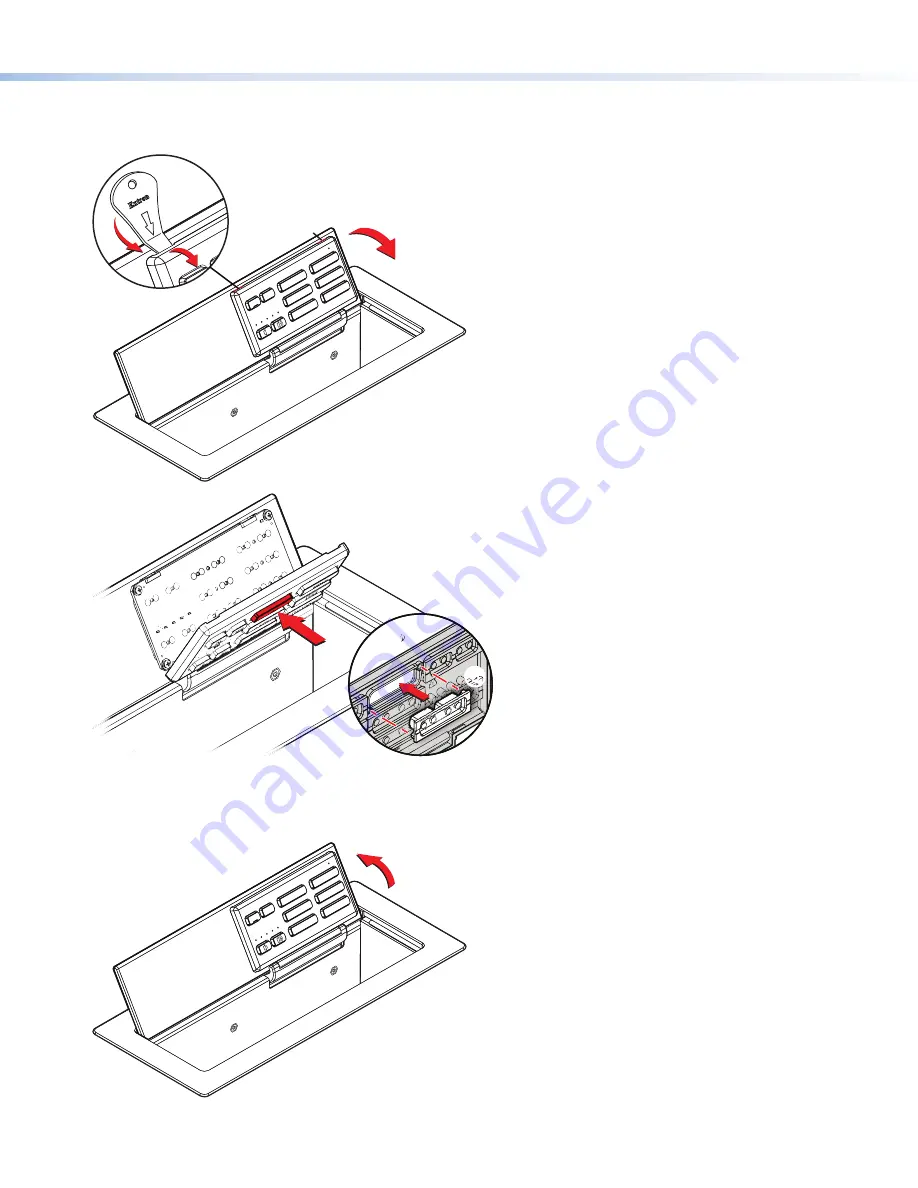
You can replace a faceplate or one or more of the individual buttons. Some additional blank buttons ship with the unit. You can
order standard or custom buttons from
www.extron.com
. To change the buttons:
e
ON
OF
F
PC
LAPT
OP
MUTE
AUX
VIDE
O
VG
A
HDM
I
ON
OF
Extr
on
Extr
on
ron
21-
785-01
LF
21
e
ON
OF
F
PC
LAPTOP
MUT
E
AU
X VIDE
O
VGA
HDM
I
1
1
Insert the Extron removal tool into one of the removal
slots in the top edge of the button panel.
Carefully release the corner of the panel.
1
1
2
2 3
3
4
4
2
2
Repeat step 1 to release the opposite corner of
the panel.
3
3
Tilt the lid forward to prevent the buttons from
falling out.
4
4
Pull the top of the button panel forward. The
panel is attached to the lid with a hinge that
allows access to the buttons without the panel
becoming completely detached.
You can now return the lid to the fully open position.
5
5
From the front of the panel, press the button
until it is free of the panel.
6
6
From the back of the button panel, insert the
replacement button into the appropriate slot.
Ensure the text is in the correct orientation.
Align the two pegs on the button with the holes
on the button panel.
7
7
Press the button into the faceplate until the
pegs on the button are seated securely in the holes.
8
8
Repeat steps 5-7 for any other buttons that
need to be replaced.
9
9
Tilt the lid forward to prevent the buttons from
falling out.
£
£
Press the top corners so that they snap back
into place, securely attaching the button panel
to the lid.
If the corners do not snap back easily, you
may need to adjust how the button panel is
seated in the hinge attaching it to the lid (
).
6
6
5
5
7
7
9
9
£
£
¢
¢
¤
¤
£
£
¢
¢
Tilt the lid and the button panel backwards.
¤
¤
Back of
Button Panel
Figure 13.
Replacing Buttons


