Installing Power Supply Units
BlackDiamond 12800 Series Switches Hardware Installation Guide
92
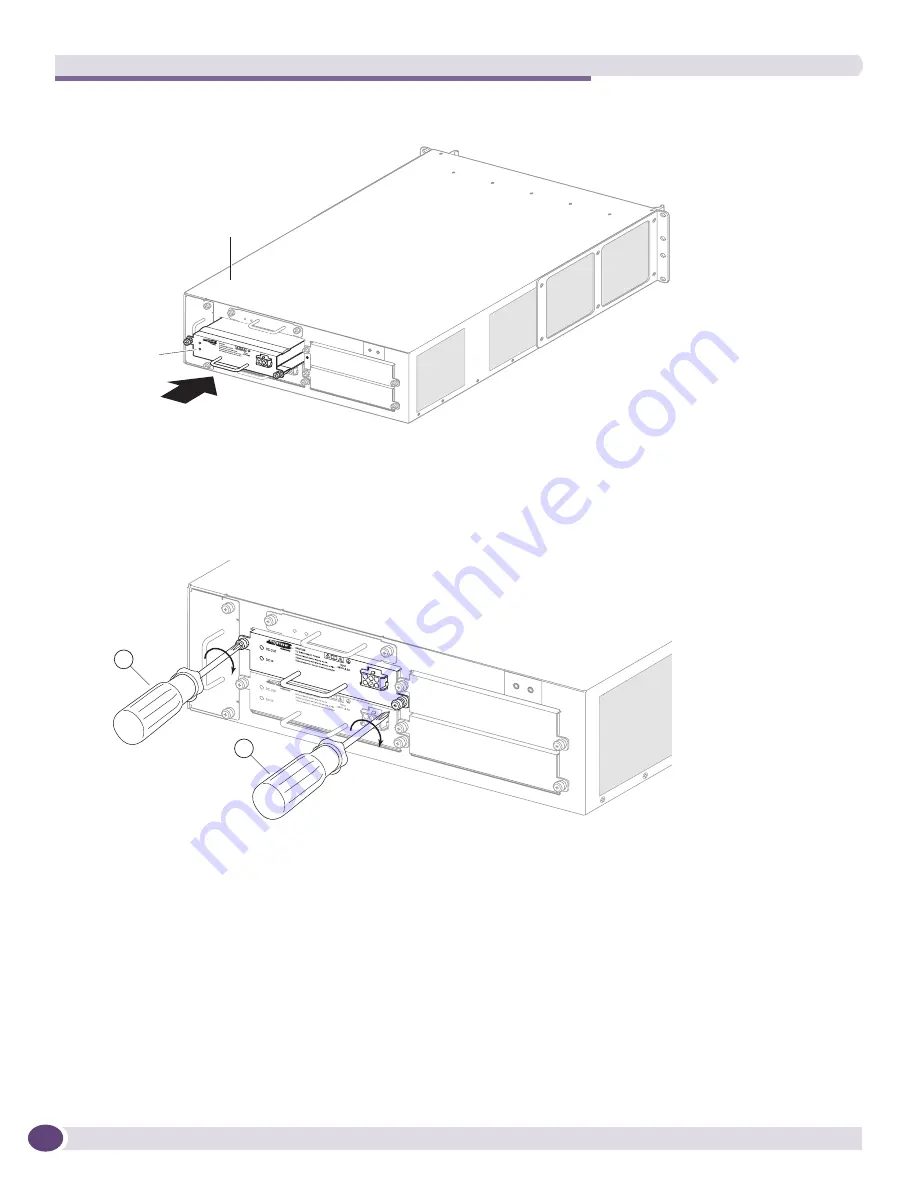
Figure 53: Installing the Extreme Networks 325 W DC PSU
4
To secure the 325 W DC PSU in the power supply bay, align and tightening the two captive screws
on the PSU front panel. When you tighten the screws, work from left to right (see
Figure 54
).
Figure 54: Securing the Extreme Networks 325 W DC PSU
5
Verify that the DC input cord was connected to a permanent DC voltage source by a qualified,
licensed electrician.
6
Verify that the DC power is turned off at the source.
7
Plug the DC input cord into the DC input socket on the front of the 325 W DC PSU (see
Figure 55
).
Verify that the input connector latch locks onto the connector on the DC PSU.
The pins must align properly for the cable to connect. Do not force the cable into the socket.
DC OUT
DC IN
Chassis
DC PSU
Torino DC PSU_01A
2
1
Torino DC PSU_02A
Содержание BlackDiamond 12800 Series
Страница 8: ...Table of Contents BlackDiamond 12800 Series Switches Hardware Installation Guide 8...
Страница 12: ...Preface BlackDiamond 12800 Series Switches Hardware Installation Guide 12...
Страница 13: ...1 BlackDiamond 12800 Series Switches...
Страница 14: ......
Страница 39: ...2 Installing BlackDiamond Switches and Modules...
Страница 40: ......
Страница 112: ...Installing Modules and Connecting Cables BlackDiamond 12800 Series Switches Hardware Installation Guide 112...
Страница 113: ...3 BlackDiamond Maintenance Procedures...
Страница 114: ......
Страница 130: ...Repacking a BlackDiamond Chassis BlackDiamond 12800 Series Switches Hardware Installation Guide 130...
Страница 131: ...4 Appendixes...
Страница 132: ......
Страница 146: ...Safety Information BlackDiamond 12800 Series Switches Hardware Installation Guide 146...
Страница 160: ...Index BlackDiamond 12800 Series Switches Hardware Installation Guide 160...


