MO297-EU-EN V4.3 4/13
5
Infrared Temperature Measurements
1.
Press the power
button to turn the meter on.
2.
Press the IRT button to enable the IR thermometer and the laser pointer. The laser pointer icon
will flash while the mode is active.
3. Press
the
▲
or
▼
button to change the temperature units
4.
Aim the laser pointer at the surface to be measured and read the surface temperature in the
secondary display.
5.
Release the IRT button. The last temperature measured and the laser icon will remain on the
display for approximately 10 seconds before returning to ambient temperature measurement.
IRT MAX MIN display:
The meter can be set to display only the maximum or minimum temperature measured during an IR
scan.
1.
With the meter in the IR hold mode, press the MODE button. “MIN” will appear in the
display.
2.
Press the IRT button to enable the IR thermometer. The meter will display the minimum
temperature measured and will update only when a lower temperature is measured.
3.
Press the MODE button twice to enable the MAX mode and proceed as stated above for the
maximum temperature.
4.
The MAX or MIN temperature is not stored when the function is exited. The unit
automatically exits MAX/MIN mode after approximately 10 seconds.
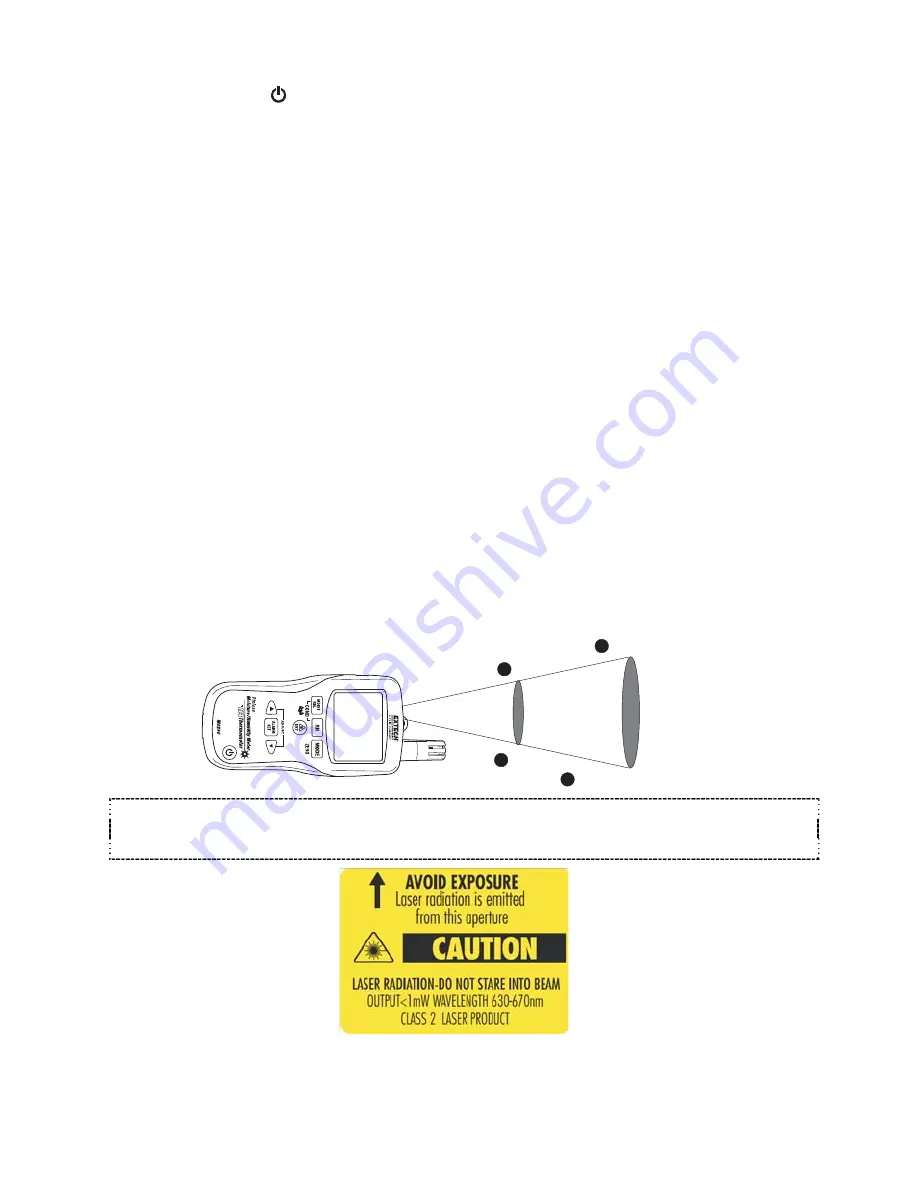
IR Field of View
Ensure that the desired target is larger than the spot size. As the distance from an object increases,
the spot size of the area measured by the meter becomes larger. The meter’s field of view ratio is
8:1, meaning that if the meter is 8 inches (cm) from the target, the diameter (spot) of the object
under test must be at least 1 inch (cm). Refer below to the field of view diagram.
WARNING: Do not directly view or direct the laser pointer at an eye.
Low power visible lasers
do not normally present a hazard, but may present some potential for hazard if viewed directly for
extended periods of time.
1” @ 8”
2” @ 16”
20mm @ 160mm
40mm @ 320mm


