background image

EA33-en-GB_v2.5 7/18

3

Basic Operation 

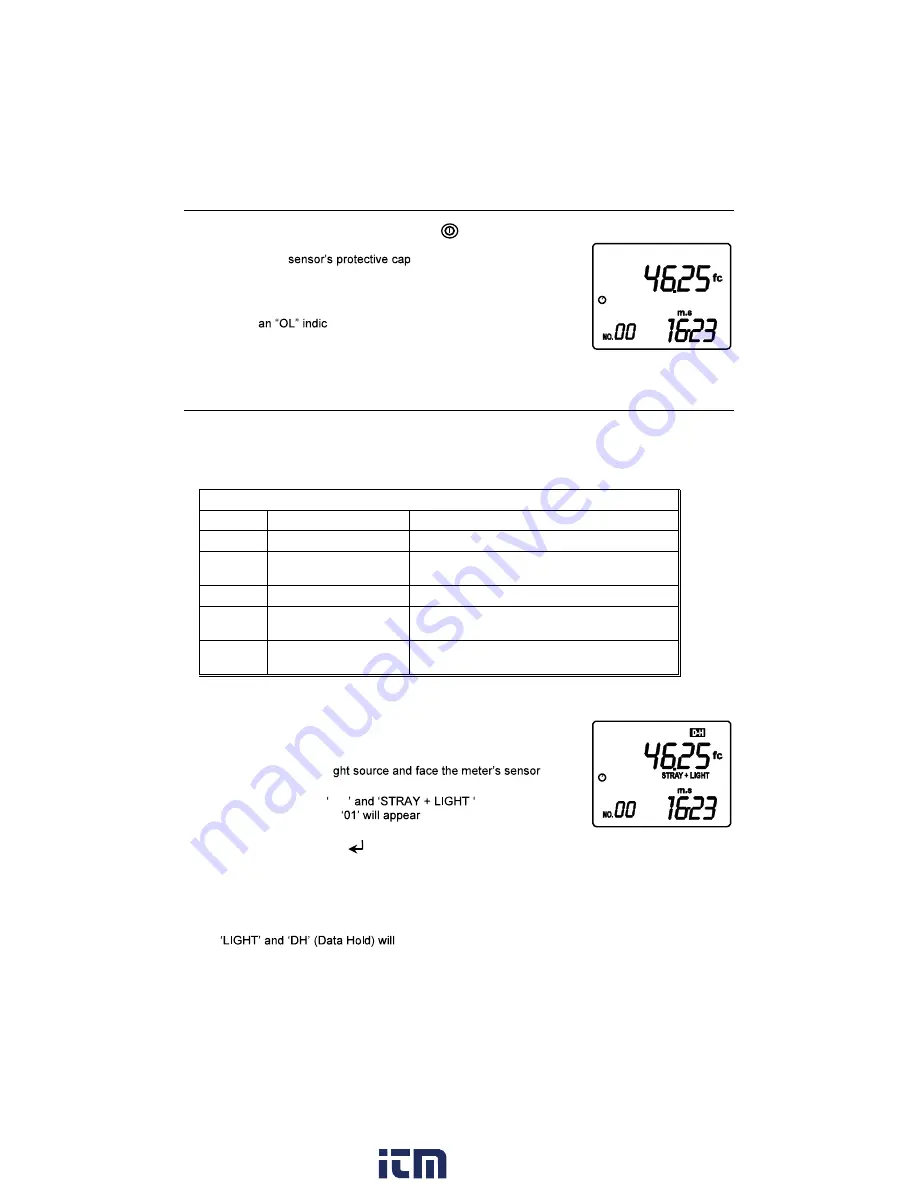
1. With the sensor cover in place, press the        button to turn the meter on. The meter will perform 

a short self-test. 

2. Remove the 

and place the sensor in the 

area to be measured. 

3. Press the 

lux / fc 

button to select the desired units of measure. 

4. Read the light level on the display. If the measurement is out of 

range, 

ation will appear. 

5. When the meter is turned on, the elapsed timer starts. The elapsed 

timer shows days/hours or minutes/seconds. Use the TIME button 
to toggle the view between minutes/seconds (M-S) and days/hours (D-H). 

Operation Modes 

In addition to the normal mode of operation where light level is measured, there are 5 special 
modes, listed below.  Each mode is explained in the subsequent sections of this manual. The SET 
button is used to access the modes. The number on the lower left of the LCD (after the SET button 
is pressed) represents the mode currently selected. Use the down arrow key to scroll to the desired 
mode. 

Programming modes 

Mode 

Name of mode 

Description 

SEt 01 

Stray+ Light 

Cancels out stray light from light under test 

SEt 02


Time - Hold 

Meter measures while timer counts down. 
Reading is held on LCD when counter = 0. 

SEt 03


rtC 

Set the day and time for internal clock 

SEt 04


Int  

Lumen-seconds, lux-hour, and fc-hour 
measurements 

SEt 05


COMP 

Measurements are compared to high and low 
limits. 

MODE 1 - Stray Light Inhibit 

This feature allows the user to measure light from one source while 
automatically factoring out the light from a secondary (stray) unwanted 
source. 
1. Turn on the desired li

towards this source (the stray light source should be on also). 

2. Press the SET key;  SEt

will appear at the 

center of the LCD and 

 on the lower left of the LCD 

(see diagram). 

3. Press the ENTER key (         ). The measurement at this point consists of the primary AND the 

stray light sources (LIGHT + STRAY). 

4. Press ENTER to store this value. STRAY will appear on the display 
5. Turn off the primary light source. 
6. Press the ENTER key again to store only the stray light source. 
7. The meter will now compute and display the light level for only the desired (primary) light source. 

also appear on the display. 

8. Press the ENTER key to exit this mode.

www.

.com

[email protected]

1.800.561.8187

Содержание 793950411339

Страница 1: ...User Manual EasyView Light Meter with Memory Model EA33 www com information itm com 1 800 561 8187 ...

Страница 2: ...Intensity cd Comparator button 8 READ Right arrow button 9 Average reading tally display 10 Power ON OFF button 11 Set button 12 Average button 13 Relative Percent button 14 Light sensor 15 Left arrow Memory button 16 Up Down arrow buttons Display 1 Relative Mode 2 Comparator Mode 3 Average 4 Data Hold 5 Relative 6 Candela 7 Relative 8 fc lx hours Integral Illuminance 9 Stray light measurement 10 ...

Страница 3: ...e Description SEt 01 Stray Light Cancels out stray light from light under test SEt 02 Time Hold Meter measures while timer counts down Reading is held on LCD when counter 0 SEt 03 rtC Set the day and time for internal clock SEt 04 Int Lumen seconds lux hour and fc hour measurements SEt 05 COMP Measurements are compared to high and low limits MODE 1 Stray Light Inhibit This feature allows the user ...

Страница 4: ...hed 7 Use the TIME key to toggle between minutes seconds m s and day hour D H views MODE 4 Integral Illuminance Mode Integral Illuminance is a luminous energy measurement based on the rate of flow of flux expressed in lumen seconds The Model EA33 can also measure any photometric quantity on a time dependent basis For example the illuminance could be integrated over time to yield lux hours lx h or ...

Страница 5: ...ement exceeds the high limit the plus sign will appear If the low limit is exceeded the minus sign will appear An audible beep will sound when a limit has been reached 14 Press the ENTER key to exit the Comparator mode 99 Point Averaging Illuminance is the amount of visible light incident upon a specific surface area Since the EA33 sensor area is small the Average Mode can be used to measure the i...

Страница 6: ...er turned on a data record is recorded The and an audible tone will sound 2 The counter on the lower left of the LCD will show the number of stored readings 3 The total memory size is 50 records READING STORED RECORDS 1 Press the READ key to enter the number for the displayed data point 2 Use the up down arrow keys to scroll through the stored readings 3 Press the ENTER key to exit this mode of op...

Страница 7: ...is feature 1 Turn the meter OFF 2 Press and hold the HOLD key while turning the meter ON 3 The AUTO POWER OFF feature will now be disabled 4 Note that AUTO POWER OFF is re enabled each time the meter is turned on 5 Also note that AUTO POWER OFF is always disabled in the Integral Illuminance mode www com information itm com 1 800 561 8187 ...

Страница 8: ...dispose of used batteries or rechargeable batteries in household waste As consumers users are legally required to take used batteries to appropriate collection sites the retail store where the batteries were purchased or wherever batteries are sold Disposal Do not dispose of this instrument in household waste The user is obligated to take end of life devices to a designated collection point for th...

Страница 9: ...hoto detector Silicon photo diode with spectral response filter Operating conditions Temperature 0 to 40o C 32 to 104o F Humidity 80 RH Storage conditions Temperature 10 to 50o C 14 to 140o F Humidity 80 RH Meter Dimensions 150 x 72 x 35mm 5 91 x 2 8 x 1 4 Detector Dimensions 92 x 60 x 29mm Weight Approx 11 3 oz 320g with battery Sensor lead length 150cm Low battery indication Battery symbol appea...

Страница 10: ...33 en GB_v2 5 7 18 10 Appendix Typical Light Levels Spectral Sensitivity 0 0 2 0 4 0 6 0 8 1 1 2 Wavelength in Nonometers 0 0 2 0 4 0 6 0 8 1 1 2 Light Meter CIE www com information itm com 1 800 561 8187 ...

Отзывы: