Operation
during transport to and from the jobsite, and when
parked inside a building.
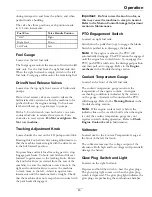
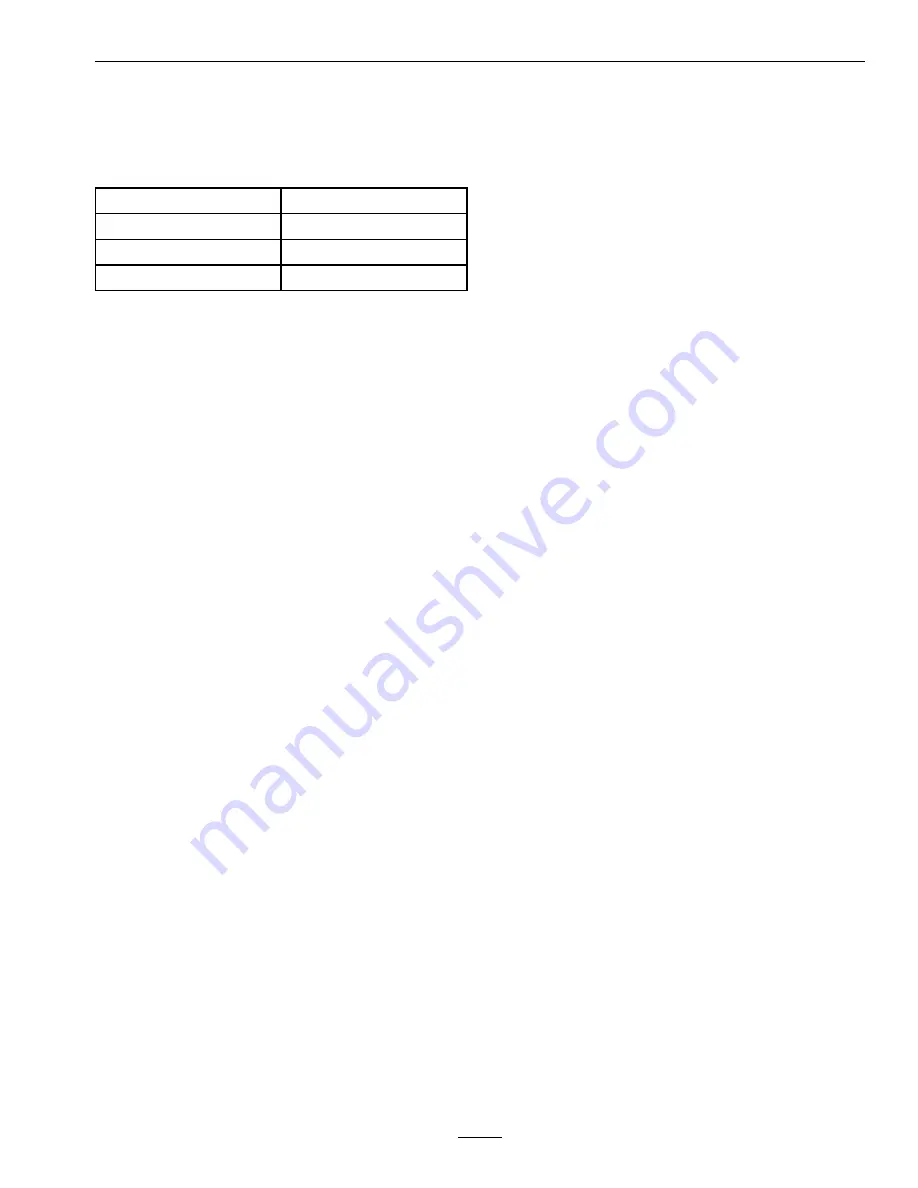
The valve has three positions, each position made
in 1/4 turn increments.
Fuel Flow
Valve Handle Position
“Off ”
Right
Right Tank
Down
Left Tank
Left
Fuel Gauge
Located on the left fuel tank.
The fuel gauge monitors the amount of fuel in the left
tank only. Use the fuel from the right fuel tank first.
When the right fuel tank is empty, switch to the left
fuel tank. Fuel gauge will monitor the remaining fuel.
Drive Wheel Release Valves
Located on the top right front corner of hydrostatic
pumps.
Drive wheel release valves are used to release the
hydrostatic drive system to allow the machine to be
pushed without the engine running. Unhook seat
latch and tilt seat up to gain access to pumps.
With a 5/8 inch wrench, turn both valves one turn
counterclockwise to release drive system. Turn
clockwise to reset system.
Do Not overtighten. Do
Not tow machine.
Tracking Adjustment Knob
Located under the seat on the LH pump control link.
Rotating this knob allows fine tuning adjustments so
that the machine tracks straight with the drive levers
in the full forward position.
Stop machine and wait for all moving parts to stop.
Engage park brake. Unhook seat latch and tilt seat
forward to gain access to the tracking knob. Rotate
the knob clockwise (as viewed from the rear of the
machine) to cause the machine to track more to the
right and counterclockwise to cause the machine
to track more to the left. Adjust in quarter-turn
increments until the machine tracks straight. Check
that the machine does not creep when in neutral with
the park brake disengaged.
Important:
Do Not rotate the knob too far, as
this may cause the machine to creep in neutral.
Refer to the Motion Control Linkage Adjustment
section in Maintenance.
PTO Engagement Switch
Located on right fuel tank.
Switch must be pulled out (up) to engage the blades.
Switch is pushed in to disengage the blades.
Note:
If the engine overheats, the PTO will
automatically disengage. The PTO cannot be engaged
until the engine has cooled down. To re-engage the
PTO, push PTO switch in to the disengaged position
and then pull out to engage. Refer to the
Engine
overheats
in the Troubleshooting section.
Coolant Temperature Gauge
Located at the front of the left fuel tank.
The coolant temperature gauge monitors the
temperature of the engine coolant. An engine
overheating condition is indicated by the red area
on the gauge. An alarm will sound and the PTO
will disengage. Refer to the
Warning Buzzer
in the
Troubleshooting section.
Note:
If the engine coolant level is below the
indicator line on the overflow bottle when the engine
is cold, the coolant temperature gauge may not
register correctly during operation. Refer to
Check
Engine Coolant Level
in Maintenance.
Voltmeter
Located next to the Coolant Temperature Gauge at
the front of the left fuel tank.
The voltmeter measure the voltage output of the
alternator. Both high and low voltages will potentially
damage the battery.
Glow Plug Switch and Light
Located on the right fuel tank.
Depress and hold the switch to heat the glow plugs.
The glow plug light comes on when the glow plug
switch is depressed. The glow plug light indicates the
glow plugs are preheating the combustion chamber.
23
Содержание LAZER Z DS Series
Страница 1: ...LAZER Z DS SERIES For Serial Nos 400 000 000 Higher Part No 4503 187 Rev B ...
Страница 59: ...Schematics Schematics Electrical Diagram 59 ...
Страница 60: ...Schematics Electrical Schematic 60 ...
Страница 62: ...62 ...


