


EMV400 FHD Mobile DVR
16
3.5
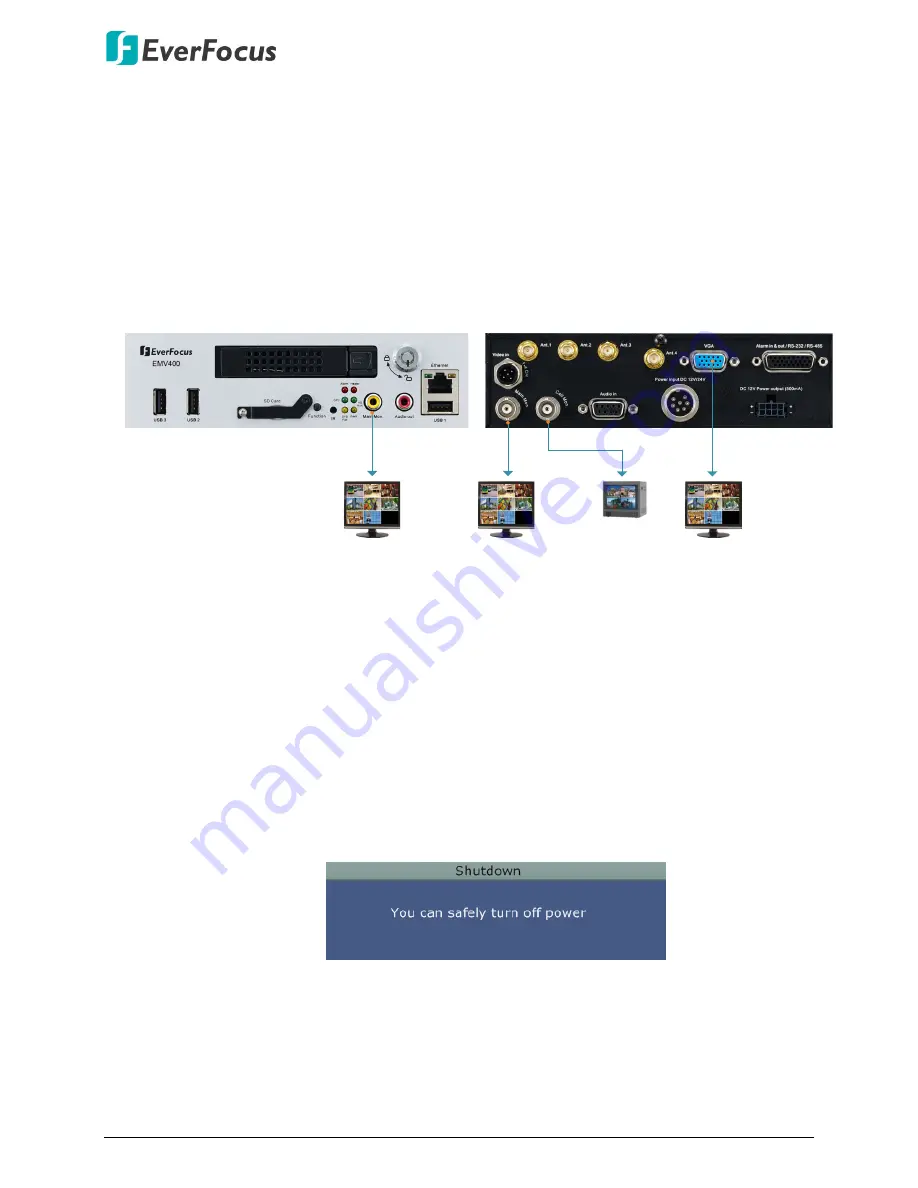
Monitor Connection
The mobile DVRs have 3 Main Monitor ports and 1 Call Monitor port. You can connect the
monitors to the BNC, VGA or RCA Main Monitor and BNC Call Monitor ports of the mobile DVR.
All of the Main and Call Monitor ports can be used simultaneously.
The configuration can only be operated on the Main Monitors, and the
3 Main Monitor outputs
have the identical functionality.
Make sure the connected monitor's specifications comply with these resolution requirements.
FHD
Main Monitor
Call Monitor
BNC Cable
VGA Cable
BNC Cable
RCA Cable
Main Monitor
Main Monitor
Front Panel
Rear Panel
3.6
Turning On / Off the Power
Before powering on the mobile DVR, please make sure the internal HDD have been installed
properly. Once you have completed the basic cable connections, you are ready to turn on the
mobile DVR. Simply plug in the power source. The POWER LED will light up if power is normal.
Once the system has finished loading, you can begin to set up the menu options for the
mobile DVR.
To turn off the power, please go to OSD Root Menu > System Setting > Miscellaneous setting
page, and click
Shutdown
(refer to 6.9.7 Miscellaneous in the User’s Manual). After the
message pops up as below, you can now turn off the power source.
+
Note that when the mobile DVR is placed in an environment where the temperature is very
low (for example, -40°C, the mobile DVR will NOT turn on immediately.)


