Studio Pro 14
Installation and Operating Manual
North American Model
Jan 2019
Page
10
of
10
Loading the Kiln
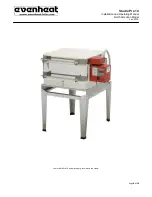
As mentioned in the Features Section of this manual the Studio Pro 14 gives you a choice between loading via the Top or Front.
To load via the top, throw the kiln control panel power switch to the OFF position and simply lift on the lid handle and take the lid
back. A built-in stop will hold the lid at the open position. Avoid positioning the shelf or ware directly at the thermocouple. The
thermocouple needs some space around it in order to operate properly. When lowering the lid be sure that your ware does not
make contact with the lid. This is possible when using tall forming molds and large pieces.
To load via the front, throw the kiln control panel power switch to the OFF position and simply lift on the front chamber handle and
take the chamber back. A built-in stop will hold the chamber at the open position. Place your shelf squarely onto the floor of the
Studio Pro 14. At this point we think it’s a great idea to gently lower the chamber to check that the shelf clears the chamber.
Reposition if necessary. Position your ware on the shelf as desired and close the kiln. Open the lid and check for clearance,
particularly with the thermocouple. Remember we want to give the thermocouple some space.
Note: Do not open the chamber with the lid in the open position.
Firing the Studio Pro
Once the Studio Pro 14 has been properly loaded and closed you may now fire the kiln.
Throw the power switch, located on the kiln control panel, to the ON position. The temperature control will illuminate and programming of the
control is now possible.
A separate instructional manual for the controls was included with your new Studio Pro 14. Please refer to these manuals for all programming
and operation details.

