40
bracket is mounted on the underground with its shorter side directed upwards
(see illustration).
Now mark the 3 places where the holes should be drilled.
Drill the holes (10 mm) on the places marked and place the 3 bolts / cotter bolts
in the holes. Cotter bolts are suitable mainly for concrete and stone walls. For
other surfaces, use fasteners that are suitable for the surface: Consult an expert,
if necessary.
Screw the wall bracket firmly to the wall.
Make sure that the installation place is safe and sturdy.
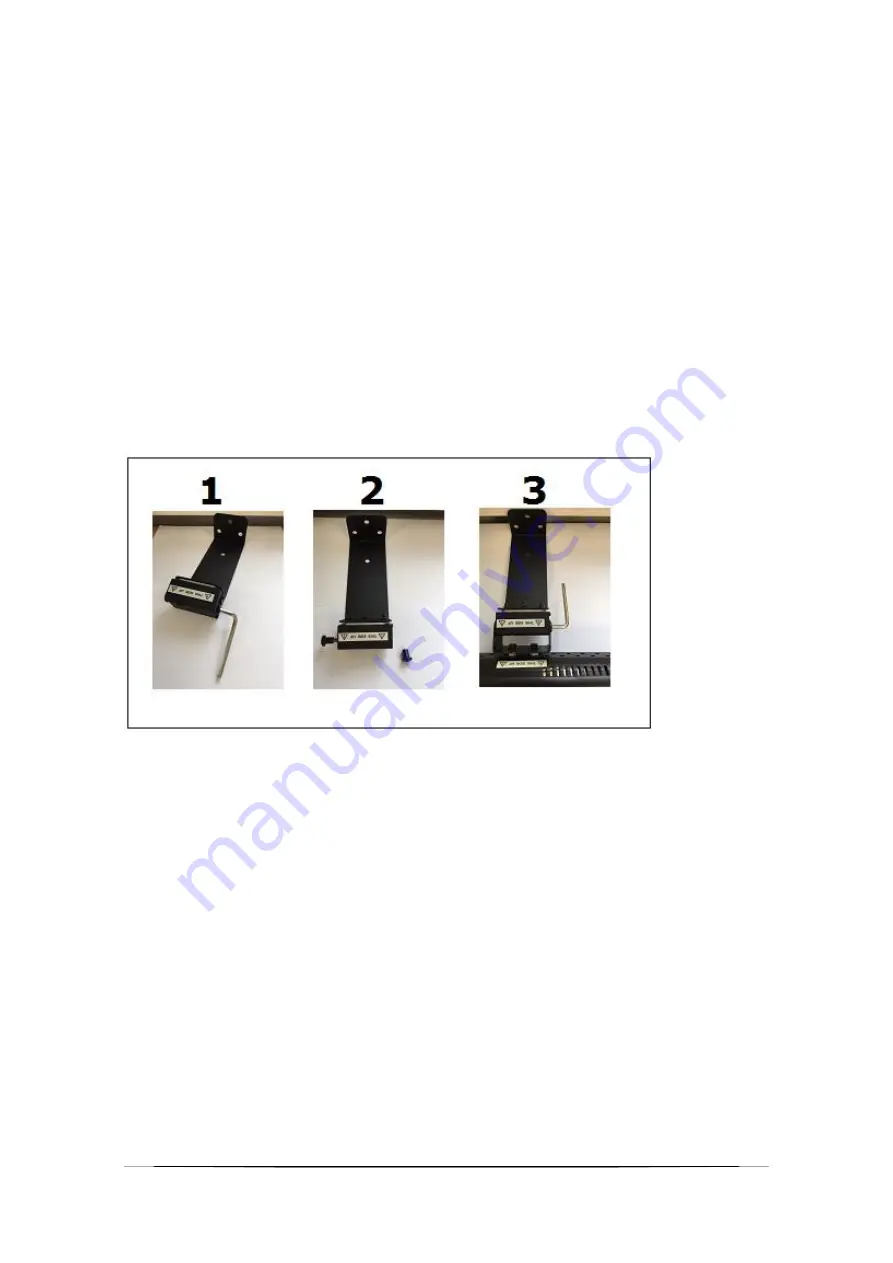
Now attach the infrared heater to the wall bracket. First use the Allen key delivered
with the package to unscrew the socket screw from the wall bracket (1) and pull
the pin that has the other socket screw from the wall bracket (2).
Install the
support bracket of the infrared heater on the wall bracket.
Push the pin that has
the socket screw back into the holes in the wall bracket.
Also install the first socket
screw and tighten it using the Allen key (3).
Now adjust the desired radiation angle and tighten the socket screw firmly.
Check regularly whether all the screw connections are still attached firmly. As a
result of mechanical pressure and oscillation by wind or rain, the infrared patio
heater could dislodge.
Remove both foam strips from the protective grid of the infrared heater. These
foam strips are meant to protect the lamp during transport.
For personal safety, the infrared patio heater must be connected to an electric
system, which is protected by an earth leakage switch of maximum 30mAmp.
Use only an undamaged, earthed socket outlet (for outdoor use, a water-tight
socket outlet).
Under certain circumstances, it might be worthwhile to connect the infrared patio
heater permanently to the electric grid and to operate it with a switch. To
guarantee the safety and dust & water tightness of the infrared patio heater, a
certified electrician must carry out this type of connection.
Содержание Golden 1500 Slim
Страница 2: ...2...
Страница 112: ...112 Eurom Kokosstraat 20 8281 JC Genemuiden NL info eurom nl www eurom nl...


