www.eurolite.de
Item 51860120
USB DMX Interface
For your own safety, please read this user manual
carefully before you initially start-up. You can find the
latest update online.
Use
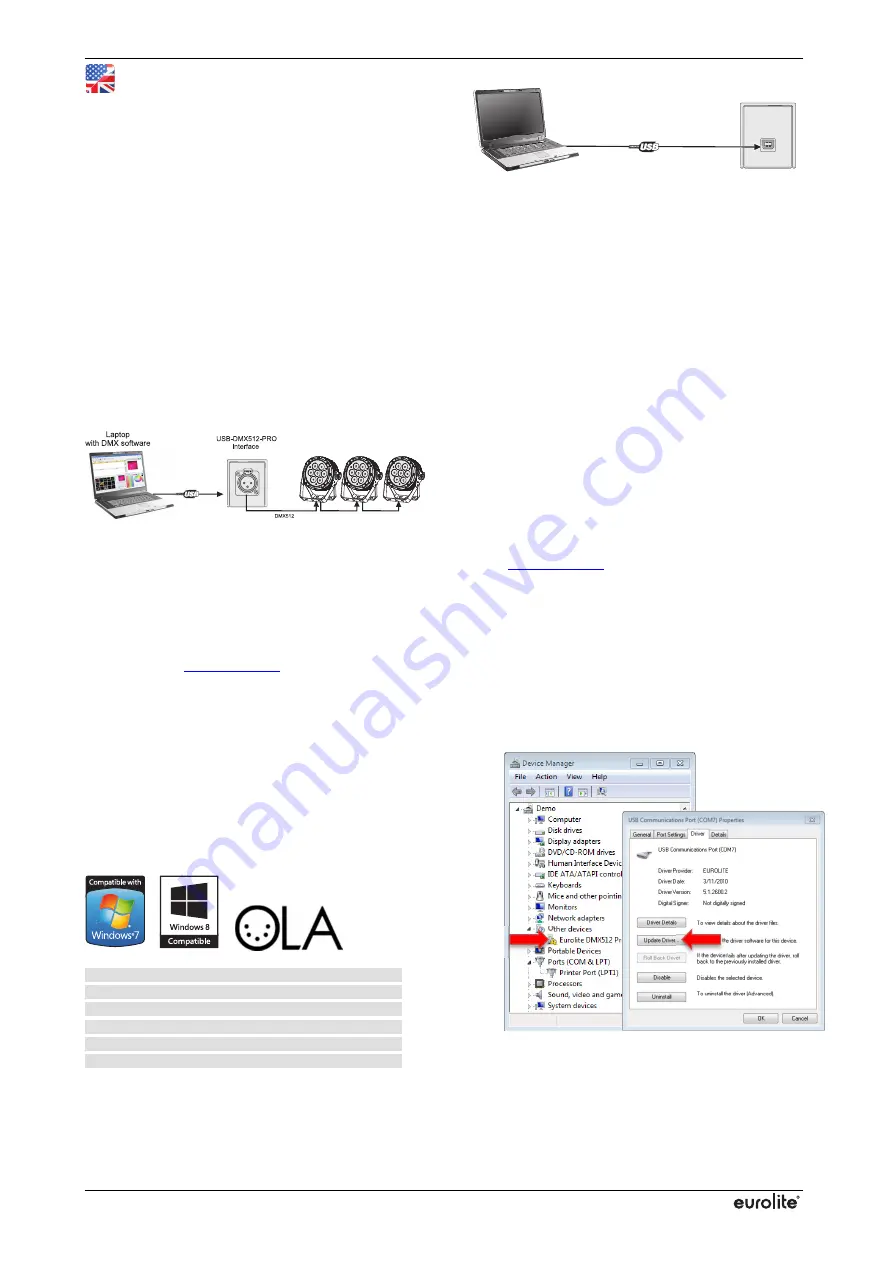
USB-DMX512-PRO is a standard DMX512A interface
used for transmission of DMX512 signals. It is set up
between a computer and various DMX devices (spot
lights, moving heads, dimmers) in lighting installations.
It can be used for output of 512 DMX channels. The
interface is provided with a 3-pin XLR mounting socket
for connecting the DMX network and a USB 2.0 port for
connecting a computer.
Setup
The interface may be used with any software
application that supports DMX to distribute DMX data. It
connects to the computer via USB. Data is sent to the
interface via USB where it is internally distributed to the
XLR output for DMX output to DMX-controlled fixtures.
Quick Start
The steps below will be described in more detail in the
following sections.
1
Connect the interface to your computer and the
DMX512 control network.
2
Download and install the driver software from the
internet
www.eurolite.de
.
3
Start your lighting control software and configure it
for use with the interface.
4
Create your show.
Connecting the DMX512 Network
Connect the interface to the DMX input of the first DMX-
controlled device in the chain. After 32 devices, insert a
signal amplifier. Connect a 120 Ω terminating plug to
the DMX output of the last DMX device.
Supported Operating Systems
Windows XP
Windows Vista
Windows 7
Windows 8
Linux OLA-OpenDMX.net
Compatible to 32 bit and 64 bit
Connecting the Interface for the First Time
Use the USB cable provided to connect the interface to
a free USB port on your computer. Always use an active
USB 2.0 port or hub supplying sufficient power for the
interface. The interface can be connected to and
disconnected from the computer during operation and
without a reboot (hot swapping and plug & play).
Multiple units can be used at the same time.
Driver Installation for Windows
For proper operation under Windows operating
systems, you need to install the matching driver. The
installation is based on the CDC driver (standard driver
of the operating system), which emulates a virtual
RS232 port for the communication with the USB port.
When connecting the interface to the computer,
Windows generates a virtual COM port that can be
accessed by any application just like a real RS232 port.
This manual will cover the Windows 7 installation
process, by way of example. Other operating systems
will be similar.
Please follow the steps below for installing the drivers:
1
Download the driver software from the internet
www.eurolite.de
download section of the
product.
2
Copy and extract the archive to your computer
(e.g. Desktop).
3
Connect the interface to your computer and wait
until Windows has finished searching for the
driver.
4
Open the device manager where the interface is
listed under Other Devices. Double-click the
interface. This will bring up the
Properties
. Select
the
Port Settings
tab and click
Update driver -
.


