


Upgrading The Computer
Upgrading the Hard Disk Drive 6 - 5
6
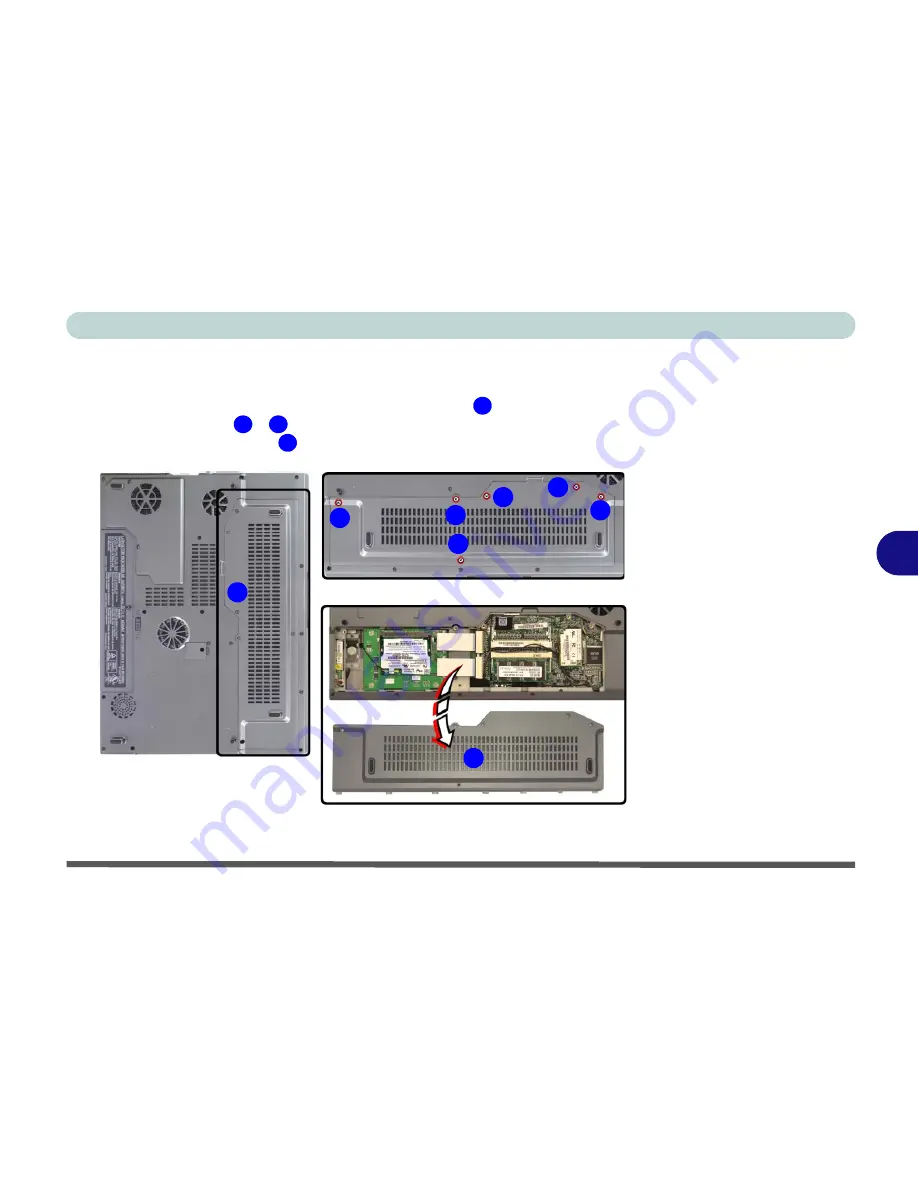
Hard Disk Upgrade Process
1.
Turn
off
the computer, and turn it over and remove the battery.
2.
Locate the hard disk and memory (RAM) bay cover
.
3.
Remove screws
-
from the bay cover.
4.
Remove the bay cover
.
Figure 6 - 2
HDD/RAM Cover
Removal
1
2
7
8
2
1
3
4
5
6
7
8
Содержание M375C MILANO
Страница 1: ......
Страница 2: ......
Страница 67: ...Advanced Controls Video Driver Controls 3 7 3 Figure 3 4 Intel Graphics Controller Properties...
Страница 90: ...Advanced Controls 3 30 3...
Страница 149: ...Wireless PC Camera Modules PC Camera 7 15 7 Figure 7 3 Audio Setup Windows XP...
Страница 152: ...Wireless PC Camera Modules 7 18 7...


