EURO EVC60SS Скачать руководство пользователя страница 7

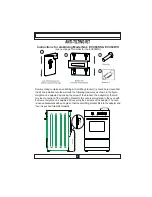
TAKE ALL IMPORTANT SECURITY MEASURES AND READ THE MANUAL

COMPLETELY BEFORE USING THE APPLIANCE


This appliance has been designed for non-professionel, domestic use only.


Carefully inspect for any transit damage after you unpacked the appliance.

    If there is any defect; do not use the appliance and immediately contact an

    authorized service agent. As the materials used for package ( nylon, stapler,

     strafoam. etc. ) may cause harmful effects to children, they should be collected

     and safely disposed of immediately.


The appliance must be installed by a qualified person in accordance with the

      Australian Wiring Rules. The manufacturer or ‘Euro Appliances’ are not responsible

     for any damage that might be caused by defective installation.


The rating data plate is attached to the rear of the appliance. Carefully check that

     your electric supply is suitable for the appliance before connecting it to supply.

       Ensure that the appliance is switched off before replacing the lamp to avoid the

     possibility of electric shock.


Switch of the appliance before performing any cleaning or maintenance.

     Some parts of appliance retain their heat for a sometime after use, wait until the

     appliance cools before touching hot surfaces or elements.

     This appliance is not intended for use by persons(including children) with reduced

     physical, sensory and mental capabilities, or lack of experience and knowledge,

    unless they have been given  supervision or instruction concerning use of the

     appliance by a person responsible for their safety.

     Children should be supervised to ensure that they do not play with the appliance.

     Keep flammable metarials away when the appliance is operating.

     Ensure that power cords from other appliances do not contact the hot surfaces

     of the oven.

      Ensure all switches are in the ‘‘O’’ position after usig the appliance.

6

PART 2 : WARNINGS

Содержание EVC60SS

Страница 1: ...INSTALLATION INSTRUCTIONS OF ELECTRICAL FREESTANDING OVEN Euro Model No s EVC60SS EVC60WH with ceramic hob EURO Model No EVE50WH with EGO solid hotplates Primera Primera Primera Primera Series Series...

Страница 2: ...technological standards ensuring maximum cooking efficiency Before using your appliance we recommend you take time to carfully read this use care manual which includes information for product installa...

Страница 3: ...et The adaptor 2 that will provide connection of the anti tilting bracket to the oven is preinstalled to the oven with 4 screws Height can be adjusted by loosening the 4 screws of the adaptor The oven...

Страница 4: ...removed from the kit and installed onto the wall with the following measures The adaptor 2 that will provide connection of the anti tilting bracket to the oven is preinstalled to the oven with 4 screw...

Страница 5: ...CONTENTS 1 PRESENTATIONAND SIZES OF PRODUCT 2 WARNINGS 3 INSTALLATIONAND PREPARATIONS FOR USE 4 USE OF YOUR OVEN 5 CLEANINGAND MAINTENANCE 6 SERVICEAND TRANSPORT 4...

Страница 6: ...2 Control Panel 3 Child Lock 4 Oven Door Handle 5 Drawer Cover 6 Supply Leg 7 Oven Door 8 Oven Tray 9 Wire Grid 10 Front Resistance 11 Fan Store 12 Oven Lamp 13 Hotplate 14 Highlite element 13 5 6 888...

Страница 7: ...ur electric supply is suitable for the appliance before connecting it to supply Ensure that the appliance is switched off before replacing the lamp to avoid the possibility of electric shock Switch of...

Страница 8: ...ing grilling mode the oven door should be closed Do not use steam cleaners for cleaning the cooking hobs and oven cavity Before opening the lid covering the hotplates take care that no liquids are on...

Страница 9: ...tion that in the area where the oven is set up the furniture s height must not exceed the height of the cooker panel Do not install the appliance near the refrigerator there must be no flammable mater...

Страница 10: ...gs or flammable burnable goods nylon plastic bag paper cloth etc into the lower drawer Protect your appliance against atmospheric effects Do not leave it to effects such as sun rain snow powder etc Yo...

Страница 11: ...4 5 6 4 3 USE OF HOTPLATES AND VITROCERAN COOKERS The electrical cooker is commanded by 7 graded switches 0 of the grades is off location The use fields in response to other 6 grades are below 1 2 3...

Страница 12: ...ly control that your cooker is off the control switch is at 0 location after cooking Also never touch it as the cooker will be hot for a speific time after it was turned off Do not let children to com...

Страница 13: ...e to make time set up between 0 23 59 hours At the end of cooking period an alarm is heard and symbol flashes You can press any key to stop the alarm Programming as Determining the Cooking Period This...

Страница 14: ...der to adjust the ending time and keys must be used at the end of wished cooking period Once the time is adjusted it is registered automatically in 5 seconds following the adjustment and A and symbols...

Страница 15: ...and warning lamps and turbo heater fan are put into use Your oven s thermostat and warning lamps and fan upper and lower heaters start operating Your oven s thermostat and warning lamps and grill hea...

Страница 16: ...me program Take the cooked food from the oven put onto a safe place and open the oven s door and ensure the oven is cool completely As the oven will be hot at that moment stay away from the oven and k...

Страница 17: ...16 Turbo Fan Function Turbo fan function spreads the oven s heat equally The food on all shelves will be cooked equally during the use of this function Top of the oven will not be hotter than the bot...

Страница 18: ...ll other cooking processes turn off the oven s switch and heat set up switch Cancel the oven s time program and take the cooked food from oven and leave onto a safe place Do not come close to the oven...

Страница 19: ...can be observed in tray because of the high heat that occur during cooking or roasting The tray will return to its old form only when the tray cooled after cooking This is a normal physical event tha...

Страница 20: ...Rack 3 Rack 2 Rack 1 Rack Wire shelf To locate the wire shelf correctly in the cavity slide it into any rack and push the shelf to rear of the oven The raised portion of the shelf must be pointing upw...

Страница 21: ...sult in shattering of the glass 20 5 1 CLEANING Be sure that all control switches are off and your appliance cooled before cleaning your oven Switch off the appliance Control whether they are appropri...

Страница 22: ...al structure and durability of Vitroceramic Color change is caused by not cleaning the residues erosion due to casseroles and using not appropriate cleaning materials and is not due to material change...

Страница 23: ...oduct please call to the Authorized Service 6 2 Information Related to Transport If you need any transport Keep the original case of product and carry it with its original case when needed to be carri...

Страница 24: ......

Отзывы: