background image

Insertion & Removal

7

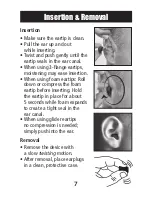
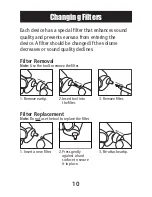
Insertion

•  Make sure the eartip is clean.  

•  Pull the ear up and out  

while inserting.

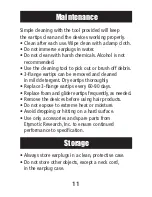
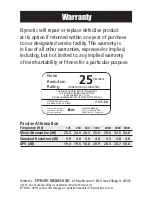
•  Twist and push gently until the  

eartip seals in the ear canal. 

•  When using 3-flange eartips,  

moistening may ease insertion.

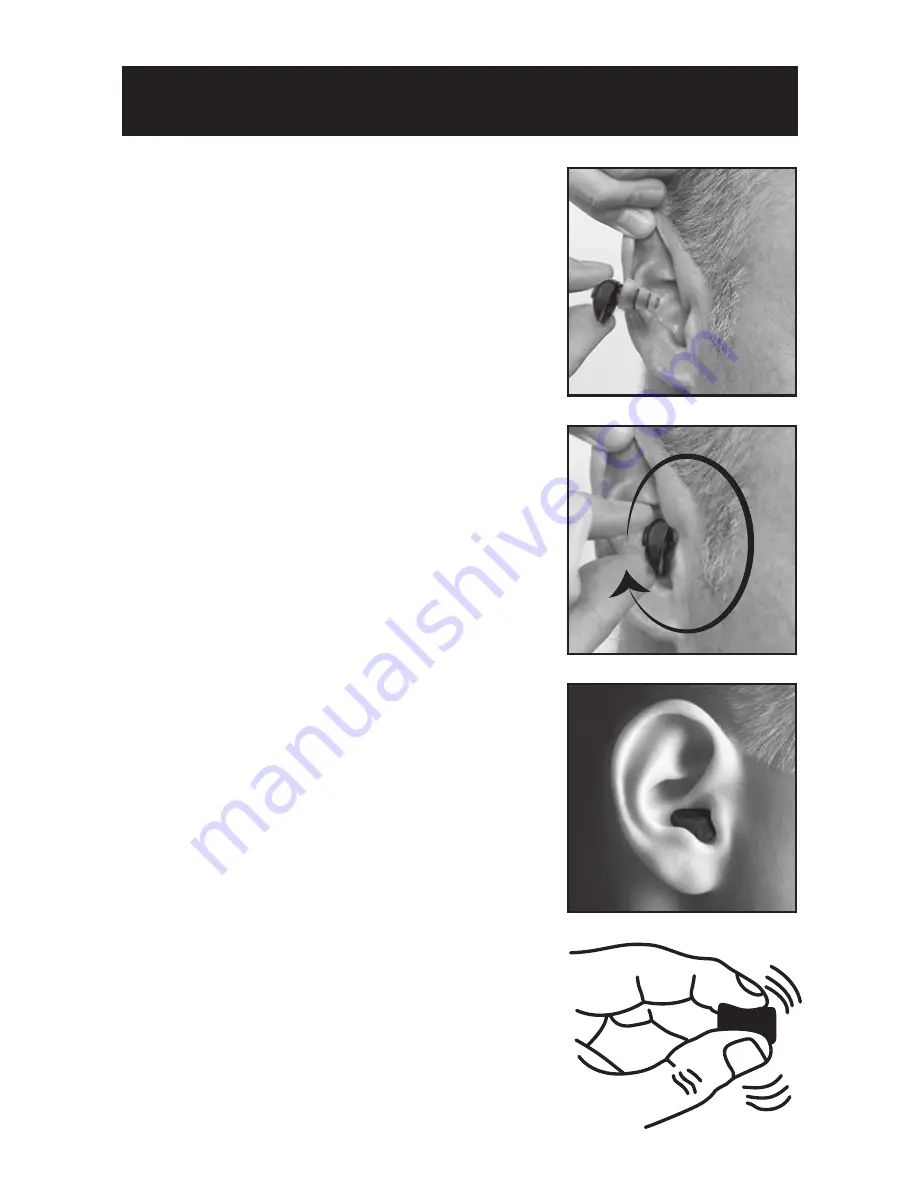
•  When using foam eartips: Roll  

down or compress the foam  

eartip before inserting. Hold  

the eartip in place for about  

5 seconds while foam expands  

to create a tight seal in the  

ear canal.

•  When using glider eartips  

no compression is needed;  

simply push into the ear.

Removal

•  Remove the device with  

a slow 

twisting

 motion.

•  After removal, place earplugs  

in a clean, protective case.

HD15-BN_Manual_ER098629-A_ENGLISH_v5.indd   7

4/3/14   4:18 PM

Содержание HD-15

Страница 1: ...User Manual ...

Страница 2: ...ing a person s ear when a hearing protector is worn as directed is closely approximated by the difference between the A weighted environmental noise level and the NRR Example 1 The environmental noise level as measured at the ear is 92 dBA 2 The NRR is 25 decibels dB 3 The level of noise entering the ear is approximately equal to 67 dBA Caution For noise environments dominated by frequencies below...

Страница 3: ...k that the connecting cord can be caught up during use This product may be adversely affected by certain chemical substances Further information should be sought from the manufacturer This earplug is provided with level dependent attenuation The wearer should check correct operation before use If distortion or failure is detected the wearer should refer to the manufacturer s advice for maintenance...

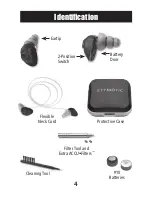
Страница 4: ...Identification 4 Flexible Neck Cord Eartip Battery Door 2 Position Switch 10 Batteries Cleaning Tool Filter Tool and Extra ACCU Filters Protective Case ...

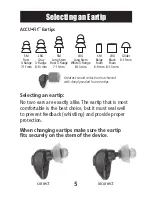
Страница 5: ...g Stem White 3 flange 8 13 mm SM Beige Foam 6 9 mm Selecting an eartip No two ears are exactly alike The eartip that is most comfortable is the best choice but it must seal well to prevent feedback whistling and provide proper protection When changing eartips make sure the eartip fits securely on the stem of the device Greatest sound reduction is achieved with deeply sealed foam eartips ...

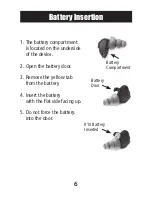
Страница 6: ...s located on the underside of the device 2 Open the battery door 3 Remove the yellow tab from the battery 4 Insert the battery with the flat side facing up 5 Do not force the battery into the door Battery Compartment 10 Battery Inserted Battery Door ...

Страница 7: ...stening may ease insertion When using foam eartips Roll down or compress the foam eartip before inserting Hold the eartip in place for about 5 seconds while foam expands to create a tight seal in the ear canal When using glider eartips no compression is needed simply push into the ear Removal Remove the device with a slow twisting motion After removal place earplugs in a clean protective case ...

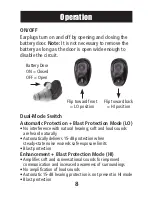
Страница 8: ...soft and loud sounds are heard naturally Automatically delivers 15 dB protection when steady state noise exceeds safe exposure limits Blast protection Enhancement Blast Protection Mode HI Amplifies soft and conversational sounds for improved communication and increased awareness of surroundings No amplification of loud sounds Automatic 15 dB hearing protection is not present in HI mode Blast prote...

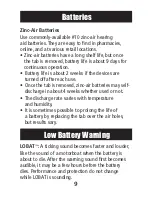
Страница 9: ...se Once the tab is removed zinc air batteries may self discharge in about 4 weeks whether used or not The discharge rate varies with temperature and humidity It is sometimes possible to prolong the life of a battery by replacing the tab over the air holes but results vary Low Battery Warning LOBAT A ticking sound becomes faster and louder like the sound of a motorboat when the battery is about to ...

Страница 10: ...be changed if the volume decreases or sound quality declines Filter Removal Note Use the tool to remove the filter 1 Remove eartip 2 Insert tool into the filter 3 Remove filter 2 Press gently against a hard surface to secure it in place 3 Re attach eartip 1 Insert a new filter Filter Replacement Note Do not use the tool to replace the filter ...

Страница 11: ... eartips can be removed and cleaned in mild detergent Dry eartips thoroughly Replace 3 flange eartips every 60 90 days Replace foam and glider eartips frequently as needed Remove the devices before using hair products Do not expose to extreme heat or moisture Avoid dropping or hitting on a hard surface Use only accessories and spare parts from Etymotic Research Inc to ensure continued performance ...

Страница 12: ... dB 25 3 24 0 24 3 25 6 29 6 32 5 34 8 Standard Deviation dB 5 9 4 6 5 6 4 8 3 3 3 8 4 0 APV dB 19 4 19 5 18 8 20 9 26 3 28 7 30 8 Etymotic will repair or replace defective product at its option if returned within one year of purchase to our designated service facility This warranty is in lieu of all other warranties expressed or implied including but not limited to any implied warranty of merchan...

Отзывы: