EN 13
INSTALLATION
Mounting
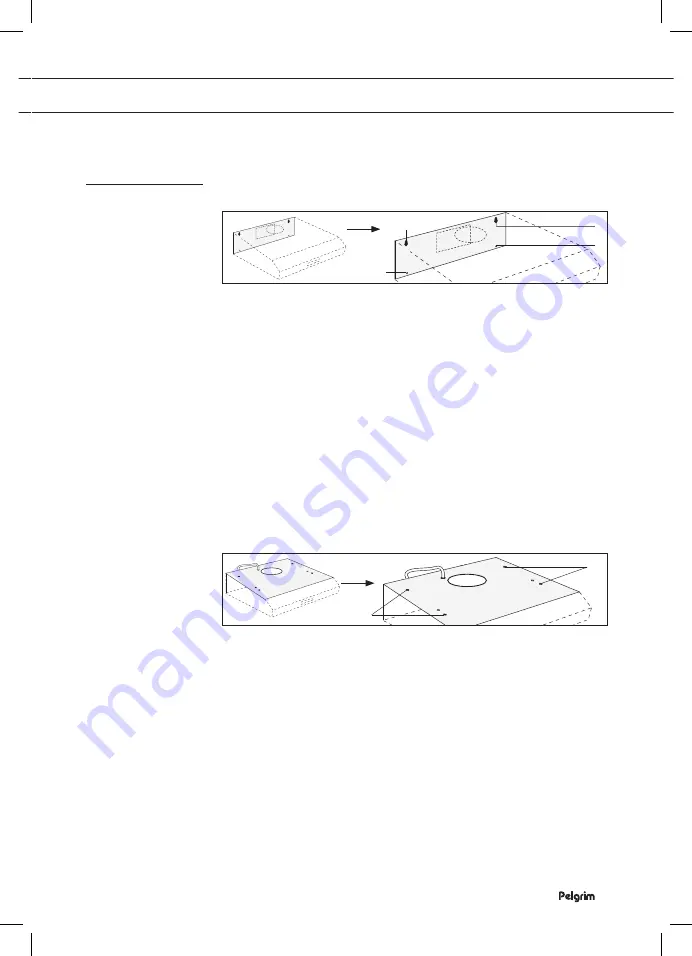
Against the wall
A
B
B
A
• Remove the filters from the extractor hood.
• Hold the hood against the wall.
• Working through the hood, draw the mounting holes (A) and the
holes to secure the hood (B).
• Drill the holes.
• Push the wall plugs supplied into the holes.
• Insert the screws into the 2 mounting holes (A).
NB: screw the screws in until 1 cm is left protruding from the wall.
• Hang the hood on the 2 mounting screws.
• Tighten the mounting screws.
• Tighten the locking screws.
• Connect the flue pipe to the flue ring.
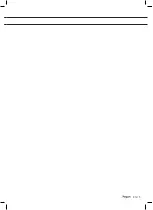
Below a kitchen cupboard
A
A
D
C
• Use the template supplied with the unit to mark the positions of
the 4 fixing holes (A), the opening for the power cable (C) and
the opening for the exhaust (D) on the underside of the kitchen
cupboard.
• Drill the holes.
• Pull the power cable upwards through the correct opening and
push the exhaust ring through the opening.
• Fasten the hood to the bottom of the kitchen cupboard using the
screws supplied with the kitchen cupboard.
• Connect the exhaust duct to the exhaust ring.
• Put the plug into the socket.
Содержание Pelgrim OWA206RVS
Страница 51: ...EN 15 ...
Страница 52: ...825811 VER 1 22 09 2020 825811 825811 ...


