background image

ETC Setup and Connect Guide

Unison Paradigm

®

 18 inch Touchscreen

Corporate Headquarters 

 Middleton, WI, USA 

 Tel +608 831 4116 

 Service: (Americas) 

[email protected]

London, UK 

 Tel +44 (0)20 8896 1000 

 Service: (UK)


[email protected]

Rome, IT 

 Tel +39 (06) 32 111 683 

 Service: (UK) 

[email protected]

Holzkirchen, DE 

 Tel +49 (80 24) 47 00-0 

 Service: (DE) 

[email protected]

Hong Kong 

 Tel +852 2799 1220 

 Service: (Asia) 

[email protected]

Web:


etcconnect.com


 © 2018 Electronic Theatre Controls, Inc.

Product information and specifications subject to change. ETC intends this document to be provided in its entirety.

7184M2200 

 Rev C 

 Released 2018-02

Overview

Welcome to the Paradigm 18 inch Touchscreen Setup and Connect Guide. The Paradigm 18 inch 
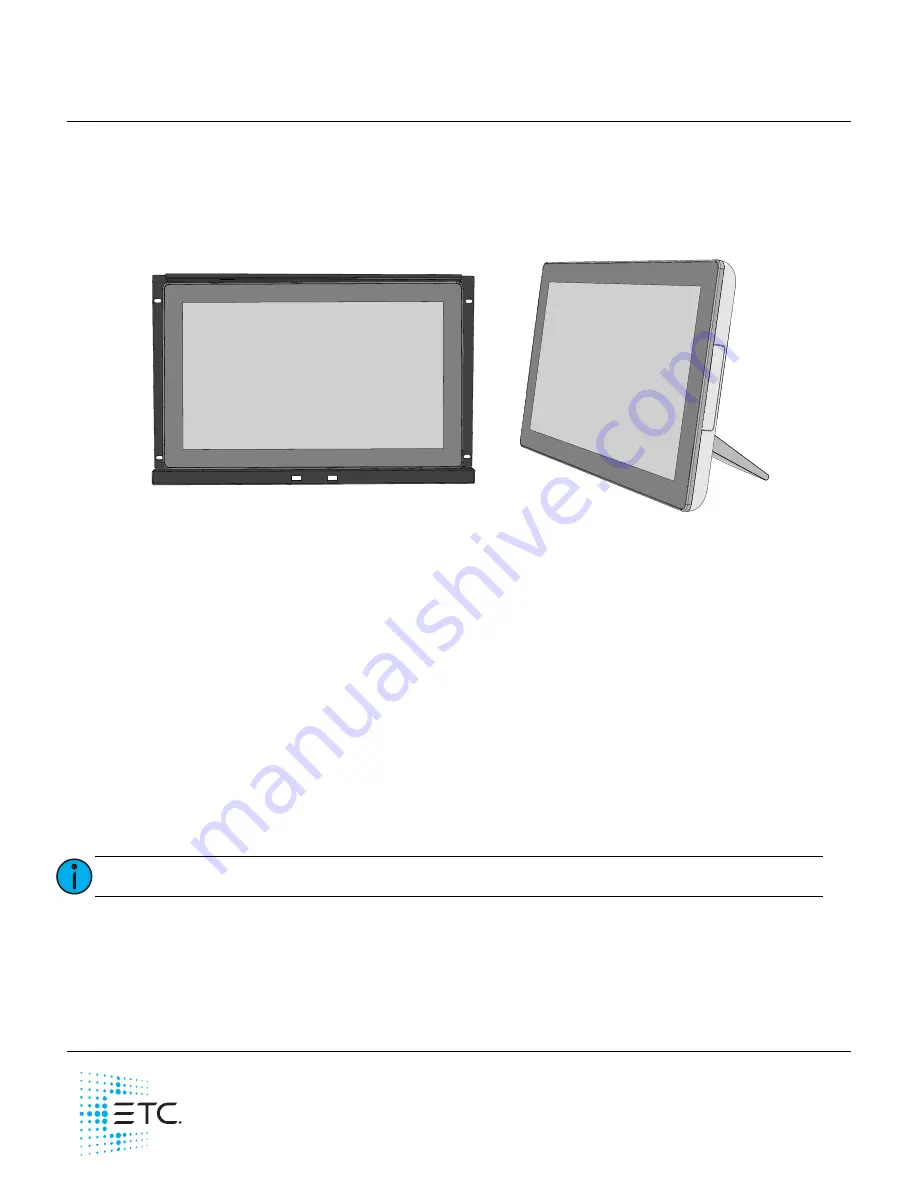
Touchscreen (P-TS18) ships standard with a table top stand and an international power supply. Available 
separately, ETC offers a 19” rack mounting kit (P-TS18-RK). Contact ETC for ordering details.

This guide provides table top stand and rack mount installation instructions, as well as information related 
to the initial setup and connection of the Paradigm 18 inch Touchscreen (P-TS18) including details to 
interface with the Application Shell. Instructions for use of the Paradigm Virtual Touchscreen Software are 
available on the ETC website at 

etcconnect.com

.

Features

• 100-240 VAC, 50/60Hz
• High-resolution 1366x768p touchscreen interface
• USB interfaces for theme upload or use of a separate mouse and keyboard (if required)
• Two Ethernet ports for connectivity to the Paradigm network
• Runs Paradigm Virtual Touchscreen Software
• Includes table top stand and installation hardware

- Supports panel, wall, desktop, and swing-arm VESA mounting. Accepts screw type M4 x 8-12mm 

(VESA mounting kit and installation hardware provided by others)

Operating Environment

• Supports use of 0-40°C, 5-95% at 40°C non-condensing humidity environment

Note:

P-TS18 is only supported by P-CCS software version 3.0 or later.

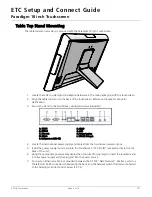
P-TS18 installed on 
table top stand 
(included)

P-TS18 installed into a 
19” rack mount kit
(P-TS18-RM) available 
separately

Содержание P-TS18

Страница 1: ...ils This guide provides table top stand and rack mount installation instructions as well as information related to the initial setup and connection of the Paradigm 18 inch Touchscreen P TS18 including...

Страница 2: ...rnational power supply and cables from the touchscreen accessory box 5 Insert the power supply round plug into the Touchscreen 12V DC IN receptacle located on the back of the unit 6 Using the appropri...

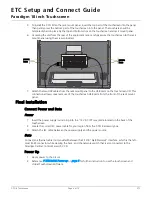
Страница 3: ...nuts mount the power supply holder with the power supply installed to the back of the rack mount panel using a 5 16 nut driver 3 Attach the rack mount panel to the 19 rack enclosure using the four M10...

Страница 4: ...tion allows convenient use of the touchscreen USB ports from the front of the rack mount panel Final Installation Connect Power and Data Power 1 Insert the power supply round plug into the 12V DC IN r...

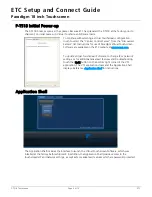
Страница 5: ...des access to the touchscreen s IP and network settings as well as more advanced features which are password protected To continue with selecting a Virtual Touchscreen configuration touch to select th...

Страница 6: ...om either removable media or the connected Paradigm Central Control Server P CCS Note The Application Shell software is included with each installation of the P TS18 Updates to the shell are combined...

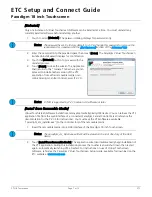
Страница 7: ...dia into a USB interface of the Paradigm 18 inch Touchscreen 2 Touch Install from Removable Media The application wizard will automatically begin installation of the VTS application During this instal...

Страница 8: ...process could take up to a minute depending on network traffic 2 Touch to select the server IP from the discovered list then touch the Install During this installation process the touchscreen will shu...

Страница 9: ...tions always defaults to Net3 Network which is the left most RJ 45 connector while viewing the back of the unit which is where the P TS18 should be connected Settings for the other network connector c...

Страница 10: ...een display using the drop down selection box By default the display is set to turn off after 15 minutes without user interaction Advanced Tab The Advanced tab is password protected by default The set...

Страница 11: ...the Copy or Move button 2 Touch Done to close the File Manager New Folder Create a new folder on either the P TS18 or the removable media using the related New Folder button beneath each section 1 Tou...

Страница 12: ...splays the Windows Device Manager for access to administrator hardware and driver support Run Selecting the Run button displays the alphanumeric keypad for specification of a Windows directory that ma...

Страница 13: ...that have been collected touch the Advanced button The collected logs will display in list form 2 Touch the Next button A dialog displays for entry of additional information about the problems experi...

Страница 14: ...ialog will display confirming the password is set Password Enabled The status of the Password Enabled checkbox next to the Set Password button determines whether or not a password is required anywhere...

Страница 15: ...etup and Connect Guide Paradigm 18 inch Touchscreen P TS18 Touchscreen Page 15 of 15 ETC 3 Touch Enter to send an echo request to the specified IP address Any responses will be displayed in a status w...

Отзывы: