background image

FRA

FRA

DR

AFT

DR

AFT

ENG

ENG

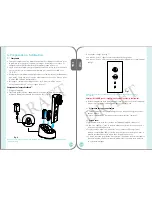
Fig. 8

6. Using LedSonic

®


6.1

  LedSonic

®

 setup 

6.1.1

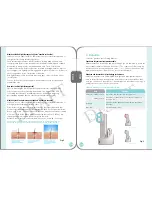
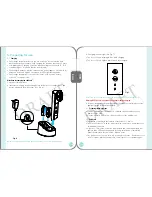
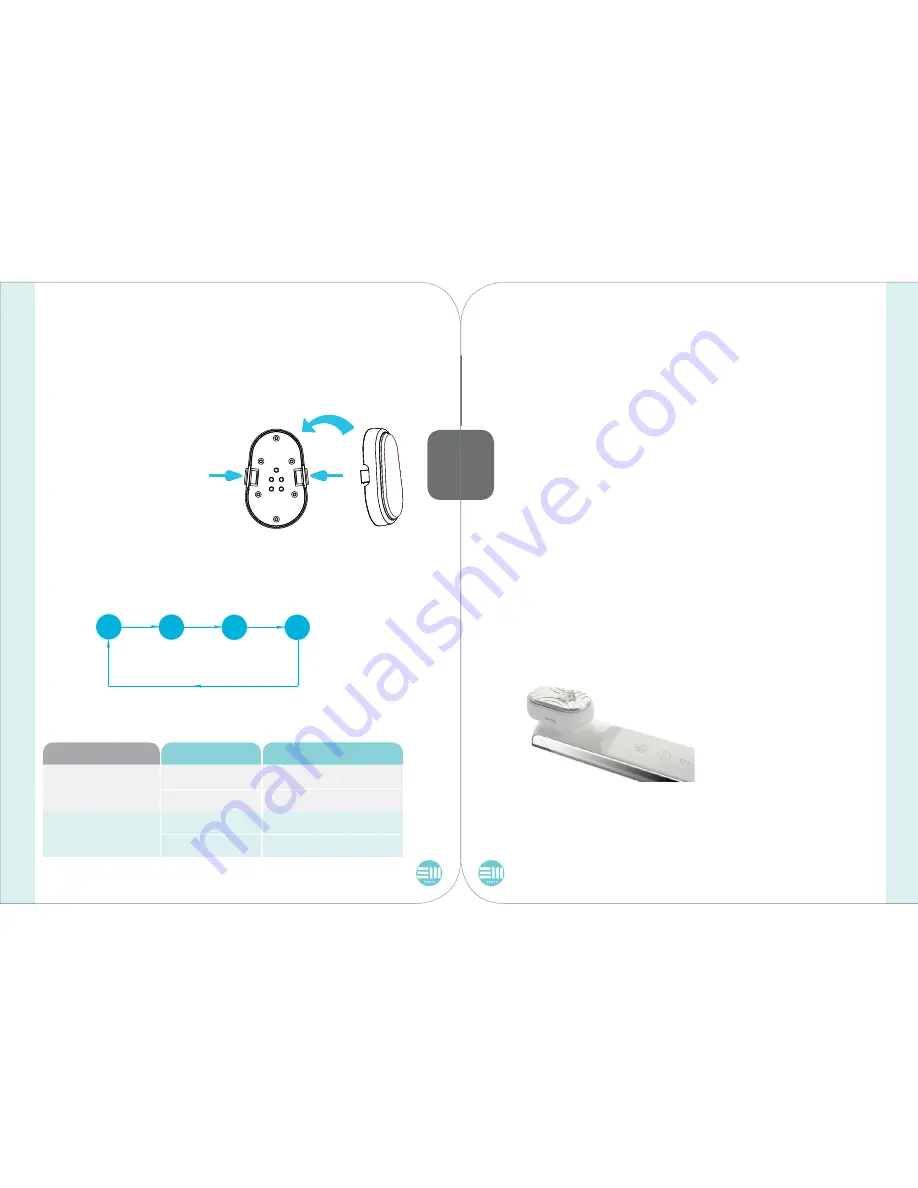
  How to change the attachment?

Press the buttons on the left and right sides and place the selected attachment 
onto the attachment connector base. (See Fig. 8)

Fig. 9

Note:  For details, please see section 7.2 “Treatment Tips” 

•  Step 4: To change the frequency mode or energy level, touch “SELECT” again.  

    The light indicator (See Fig. 6) is blinking in difference status in each selection :   

Frequency Mode  

1 MHz

5 MHz

Level

Normal

Strong

Normal

Strong

Indicator Status

“1MHz” Blinking slowly

“1MHz” Blinking quickly

“5MHz” Blinking slowly

“5MHz” Blinking quickly

6.1.2

  Operate the system

 (Please check with section 3.1 
“LedSonic

®

 device description”)

A)  Ultrasonic Therapy Mode

•  Step 1: Ultrasonic attachment is

    well equipped on the attachment 

connector base

•  Step 2: Long touch “ON/OFF” for power on.  

Note:  The buttons are touch sensors, please use a dry finger while touching. 

•  Step 3: Touch “SELECT” one time for selecting difference frequency mode

(1MHz/ 5MHz) and energy level (Normal/ Strong) for difference purposes.
(See. Fig. 9 for the sequences of the default setting when press “SELECT”)

1 MHZ

Normal

1 MHZ

Strong

5 MHZ

Normal

5 MHZ

Strong

•  Step 5: Long touch “ON/OFF” for power off when finished treatment.
•  Step 6: Use a damped soft cloth to clean the surface of the attachment.
•  Step 7: The appliance will stop function after 15 mins for reminding the treatment   

                  time, you have to press “SELECT” again to continue the treatment. 

Note: As it is recommended to do 15 mins for each treatment, the appliance will be power
off after 15 mins automatically.

B)  Light Therapy Mode

•  Step 1: Red/ Blue LEDs attachment is well equipped on the attachment 

connector base.

•  Step 2: Long touch “ON/OFF” for power on.
•  Step 3: Touch “SELECT” for light on.  
•  Step 4: Long touch “ON/OFF” for power off when finished treatment.
•  Step 5: Use a damped soft cloth to clean the surface of the attachment. 
•  Step 6: LedSonic

®

 will sound “b” for each one minute to remind the 

treatment time.

•  Step 7: LedSonic

®

 will stop function after 9 mins for reminding the treatment 

time, you have to press “SELECT” again to continue the treatment. 

Note:  The appliance will be power off after 9 mins automatically and please wait 8 mins 
for cool down to power on again.    

6.2

  Treatment Tips

A)  Ultrasonic Therapy Mode

•  Apply the skin care products on the ultrasonic attachment surface 

    (See Fig.10) and suitable effective frequencies area (See. Fig 3)


•  Apply on a serum/ lotion/ aqueous 

skin care product.  The energy level 
is recommended to use in difference 
structure of the skin care product to 
maximize the penetration to the skin :

Fig. 10

Содержание LedSonic

Страница 1: ...FRA FRA DRAFT DRAFT LedSonic...

Страница 2: ...sures oculaires Ne pas utiliser les embouts LED sur vos yeux ou paupi res Ne pas utiliser les embouts LED sur et autour de la glande thyro de zone du cou Lors de l utilisation des embouts ultrasons lo...

Страница 3: ...ces des taches de rousseur et des rougeurs Le processus est sans danger indolore et tr s doux pour la peau Quelle est la diff rence entre 1MHz et 5MHz En r gle g n rale les basses fr quences ultrasoni...

Страница 4: ...e la production de collag ne et des fibroblastes pour renforcer la peau terne et rid e Les effets cellulaires et m taboliques peuvent aider r duire l hyperpigmentation localis e am liorer la n ocollag...

Страница 5: ...le cou Voir fig 3 Resserement et tonification de la peau rajeunissement et p n tration des ingr dients en profondeur Voir fig 3 Combat efficacement l acn Voir fig 3 Mode Ultrasonic 1 MHz niveau 2 5 MH...

Страница 6: ...s placer ou laisser tomber dans l eau ou autre liquide L adaptateur et le socle du chargeur ne sont pas tanches loignez les de l eau Gardez l appareil et l adaptateur sec en tout temps Ne tentez pas d...

Страница 7: ...des interf rences ne se produiront pas dans une installation particuli re Si l appareil provoque des interf rences nuisibles la r ception radio ou t l vision ce qui peut tre d termin en mettant l qui...

Страница 8: ...gr de risque Par cons quent il est important que vous compreniez et acceptiez les risques et les complications qui peuvent survenir LedSonic est un appareil m nager doux d utilisation la plupart des u...

Страница 9: ...3 Voyant de charge voir fig 7 La touche Select clignote en bleu pendant le chargement La touche Select est bleue en continue lorsque l appareil est compl tement charg Fig 7 Notes Il est normal que l a...

Страница 10: ...pe 5 Appuyer longuement sur le bouton ON OFF pour mettre l appareil hors tension lorsque le traitement est fini tape 6 Utilisez un chiffon doux humide pour nettoyer la surface de l embout tape 7 L app...

Страница 11: ...MHz 1 MHz Maximiser les effets de vos produits de soin de peau les ondes ultra sonores sont efficaces pour la p n tration des ingr dients et des fr quences sp cifiques selon la zone traiter A L utili...

Страница 12: ...il LedSonic s est s teint brusquement La temp rature de l appareil monte pendant le fonctionnement et le chargement des piles Voyant de charge de batterie bouton Select la lumi re bleue ne s allume pa...

Страница 13: ...garantie La garantie s applique dans tous les pays dans lesquels notre produit a t vendu par l interm diaire d un revendeur agr Cette garantie ne couvre pas le dommage qui est d un accident ou une ut...

Страница 14: ...warnings and safety precautions before use and strictly follow them when using LedSonic Keep away from the children 1 Introduction 2 Benefits 3 Before You Start 3 1 LedSonic device description 3 2 Pac...

Страница 15: ...e application See Fig 1 The intensive rejuvenating cyclic sound waves penetrate below the skin reaching the dermis Generally 1MHz frequency mode will penetrate deeper below the skin It is designed for...

Страница 16: ...targeted bacteria that produces the inflammation associated with acne known as Propionobacterium Acnes or P acnes P acnes releases porphyrins which are naturally occurring molecules in the body When p...

Страница 17: ...does not contain any harmful ultraviolet UV light which can damage skin and does not result in dryness or discomfort Fig 4 ON SELECT 1MHZ 5MHZ OFF 1 2 3 4 5 6 7 11 8 9 10 3 Before You Start 3 1 LedSon...

Страница 18: ...LedSonic is only designed for personal use DO NOT share with others 4 2 Cautions Never use the appliance with the LEDs attachments around and on the eyes to avoid the risk of eye damage Read all instr...

Страница 19: ...the treatment area If you have pre cancerous lesions or multiple atypical moles in the areas to be treated If you have dark brown or black spots such as moles large freckles birthmarks or warts on the...

Страница 20: ...tor light See Fig 7 The Select key is blinking in blue while charging The Select key is light on in blue when fully charged Notes It is normal when the adaptor and the appliance feel warm during charg...

Страница 21: ...h ON OFF for power off when finished treatment Step 6 Use a damped soft cloth to clean the surface of the attachment Step 7 The appliance will stop function after 15 mins for reminding the treatment t...

Страница 22: ...ion Repeat each step a total of 5 times glide LedSonic very slowly and slightly See Fig 11 B Using with products like facial mask Repeat each step a total of 10 times glide LedSonic very slowly and sl...

Страница 23: ...100V 240V Rated Frequency 50Hz 60Hz Adaptor spec AC DC adapter S08 006 0120 00400 Input 100 240V 50 60Hz 0 2A Output 12Vd c 400mA Operating conditions Temp 15 C to 30 C Relative humidity 25 to 75 Baro...

Страница 24: ...5 EN 60601 1 2006 IEC 60601 1 2 2007 EN 60601 1 2 2007 IEC 60601 2 5 2000 EN 60601 2 5 2000 IEC 60601 1 11 2010 EN 60601 1 11 2010 FDA ISO10993 5 2009 ISO10993 10 2010 EMC EN55011 2009 A1 2010 EN61000...

Страница 25: ...FT DRAFT ENG ENG GUA R A N T E E G A R A N T I R Chop Area Date of Purchase Date d achat Dealer stamp Cachet du revendeur Certificate of Purchase Certificat d achat Mode Name Nom de Mode LedSonic ESTH...

Отзывы: