background image


12 

paste collected during the floating operation. Increase the blade pitch up to 10mm for the first 

finishing operation and then continue to increase the pitch on the following finishing operations. 


Continue the finishing passes until you obtained the desired finished floor surface. The time 

required between each finishing pass is dependent on the weather conditions, cement and water 

content of the concrete. If some areas of the concrete set harden too fast, you may apply a small 

amount of water with a brush to help achieve a finish. Be careful when running the concrete 

finisher on areas where water has been applied because the machine will tend to skate away. Be 

sure to maintain control of the concrete finisher at all times. 


Pitch Adjustment 

The pitch control knob or the optional blade pitch lever is in easy reach of the operator. The pitch 

adjustment has a limited pitch variation. Rotate the pitch control knob clockwise to tilt the blades 

and counterclockwise to flatten the angle of the blades. Adjustment is based on the desired 

performance for the specific job application. With the blade pitch lever, blade pitch can be adjusted 

by depressing the spring-loaded button in the adjustment lever and moving the lever to the desired 

pitch. 


Spider Plate 

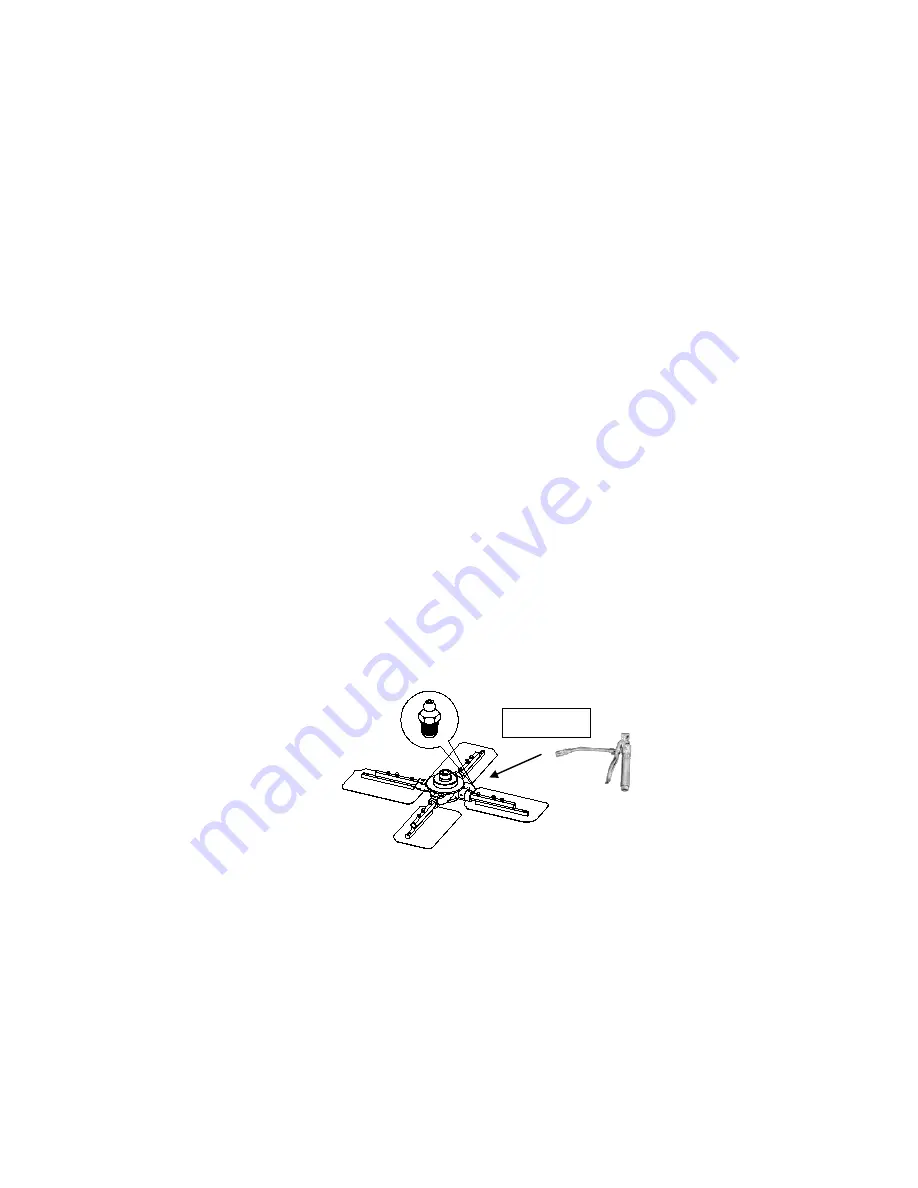
By experience, we know  that 2 major problems with  the  concrete  finisher’s  arms  are  lack of 

lubrication and bent arms due to the machine being dropped. Greasing should be carried out on a 

weekly basis using the grease nipple provided (Figure 3).  If an arm becomes jammed, this is 

probably due to the arm being bent and will require replacement. 


Figure 3 - Lubrication 

GREASE 

Содержание EWT120

Страница 1: ...Operator s Manual Concrete Finishers Range Concrete Finisher EWT90 EWT120 Manual Version 1...

Страница 2: ...2 Concrete Finisher Proposition Warning...

Страница 3: ...e s curit des machines et des crit res associ s et configur s si applicable Les missions debruit sont conformes la directive 2005 88 CE Annexe VI pour machines article 12 L objet mentionn est T V Rhei...

Страница 4: ...SI reserves the right to change machine specification without prior notice or obligation Safety Notation Explanation Texts in this manual to which special attention must be paid are shown in the follo...

Страница 5: ...fely switch this machine OFF before you switch it ON in case you run into any difficulties Always switch OFF the engine before servicing it During use the engine becomes very hot Always allow the engi...

Страница 6: ...vapors and avoid contact with your skin Wash fuel splashes immediately If you get fuel in your eyes irrigate with a large amount of water and seek medical attention as soon as possible Exhaust Fumes P...

Страница 7: ...t of the machine s components and their respective materials Take the discarded apparatus to the relevant recycling facilities Component Material Operator Handle Steel Belt Guard Glass Fiber Blade Gua...

Страница 8: ...Tank 7 Recoil Starter 8 Blade Guard 9 Belt Guard 10 Handle Height Adjuster 11 Lifting Bar 5 4 6 7 9 8 3 10 2 1 11 1 Throttle Lever 2 Pitch Control Lever 3 Centri safety Switch Handle 4 Handle Height A...

Страница 9: ...gine oil with the proper viscosity SAE 10W 30 recommended 4 Check the engine fuel level and top up as necessary Use clean fuel Use of contaminated fuel would damage the fuel system Do not overfill fue...

Страница 10: ...upply Refer to Engine User Manual Operation Before Starting the Engine 1 Visually check to be sure that the blades are free of obstructions and the area is clear for operation 2 Grip the operator s ha...

Страница 11: ...ab Floating Operation Floating can be performed by using either the combination blades furnished with the machine or the optional Float Pan If using the float pan before starting the floating operatio...

Страница 12: ...sher at all times Pitch Adjustment The pitch control knob or the optional blade pitch lever is in easy reach of the operator The pitch adjustment has a limited pitch variation Rotate the pitch control...

Страница 13: ...cleaned with a high pressure hose and water while the concrete is still wet Hard cement concrete is very difficult to remove Immediately replace any labels stickers should you notice that they are wo...

Страница 14: ...nally replace the belt guard ensuring it is correctly and securely fitted Routine maintenance Daily After first 4 hrs weekly First month 20 hours Every 3 months 50 hrs Every 6 months 100 hrs Air Filte...

Страница 15: ...dd oil to the recommended level b Keep speed high c Clean air filter d Remove cement concrete on concrete finisher e Retighten V belt Machine engine runs but machine does not a Presence of water in th...

Страница 16: ...ING DIAMETER in mm 39 1 992 47 2 1 200 OPERATING WEIGHT lb kg 170 77 209 95 HANDLE TYPE STRAIGHT STRAIGHT GEARBOX HEAVY DUTY HEAVY DUTY MAX BLADE PITCH ANGLE 15 15 NO OF BLADES 4 4 BLADE OPERATING SPE...

Страница 17: ...sh away concrete accumulated on the concrete finisher Clean the engine mounting plate Apply a light coat of oil on arbor shaft blade retaining cap and backing plate to prevent rust formation Cover the...

Страница 18: ...o renew repair or replace components due to fair wear and tear 5 The engine air filter and the engine spark plug The engine will be warranted by the engine manufacturer Please contact the nearest engi...

Страница 19: ...Notes...

Страница 20: ...EQUIPMENT SYNERGY INTERNATIONAL 7422 Rock Hollow Lane PO Box 1902 Midland Michigan 48642 48641 USA 1 336 454 2665 1 866 648 7101 service theESIchoice com www theESIchoice com...

Отзывы:

Похожие инструкции для EWT120