background image

17

4.4   Quarantine

The main task of quarantine is to safely store infected
files. Files should be quarantined if they cannot be
cleaned, if it is not safe or advisable to delete them, or
if they are being falsely detected by ESET
Cybersecurity.

You can choose to quarantine any file. This is advisable
if a file behaves suspiciously but is not detected by the
antivirus scanner. Quarantined files can be submitted
for analysis to ESET’s Threat Lab.

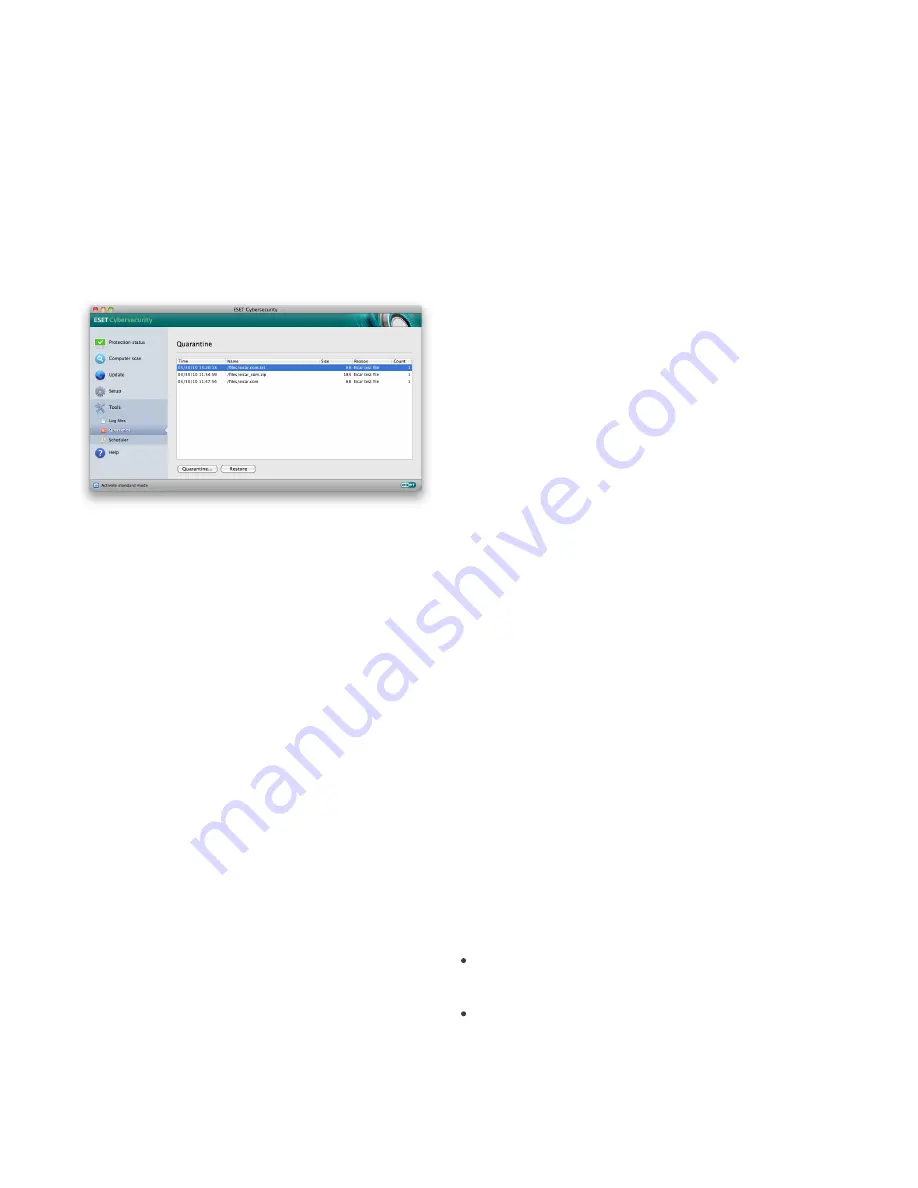
Files stored in the quarantine folder can be viewed in a
table which displays the date and time of quarantine,
the path to the original location of the infected file, its
size in bytes, reason (e.g., added by user…), and
number of threats (e.g., if it is an archive containing
multiple infiltrations). The quarantine folder with
quarantined files (

/Library/Application Support/Eset/

cache/esets/quarantine

) remains in the system even

after uninstalling ESET Cybersecurity. Quarantined
files are stored in a safe encrypted form and can be
restored again after installing ESET Cybersecurity.

4.4.1   Quarantining files

ESET Cybersecurity automatically quarantines deleted
files (if you have not cancelled this option in the alert
window). If desired, you can quarantine any suspicious
file manually by clicking the 

Quarantine...

 button. The

context menu can also be used for this purpose – right-
click in the 

Quarantine

 window, choose file you want

to quarantine and click the 

Open

 button.

4.4.2   Restoring from Quarantine

Quarantined files can also be restored to their original
location. Use the 

Restore

 button for this purpose;

Restore is also available from the context menu by
right-clicking on the given file in the 

Quarantine

window, then clicking 

Restore

. The context menu also

offers the option 

Restore to...

, which allows you to

restore a file to a location other than the one from
which it was deleted.

4.4.3   Submitting file from Quarantine

If you have quarantined a suspicious file that was not
detected by the program, or if a file was incorrectly
evaluated as infected (e.g., by heuristic analysis of the
code) and subsequently quarantined, please send the
file to ESET‘s Threat Lab. To submit a file from
quarantine, right-click the file and select 

Submit file

for analysis

 from the context menu.

4.5   Log files

The Log files contain information about all important
program events that have occurred and provide an
overview of detected threats. Logging acts as an
essential tool in system analysis, threat detection and
troubleshooting. Logging is performed actively in the
background with no user interaction. Information is
recorded based on the current log verbosity settings. It
is possible to view text messages and logs directly
from the ESET Cybersecurity environment, as well as
to archive logs.

Log files are accessible from the ESET Cybersecurity
main menu by clicking 

Tools

 > 

Log files

. Select the

desired log type using the 

Log

 drop-down menu at the

top of the window. The following logs are available:
1.

Detected threats

 – Use this option to view all

information about events related to the detection of
infiltrations.

2.

Events

 – This option is designed for system

administrators and users to solve problems. All
important actions performed by ESET Cybersecurity
are recorded in the Event logs.

3.

Computer scan

 – Results of all completed scans are

displayed in this window. Double-click any entry to
view details of the respective On-demand computer
scan.

In each section, the displayed information can be
directly copied to the clipboard by selecting the entry
and clicking on the 

Copy

 button.

4.5.1   Log maintenance

The logging configuration for ESET Cybersecurity is
accessible from the main program window. Click 

Setup

 > 

Enter application preferences ...

 > 

Tools

 >

Log Files

. You can specify the following options for log

files:

Delete old log records automatically

 - log entries

older than the specified number of days are
automatically deleted.

Optimize log files automatically

 - enables

automatic defragmentation of log files if the
specified percentage of unused records has been
exceeded.

To configure the 

Log Records Default Filter

 click the

Edit...

 button and select/deselect log types as

required.

Содержание CYBERSECURITY -

Страница 1: ...ESET Cybersecurity Installation Manual and User Guide...

Страница 2: ...duced stored in a retrieval system or transmitted in any form or by any means electronic mechanical photocopying recording scanning or otherwise without permission in writing from the author ESET spol...

Страница 3: ...engine parameters setup 4 1 3 12 Objects 4 1 3 1 12 Options 4 1 3 2 13 Cleaning 4 1 3 3 13 Extensions 4 1 3 4 13 Limits 4 1 3 5 13 Others 4 1 3 6 14 An infiltration is detected 4 1 4 14 Updating the...

Страница 4: ...ith Windows users and vice versa Although Windows malware does not pose a direct threat to Mac disabling malware that has infected a Mac machine will prevent its spread to Windows based computers thro...

Страница 5: ...ng system These applications are often bundled with other programs and may be difficult to notice during the installation process Although these applications usually display a notification during inst...

Страница 6: ...ctivation instructions The Activation Key is usually located inside or on the back side of the product package For a successful activation the Activation Key must be entered as supplied 2 If you recei...

Страница 7: ...for common operations It does not display any advanced options To toggle between modes click the plus icon next to Activate advanced mode Activate standard mode in the bottom left corner of the main...

Страница 8: ...em using the suggested solutions click Help to access the help files or search the Knowledgebase If you need assistance you can contact ESET Customer Care support on the ESET website ESET Customer Car...

Страница 9: ...r 4 1 1 1 2 Advanced scan options In this window you can define object types to be scanned by the ThreatSense engine and enable disable Advanced heuristics as well as modify settings for archives and...

Страница 10: ...and how to troubleshoot them Real time protection is disabled If Real time protection was inadvertently disabled by a user it will need to be reactivated To reactivate Real time protection navigate to...

Страница 11: ...g actions select the Scan without cleaning option Furthermore you can choose from three cleaning levels by clicking Setup Cleaning Performing computer scans with Custom scan is recommended for advance...

Страница 12: ...or directory Email files not available in Real time protection scans special files where email messages are contained Mailboxes not available in Real time protection scans user mailboxes in the syste...

Страница 13: ...he log cfg and tmp extensions 4 1 3 5 Limits The Limits section allows you to specify the maximum size of objects and levels of nested archives to be scanned Maximum Size Defines the maximum size of o...

Страница 14: ...d no clean files In other words archives are not deleted if they also contain harmless clean files However use caution when performing a Strict cleaning scan with Strict cleaning the archive will be d...

Страница 15: ...button Authentication for update servers is based on the Username and Password generated and sent to you after purchase To enable the use of test mode downloads pre release updates click the Setup but...

Страница 16: ...u Five types of scheduled tasks are available Run application Update Log maintenance On demand computer scan System startup file check Since Update is one of the most frequently used scheduled tasks w...

Страница 17: ...e was incorrectly evaluated as infected e g by heuristic analysis of the code and subsequently quarantined please send the file to ESET s Threat Lab To submit a file from quarantine right click the fi...

Страница 18: ...ET Cybersecurity Disabling the Display alerts option will cancel all alert windows and is only suitable in specific situations For most users we recommend that this option be left to its default setti...

Страница 19: ...stem option to activate and then click the Setup button beside the Advanced Options heading 4 7 1 Suspicious files The Suspicious files option allows you to configure the manner in which threats are s...

Страница 20: ...as documents or spreadsheets The most common file types are excluded by default doc etc You can add file types to the list of excluded files Contact Email optional Your email can be sent with any susp...

Страница 21: ...click Setup Import and export settings Select the Export settings option and enter the name of the configuration file Use the browser to select a location on your computer to save the configuration fi...

Страница 22: ...in network applications Worms are therefore much more viable than computer viruses Due to the wide availability of the Internet they can spread across the globe within hours of their release in some c...

Страница 23: ...ntain security codes PINs bank account numbers etc Spyware is often bundled with free versions of a program by its author in order to generate revenue or to offer an incentive for purchasing the softw...

Отзывы: