14.ST/PROG---stereo/programmed
playback
In radio mode, press the button to select
stereo or mono station; in playback
status, work with number buttons to
start programmed playback.
15. 0-10+---number button
In radio mode, press number buttons
to select to play pre-stored stations;
long press the number button (1-6) to
store the current frequency in the pre-
stored position.
In playback mode, press number buttons
to directly select songs and chapters.
In analog TV mode, press number
button (1-9) to select station.
16.AMS/RPT
Long press the button to search for
station automatically. In radio mode,
press the button to browse memory
stations; in playback status, press the
button to select repeat to play mode.
17.TITLE
In DVD mode, press the button to
return to the top menu of the disc.
18.AUDIO
In DVD mode, press the button to
switch the dialogue language of the
played program. Under VCD status,
press the button to select L/R channel/
stereo.
19.GOTO---play time setup
Under playback status, after the button
is pressed, work with number buttons
to select track/time play.
20.SUB-T
In DVD mode, press the button to
switch subtitle language.
21.PBC
In VCD mode, press the button to
display all tracks menu of the disc, work
with a number button to select a track.
In DVD mode, press the button to return
to the root menu.
22. Enter
In DVD mode, press the button to move
the cursor up/down/left/right to select
an item in the system setup menu, and
press the ENTER button to confirm the
selected item.
23.SLOW
Under playback status, press the button
to start slow forward playback.
24.ANGLE
In DVD mode, press the button to change
the shooting angle of the played program.
25.SETUP
In playback mode, press the button to
switch among different setup options.
26.OSD
Press the button to display title, chapter,
playing time and remaining time.
27.ZOOM
Under VCD/DVD reading status, press
the button to zoom the image in/out.
28.MENU
Press the button to switch between the
main interface and the current mode.
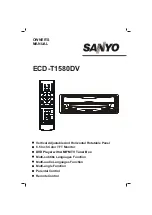
Battery Change
If the remote controller operates only over shorter distances or does not operate at all, replace
the battery with a new one, and confirm polarities before you change the battery.
One hand press stopper,
then pull out battery.
Put battery into battery
holder.
Put the holder into the
remote controller.
Basic Operation
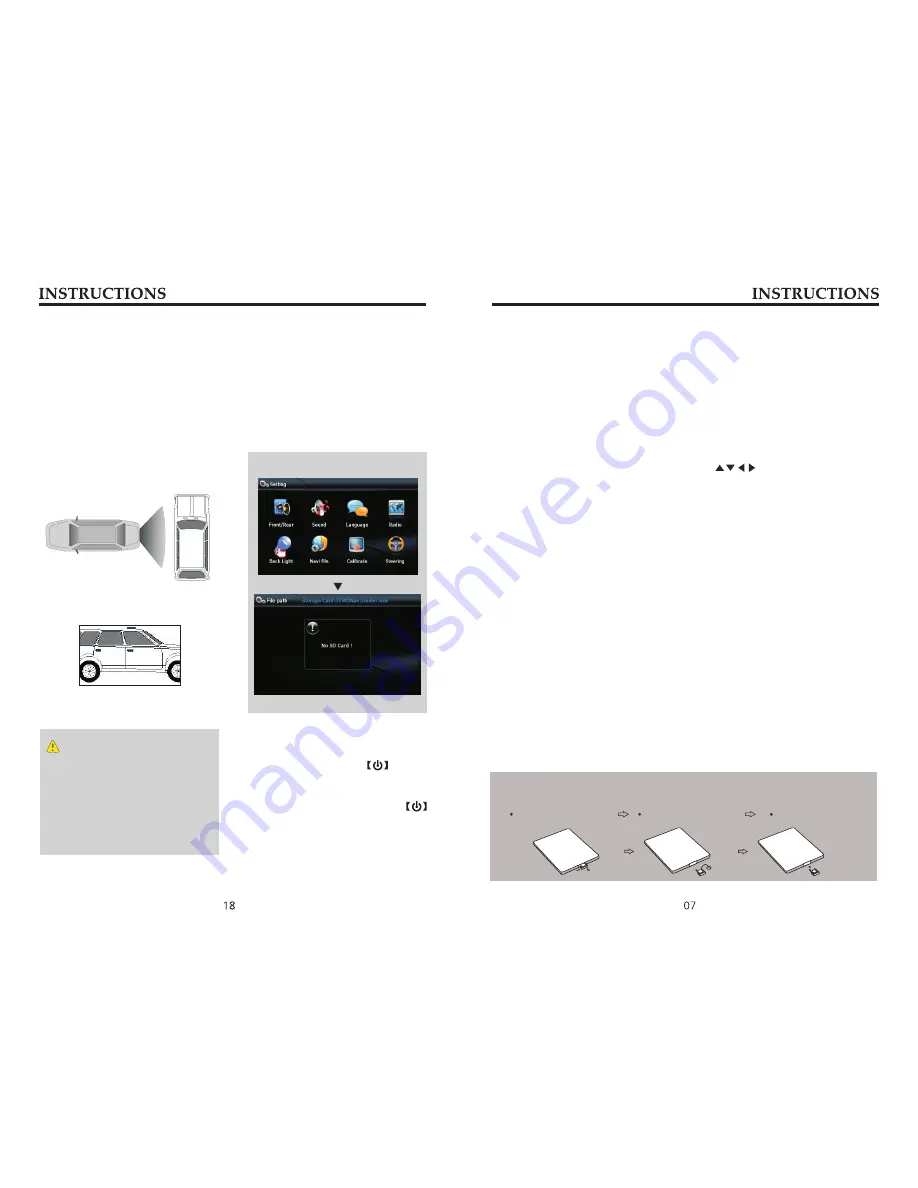
CCD system (back rearview function)
During back, if your rearview mirror
device has been connected, after the car
is put in reverse, system automatically
switches to the rearview mirror function
screen and display the back scene video
shot by your rearview mirror.
Reverse field simulation
Other Functions Operation
Do not rely on CCD system completely,
please make sure your car is safe by your
eyes during driving. Back rearview system
only assists in driving. As the distance
range of rearview system is limited,
completely relying on the rearview system
during driving may cause accidents.
Rearview backup image
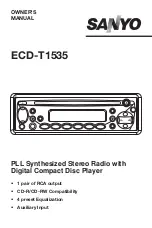
Navigation path is already set when
you buy the product. Do not enter into
the navigation setup interface to change
path arbitrarily. Otherwise you may
cause navigation program abnormal.
Warning
Navigation Path Setup
Video setup
You can adjust screen brightness and
contrast etc. by operating button
on the panel. Setup method is follows:
In DVD/AV/TV mode, when the volume
display has not disappeared, press
to switch to video setup function of
brightness and contrast etc. After you
switch to the video parameter you wish
to adjust, rotate the button to adjust its
level.
Function Operation
Basic operation of setup
menu


