Function Operation
Touch Menu Function Description
Play/pause
During playback of disc, touch the
middle lower area of the screen to
pop up the touch menu below, operate
the touch menu to perform various
playback controls.
Touch the button to pause, retouch it
to continue to play.
Touch the button to select fast forward/
backward playback.
Fast
forward
/
backward
4
Stop
Touch the button to enter into prestop
status, and then touch
to continue
to play.
Double touch button to enter into
completely stop status, then touch
button to restart playing in the song
sequence of disc.
Touch the button to select the previous/
next song.
The previous/next song
Numeric keypad
Touch the button to pop up the numeric
keypad. Directly select a song to play by
touching the numeric keypad.
Enter into DVD setup menu
System setup modes contain basic setup,
audio setup, video setup and code setup.
Playback
Touch the file name icon and the song
to read and play. Touch
to
select the previous/next file.
Touch
icon between and to
return to the master category of folder.
MP3/WMA format disc playback
Put the MP3/WMA disc in DVD player,
after the disc is read, system enters into
the interface as is shown below:
During playback of USB storage
device/SD card, icon appears
on the screen.
Enter/exit
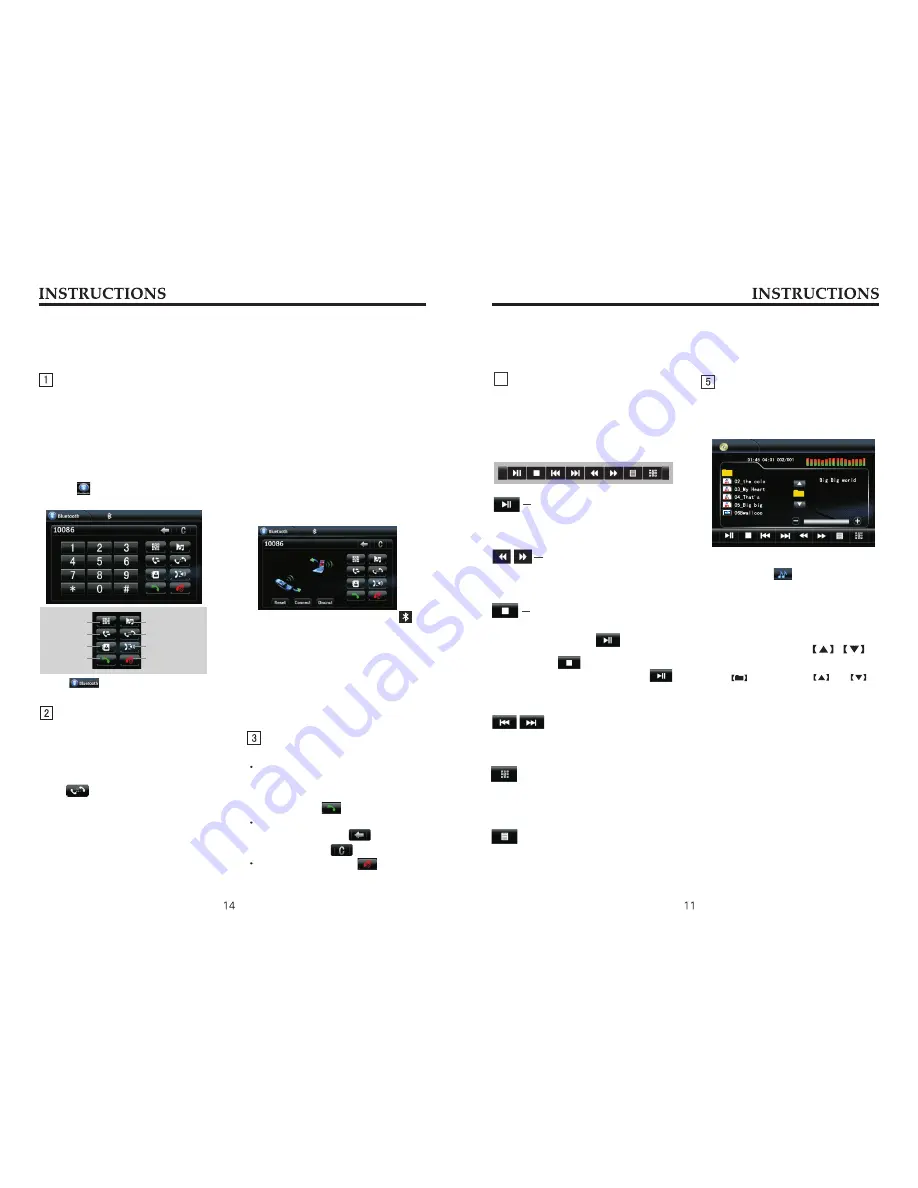
Bluetooth Function Operation
The system provides bluetooth hands-
free communication function, if your
cellphone supports bluetooth function,
you can establish a point-to-point
connection between your cellphone and
the system. The system can also achieve
the dialing, answering function and the
function of phonebook on the screen.
Touch
icon in the main interface
to enter the bluetooth interface.
Touch icon to exit bluetooth
interface.
Pair/link
The first time you pair your cellphone
with the unit, the procedures below
should be followed:
①
Turn the bluetooth function of your
callphone on.
Press
button on the unit.
Screen displays “Searching”.
Recognized phones will be displayed.
Select the phone you wish to connect
on the phone list. Only one phone can
be connected.
②
The cell phone searches for bluetooth
device and connect.
A virtual keypad is displayed on the
screen; enter the numeric code (0000)
and press [OK] button.
③
A prompt is displayed on the screen
of the phone, to accept pair, enter the
same numeric code on the phone and
press [OK] button.
④
After the pair is completed, the name
of the connected cellphone is displayed
on the screen.
⑤
After recharged, the bluetooth
system will automatically get connect to
the lastly disconnected cellphone.
Dial/answer/switch/hang up
Dial a call
After the cellphone gets connected
to the unit, enter a phone number by
touching number buttons on the screen,
and then touch
to dial a call.
During dialing, if wrong numbers are
entered, you can click to delete
one by one, touch
to delete all.
During dialing, touch
to hang
up the connecting phone.
Function Operation
Dial/answer
Dial
Call records
Phonebook
Hang-up/refuse
Switch
Reset/link
Music playback
After the successful pair, the icon
that indicates connecting status will
be lighted, otherwise, it will appear
dimmed.
Touch [Disconnect] to disconnect the
current connection; after disconnected,
touch [Connect] to connect the
disconnected bluetooth device.
Touch [Reset] icon to clear all pair
records.


