6
Getting started
No
t for
Co
m
m
ercial
Us
e
E
ri
css
on
Bu
si
ne
ss
Mo
bil
e
N
etwo
rk
s
B
V
mount. Due to possible interference, do not place the cordless phone near
audio or video equipment.
3.
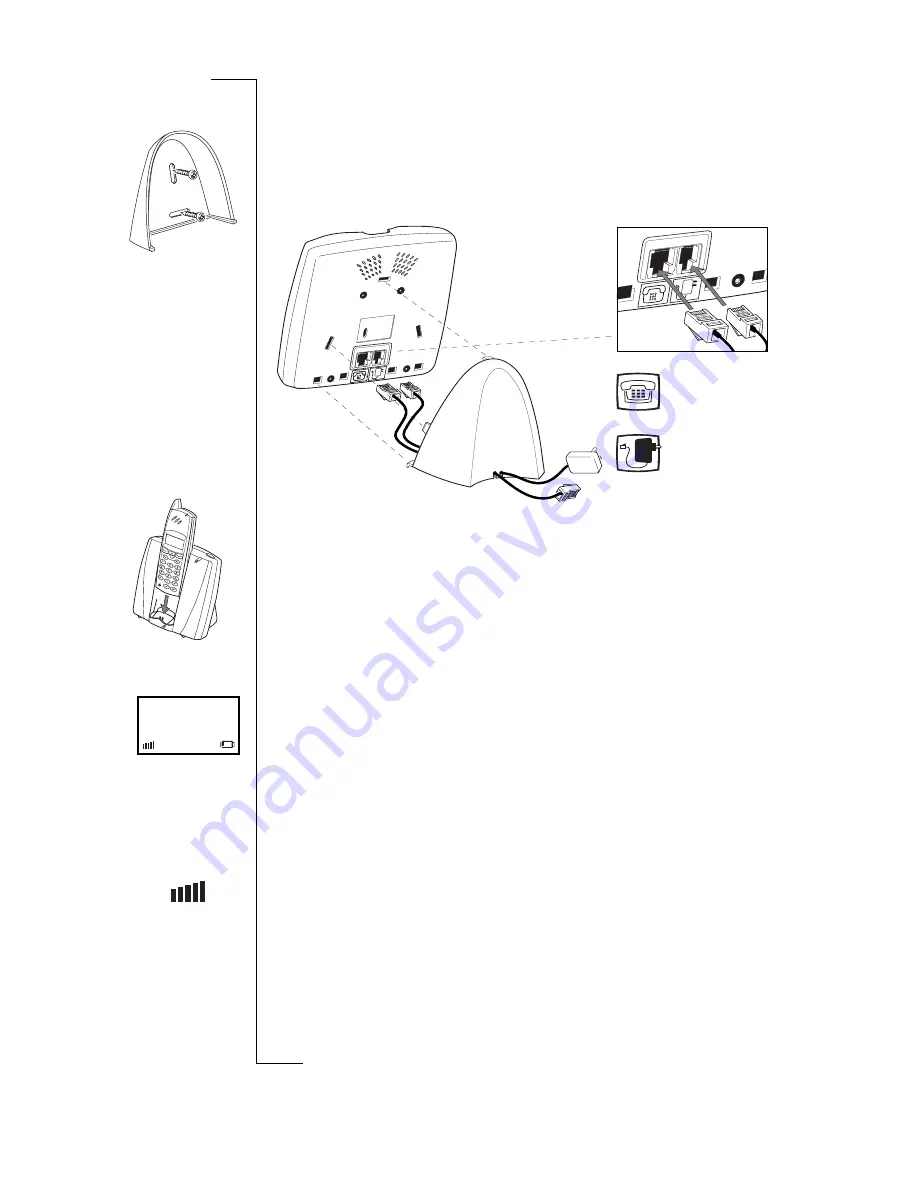
If you place the base station on a wall, screw the wall mount to the wall.
4.
Connect the telephone cable to the base station’s telephone socket and to
the ISDN network terminator. Connect the power cord to the power plug
socket of the base station.
5.
Connect the desk stand to the base station or connect the base station to the
wall mount. Locate the lower hooks first.
For the desk stand, route the cables through the slots at the back.
6.
Place the handset into the base station as shown in the illustration. Make
sure that the handset is switched off.
7.
Plug the power adaptor into the wall socket.
The red light on top of the base station should now be on continuously. If
you see a red, flashing light, there is a fault with the telephone line
connection.
After a few minutes the handset will subscribe itself to the base station and
the red light on the top of the base station will go off.
8.
Leave the handset in the base station for at least 3 hours to charge the bat-
tery for the first time.
When the battery is charged, the handset is ready for use. For more informa-
tion about charging the battery, please refer to “Battery” on page 9.
If subscription fails
Normally the handset automatically subscribes to the base station when the
cordless phone is installed. However if automatic subscription fails (the signal
strength indicator is not visible in the display), you have to manually sub-
scribe the handset to the base station see “Subscribing a DT200 handset to the
230i base station” on page 29.
Language
At this point you may wish to change the language of your handset.
Line
Power
Home
1
Содержание 230i
Страница 1: ......


