26
Operation
01
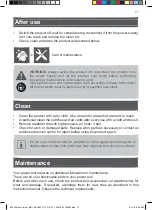
Cutting (Fig. K, L)
WARNING!
During operation fine dust will be generated!
The dust is highly inflammable and explosive! Do not smoke during
operation, keep heat sources and open flames out of the working area!
Always wear a dust mask to protect yourself against hazards resulting
from fine dust!
It is recommended to make a trial cut before working on the actual
workpiece to determine the position and size of the groove, especially
after replacing the blade.
Switch the product off, let it come to a complete stop and disconnect it
from the power supply if the saw blade gets stuck in the workpiece. Only
then free the jammed blade.
1. Ensure the workpiece is free of obstacles like nails or screws before operation.
Remove them if required.
2. Mark the centre of the groove on both workpieces which are to be connected.
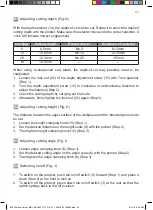
3. Set proper cutting depth. For a solid connection, use the largest possible biscuit
dowel. Apply two biscuit dowels if necessary (Fig K).
4. Set proper cutting height and angle.
5. Never hold the workpiece with your hands or across your leg. Secure the workpiece
with proper clamps to a stable worktop. Support longer workpieces to avoid tilting.
6. Hold the product with one hand on the main handle (4), and with the other hand on
the auxiliary handle (1). Never try to operate the product with only one hand!
7. Place the angle stop (11) on the upper surface of the workpiece. Place the depth
stop (13) on the surface that the groove is required.
8. Align the central red line on the front of angle stop (11) / depth stop (13) / base
plate (5) with the marked cutting line.
9. Switch the product on and wait until it runs at full speed.
10. Push the product forwards to cut groove on the workpiece. Some of the more
common biscuit joinery applications are shown in Fig L.
11. Only apply proper feeding force. Higher feeding force will not increase but lower
the performance of the product, overheat the blade tips and leads to low cutting
surface/edge quality.
12. Return the product to the initial position before switching it off.
860 W Biscuit joiner_MNL_EBJ860_TPS_GB_V1_V20518_20180605.indd 26
6/5/18 9:04 AM


