25
01
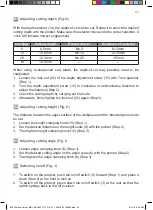
Adjusting cutting depth (Fig. G)
With the depth selector (14), the depth-of-cut can be set. Rotate it to select the desired
cutting depth with the pointer. Make sure the selector moves into the correct position. A
‘click’ will indicate correct engagement.
marking
Cutting depth
Biscuit dowel
thickness of material
0
8.0mm
No.0
8-12mm
10
10.0mm
No.10
12-15mm
20
12.3mm
No.20
>15mm
M
14.0mm
--
--
When using re-sharpened saw blade, the depth-of-cut may possibly need to be
readjusted.
1. Loosen the lock nut (22) of the depth adjustment screw (15) with 7mm spanner
(Step 1).
2. Turn the depth adjustment screw (15) in clockwise or anticlockwise direction to
adjust the distance (Step 2).
3. Check the cutting depth by carrying out trial cuts.
4. Afterwards, firmly tighten the lock nut (22) again (Step 3).
02
Adjusting cutting height (Fig. H)
The distance between the upper surface of the workpiece and the intended groove can
be set.
1. Loosen the height clamping knob (10) (Step 1).
2. Set the desired distance on the height scale (9) with the pointer (Step 2).
3. Then tighten height clamping knob (10) (Step 3).
03
Adjusting cutting angle (Fig. I)
1. Loosen angle clamping knob (6) (Step 1).
2. Set the desired cutting angle on the angle scale (8) with the pointer (Step 2).
3. Then tighten the angle clamping knob (6) (Step 3).
04
Switching on/off (Fig. J)
1. To switch on the product, push the on/off switch (3) forward (Step 1) and press it
down (Step 2) at the front to lock on.
2. To switch off the product, press down the on/off switch (3) at the rear so that the
switch springs back to the off position.
860 W Biscuit joiner_MNL_EBJ860_TPS_GB_V1_V20518_20180605.indd 25
6/5/18 9:04 AM


