background image


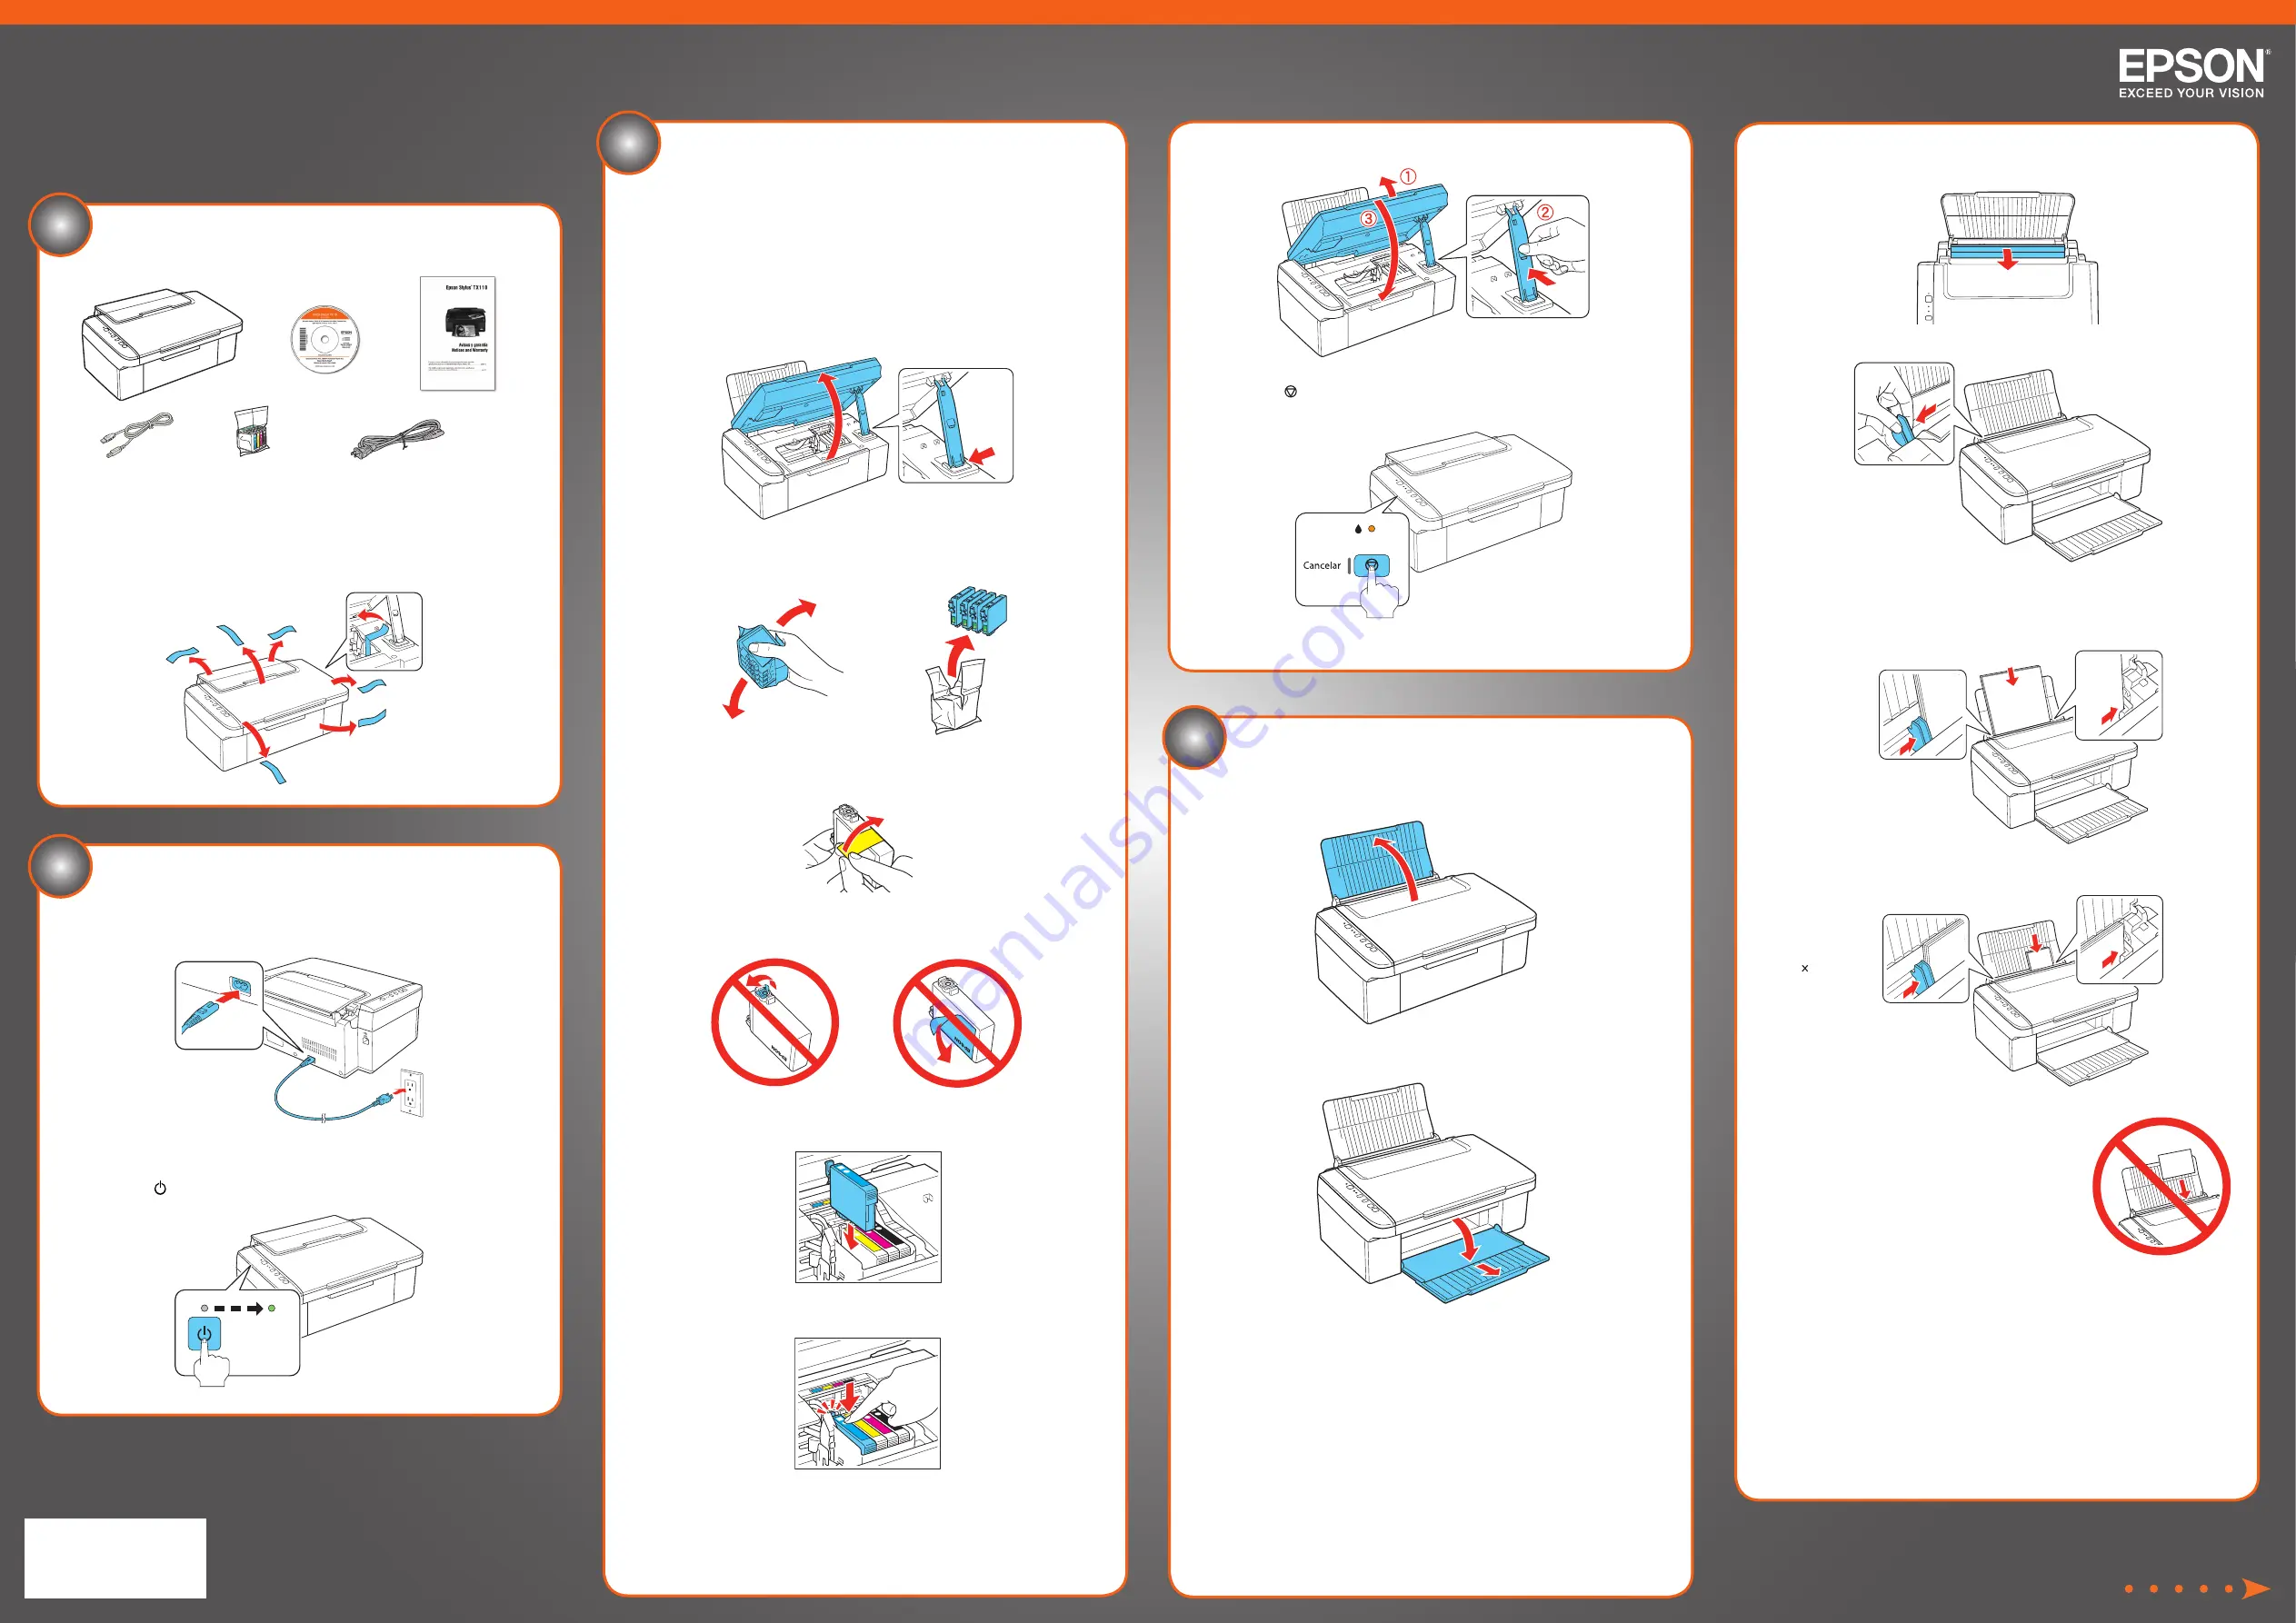
Release the scanner support and lower the scanner.

7


Press the 


Cancelar 

(Stop) button to charge the ink. Charging takes 

about 2 minutes.


Caution:

 Don’t turn off the TX110 while it is charging or you’ll waste ink.

Unpack

If anything is missing, contact Epson as described on the back of this sheet.

Caution:

 Do not open the ink cartridge package until you are ready to install the ink. 

Cartridges are vacuum packed to maintain reliability.

Remove all the protective materials.


1

Start Here

Read these instructions before using the printer.


3

Install cartridges

Caution: 

Keep ink cartridges out of the reach of children and do not drink the ink.

Note: 

The ink cartridges that come with your printer have a lower yield due to the ink 

system charging process. This process is carried out the first time you turn on your 
printer and guarantees better performance.

Don’t load paper before installing ink cartridges.

1


Lift up the scanner and prop it up with the support.

2


Shake the ink cartridges, then unpack them.

Remove only the yellow tape from each cartridge.


Caution:

 Do not remove any other seals or the cartridge may leak.

Insert the cartridges in the holder for each color.

5


Press each cartridge down until it clicks.

3


Flip the feeder guard forward. Then squeeze the edge guide and slide 
it left.

4


Load paper against the right edge and underneath the tab, then slide the 
edge guide over.

A4, Letter

4    6


Note: 

Don’t load the paper sideways; always load 


it short edge first.  

5


Flip the feeder guard back.

Epson Stylus

®

 TX110


4

2

Turn on the TX110

1


Connect the power cable.


Caution:

 Do not connect to your computer yet.

2


Press the

Encender/Ligar

 (On) button.

*411585200*

*411585200*

Load paper

1


Open the paper support.

2


Open the output tray and pull out the extension.

Содержание TX110 - Stylus Color Inkjet

Страница 1: ...ut the first time you turn on your printer and guarantees better performance Don t load paper before installing ink cartridges 1 Lift up the scanner and prop it up with the support 2 Shake the ink cartridges then unpack them 3 Remove only the yellow tape from each cartridge Caution Do not remove any other seals or the cartridge may leak 4 Insert the cartridges in the holder for each color 5 Press ...

Страница 2: ...ut the first time you turn on your printer and guarantees better performance Don t load paper before installing ink cartridges 1 Lift up the scanner and prop it up with the support 2 Shake the ink cartridges then unpack them 3 Remove only the yellow tape from each cartridge Caution Do not remove any other seals or the cartridge may leak 4 Insert the cartridges in the holder for each color 5 Press ...

Страница 3: ...and white document or photo Turn power on off Cancel printing Scan a document or photo To scan or copy Place original 1 Open the document cover 2 Place your original face down on the glass with the top facing into the front right corner 3 Close the document cover To scan Press the Escanear Digitalizar Scan button to scan the image Then save the file on your computer See your on screen User s Guide...

Страница 4: ...and white document or photo Turn power on off Cancel printing Scan a document or photo To scan or copy Place original 1 Open the document cover 2 Place your original face down on the glass with the top facing into the front right corner 3 Close the document cover To scan Press the Escanear Digitalizar Scan button to scan the image Then save the file on your computer See your on screen User s Guide...

Отзывы: