background image

In an unregistered status, the media type is set
to 

Med-Thick 70g/m

2

. If the paper weight of

the loaded media is 61 to 89 g/m

2

, you can

leave this as it is.

If the paper weight differs from that of the
loaded media, change the media type. Failure to
select the appropriate media type can cause
print quality problems.

U


User’s Guide

 (Online Manual)

When media settings have been registered for
the loaded media/EMX files have already
been downloaded

Select the registered media number.

B

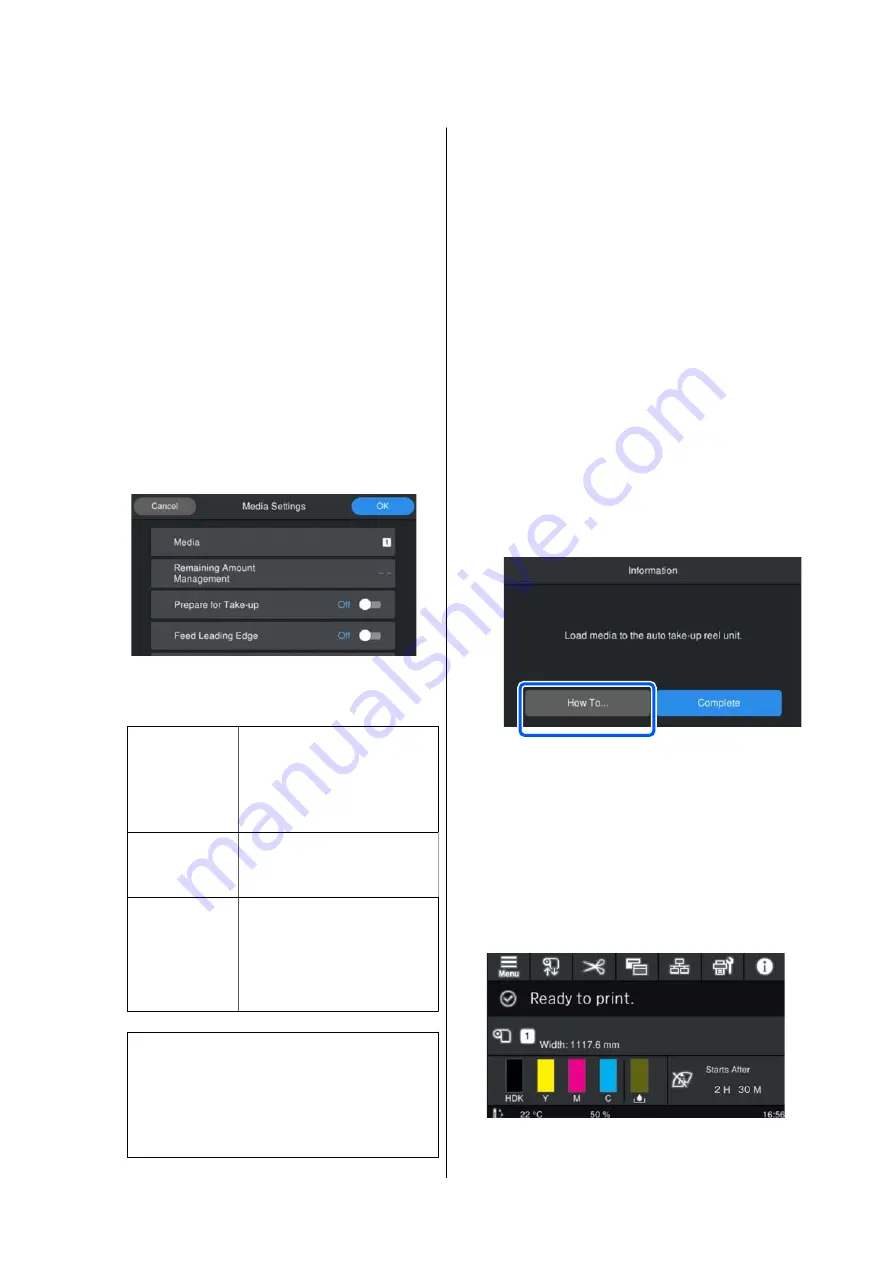
If necessary, set the action to be performed
when feeding paper.

The following shows the details for each
operation.

Prepare for
Take-up

Displayed when the auto
take-up reel unit is installed.

After feeding media, set this to

On

 to continue loading media

into the take-up reel unit.

Cut Leading
Edge

Set this to 

On

 when the leading

edge of the loaded media is not
straight or is not cut neatly.

Feed Leading
Edge

Set this to 

On

 when the

remaining media value is
printed on the leading edge of
the loaded media. The printed
section is fed forward to avoid
printing over it.

Note:

If necessary, set 

Remaining Amount

Management

 and 

Media Detection

 when the

printer is ready to print.

U

 User’s Guide (Online Manual)

C

Press 

OK

 when you have finished making

settings.

Media feeding starts.

See the following when the auto take-up reel
unit is not installed, or when 

Prepare for

Take-up

 is set to 

Off

.

U


“Printing” on page 9

See the next section when 

Prepare for Take-up

is set to 

On

.

Loading into the Auto
Take-up Reel Unit

You can load media into the auto take-up reel unit
while viewing the procedure on the screen.

A

Press 

How To...

.

B

Press 

Complete

 when you have finished

loading media.

Printing

When 

Ready to print.

 is displayed on the screen, you

can start printing.

SC-F6400 Series/SC-F6400H Series     General Information

Using the Printer


9

Содержание SureColor SC-F6400

Страница 1: ...General Information CMP0382 00 EN ...

Страница 2: ...mable products other than those designated as Original Epson Products or Epson Approved Products by Seiko Epson Corporation Seiko Epson Corporation shall not be held liable for any damage resulting from electromagnetic interference that occurs from the use of any interface cables other than those designated as Epson Approved Products by Seiko Epson Corporation EPSON and EPSON EXCEED YOUR VISION or...

Страница 3: ...iewing Video Manuals 5 Viewing PDF Manuals 5 Supported Media Types Using the Printer Printing Process 8 Loading the Media 8 Making Settings for the Loaded Media 8 Loading into the Auto Take up Reel Unit 9 Printing 9 System conditions Epson Edge Dashboard 10 Epson Edge Print 11 Web Config 11 Specifications Table SC F6400 Series SC F6400H Series General Information Contents 3 ...

Страница 4: ...als for the product are organized as shown below You can view the PDF manuals using Adobe Reader or Preview Mac OS X Setup Guide booklet Provides information on how to setup the printer after unpacking it from the box Make sure you read this manual to perform operations safely General Information this manual This manual provides specifications and contact details for the product Safety Instruction...

Страница 5: ...w the Online Manuals in an environment that can connect to the Internet Viewing Video Manuals The video manuals have been uploaded to YouTube Click Epson Video Manuals video from the top page of Online Manuals or click the following blue text to view the manuals Epson Video Manuals If the subtitles are not displayed when you play the video click the subtitles icon shown in the image below Viewing ...

Страница 6: ...ect Find in the Edit menu to open the search toolbar F To enlarge text in the display that is too small to see well click Click to reduce the size To specify a part of an illustration or screenshot to enlarge do the following For Windows Right click on the page in the PDF manual and select Marquee Zoom in the menu that is displayed The pointer changes to a magnifying glass and you can use it to sp...

Страница 7: ...e buying media in large quantities try printing on a smaller sample and check the results cImportant Do not use media that is wrinkled has fluff is ripped or stained Roll media Roll core size core diameter 2 or 3 inches Roll outer diameter Up to 150 mm Media width 254 mm 10 inches to 1118 mm 44 inches Media thickness 0 08 to 0 5 mm 432 mm 17 inches to 1118 mm 44 inches when using the auto take up ...

Страница 8: ... is an optional item U Loading into the Auto Take up Reel Unit on page 9 4 Printing U Printing on page 9 Loading the Media You can load media while viewing the procedure on the screen A Check that Load the media is displayed on the screen and then press B Press Start See Description on the screen to check the loading procedure You can then follow the on screen instructions Making Settings for the ...

Страница 9: ...e leading edge of the loaded media is not straight or is not cut neatly Feed Leading Edge Set this to On when the remaining media value is printed on the leading edge of the loaded media The printed section is fed forward to avoid printing over it Note If necessary set Remaining Amount Management and Media Detection when the printer is ready to print U User s Guide Online Manual C Press OK when yo...

Страница 10: ...he sleep function so that the computer does not enter sleep status Windows Operating system Windows 7 SP1 Windows 7 x64 SP1 Windows 8 Windows 8 x64 Windows 8 1 Windows 8 1 x64 Windows 10 Windows 10 x64 Windows 11 CPU Intel Core2Duo 2 5GHz or more Free memory 1 GB or more Hard disk free space during installation 2 GB or more Display resolution 1280 1024 or better Communication interface High Speed ...

Страница 11: ... Speed USB Ethernet 100Base TX 1000Base T We recommend installing this software on a computer with high specifications since the software will be used in combination with software applications such as Adobe Illustrator Also this software normally handles data that is several GB in size and in some cases may be tens of GB in size particularly when performing high quality banner printing jobs We the...

Страница 12: ...x 80 W Sleep mode Less than 19 W Power off Less than 0 3 W Temperature and humidity without condensation Printer Specifications Printing 10 to 35 C 20 to 80 Recommended 15 to 25 C 40 to 60 In storage Before unpacking 20 to 60 C 5 to 85 Within 120 hours at 60 C within a month at 40 C In storage Before charging ink 20 to 40 C 5 to 85 Within a month at 40 C In storage After charging ink 5 to 35 C 5 t...

Страница 13: ...Density Black Cyan Magenta Yellow Light Cyan Light Magenta Fluorescent Pink Fluorescent Yellow Violet Orange Use by date See the expiration date printed on the ink pack store at normal temperature Print quality guarantee expiry One year from printer installation Storage temperature 5 to 35 C External dimensions approx W 180 D 410 H 30 mm Capacity 1600ml Note To ensure your printouts have consisten...

Отзывы: