EPSON Stylus Pro 4400/4450/4800/4880/4880C
Revision C
Disassembly & Assembly
Disassembly Procedures
226
4.2.4 Circuit Board Removal
This section describes steps for removing “C593 MAIN Board“, “Power Supply
Board”, and each “C593_SUB Board“.
4.2.4.1 C593 MAIN Board
1.
2.
Remove "Paper Guide Assy., M, SP"
3.
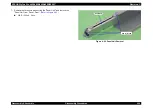
Remove the two screws securing "Cover, Harness".
C.B.S. 3x8:
2 pcs.
4.
Slide "Cover, Harness" outward.
5.
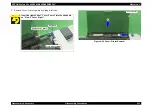
Release all harnesses through the "Cover, Harness" notch and remove the
"Cover, Harness".
Figure 4-30. Screws Securing the Cover, Harness
Figure 4-31. Cover, Harness Removal
C H E C K
P O I N T
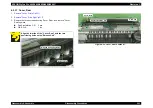
The board used for Stylus 4400/4800 is "C593 MAIN Board",
and "CA00 MAIN Board" is used for Stylus Pro 4450/4880/
4880C. The explanation in this section is based on Stylus
Pro 4400/4800.
C A U T I O N
Be sure to insert and unplug FFCs vertically. (Inserting/
Unplugging at an angle can damage shorten or disrupt the
terminals inside the connector and cause damage to circuit
board components.)
Insert "Cover, Harness" into the two ribs of "Paper Guide,
Lower".
Do not allow any harness to jut out from under the "Cover,
Harness".
Ribs
C.B.S. 3x8
Cover, Harness
Notch
Содержание Stylus Pro 4800 Portrait Edition
Страница 1: ...EPSONStylusPro 4400 4450 4800 4880 4880C Color Large Format Inkjet Printer SERVICE MANUAL SEIJ04008 ...
Страница 9: ...C H A P T E R 1 PRODUCTDESCRIPTION ...
Страница 113: ...C H A P T E R 2 OPERATINGPRINCIPLES ...
Страница 156: ...C H A P T E R 3 TROUBLESHOOTING ...
Страница 200: ...C H A P T E R 4 DISASSEMBLY ASSEMBLY ...
Страница 366: ...C H A P T E R 5 ADJUSTMENT ...
Страница 448: ...C H A P T E R 6 MAINTENANCE ...
Страница 457: ...C H A P T E R 7 APPENDIX ...
Страница 463: ...EPSON Stylus Pro 4400 4450 4800 4880 4880C Revision C Appendix Exploded Diagrams 463 7 2 Exploded Diagrams ...
Страница 469: ...PX 6500 E PS ON S TYLUS PR O 4800 No 4 R ev 01 C593 ME CH 011C8 A2 518 520 507 505 513 501 511 508 512 514 517 519 500 ...


