


3. Select the paper size you loaded in the printer from the
Paper Size list.
4. Check the Orientation option for
Portrait or
Landscape
orientation.
Note:
Always load paper into the sheet feeder short edge first. Load
envelopes flap edge first with the flap side down.
5. After making your settings, click the
OK
button to close the
Page Setup dialog box.
Note:
You cannot print from the Page Setup dialog box. You can only
print from the Print dialog box.
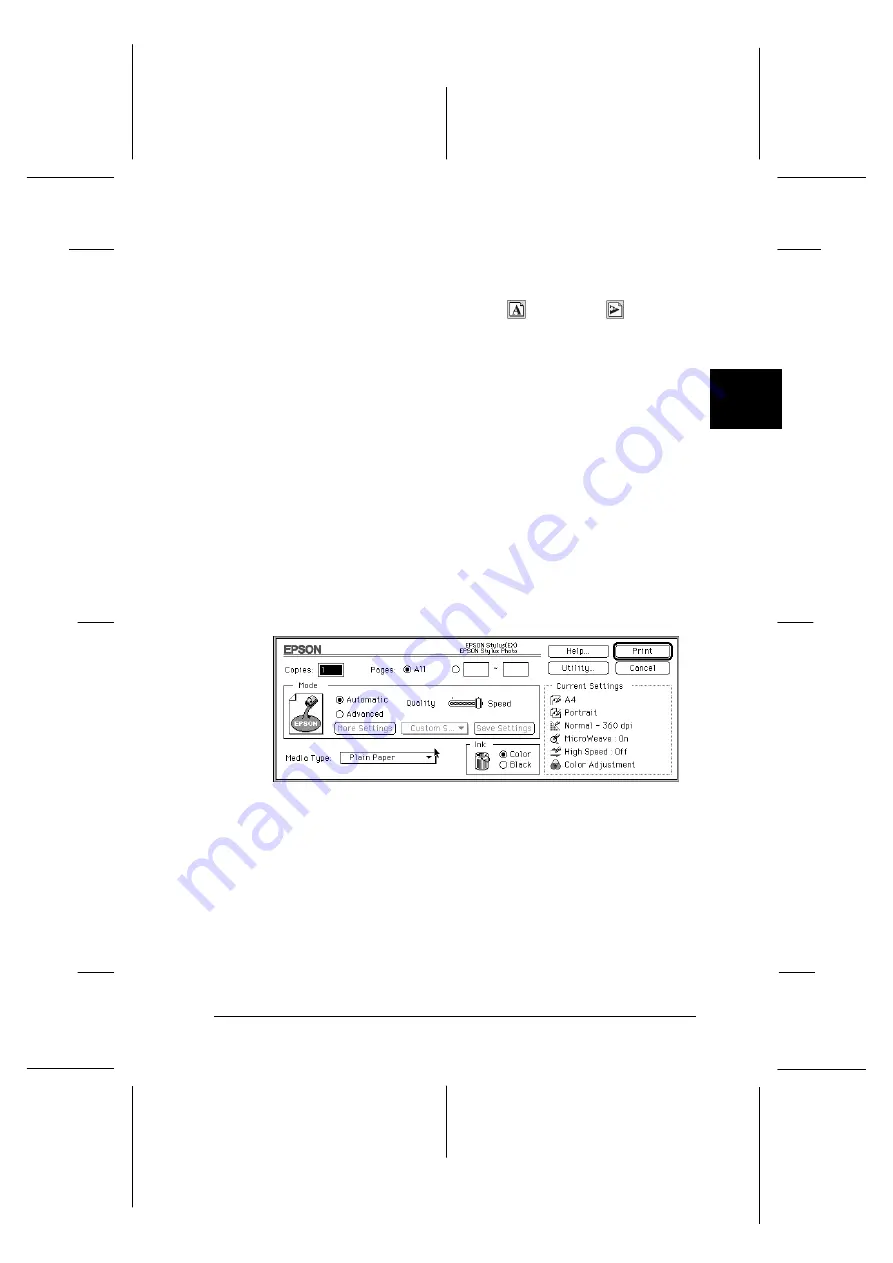
6. Choose
from the File menu. This brings up the dialog
box shown below.
7. Make sure the Mode option is set to
Automatic
.
Note:
When
Automatic
is selected, the printer software determines
the best settings according to the Media Type and Ink settings
you make.
dr-6
3
R
EPSON Stylus Photo
User’s Guide
A5 size
Chapter 3
12-28-96
Starting to Print
3-9
Содержание Stylus Color
Страница 1: ......
Страница 10: ...L EPSON Stylus Photo User s Guide A5 size Front 12 27 96 viii ...
Страница 16: ...L EPSON Stylus Photo User s Guide A5 size Introduction 12 26 96 6 Safety Instructions ...
Страница 24: ...L EPSON Stylus Photo User s Guide A5 size Chapter 1 01 14 97 1 8 Getting to Know Your Printer ...
Страница 52: ...L EPSON Stylus Photo User s Guide A5 size Chapter 2 12 28 96 2 28 Getting Started ...
Страница 80: ...L EPSON Stylus Photo User s Guide A5 size Chapter 4 12 28 96 4 18 Using the Printer Software for Windows ...
Страница 106: ...L EPSON Stylus Photo User s Guide A5 size Chapter 5 96 12 28 5 26 Using the Printer Software for Macintosh ...
Страница 118: ...L EPSON Stylus Photo User s Guide A5 size Chapter 6 01 14 97 6 12 Printing on Special Paper ...
Страница 168: ...L EPSON Stylus Photo User s Guide A5 size Chapter 8 12 28 96 8 42 Troubleshooting ...
Страница 188: ...L EPSON Stylus Photo User s Guide A5 size Appendix b 12 27 96 B 12 Specifications ...
Страница 194: ...L EPSON Stylus Photo User s Guide A5 size Glossary 12 16 96 6 Glossary ...
Страница 201: ......
Страница 203: ......


