background image

Checking the Ink Cartridge Status

33

Checking the Ink Cartridge Status

Your RX680 Series will let you know when an ink cartridge is low or expended by 
displaying a message on its display screen or your computer.

Note: 

You cannot print or copy when an ink cartridge is expended even if the other cartridges 
are not expended. Replace any expended cartridges before printing or copying.

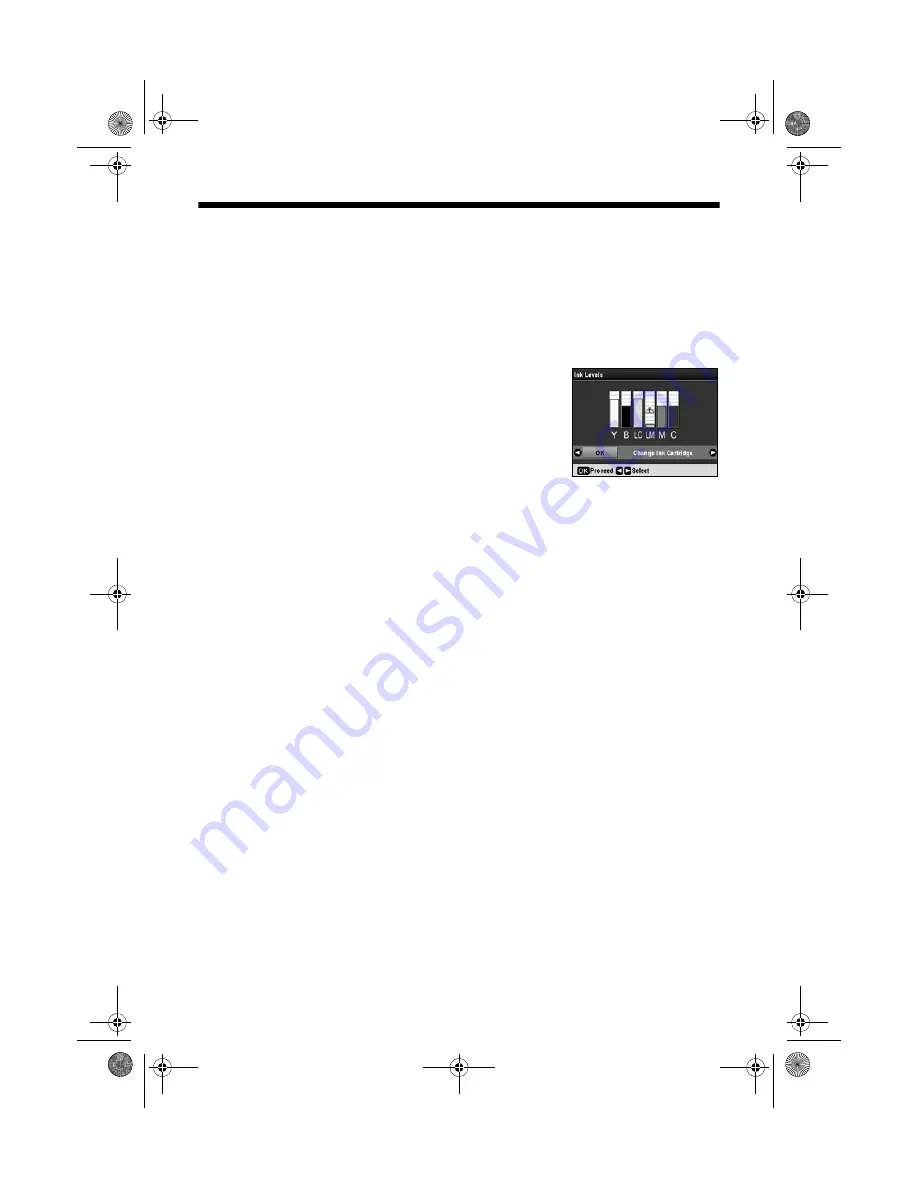
To check ink cartridge status from the display screen 
anytime, follow these steps:

1. Press the 

Setup

 button.

2. Select 

Ink Levels

 and press 

OK

.

A cartridge marked with an exclamation point (

!)

 is 

low on ink. See page 35 to replace the cartridge, if 
necessary.

A window may also appear on your computer screen if you print when ink is low. 
This window can optionally display ink offers and other updates retrieved from an 
Epson website. On a Windows computer that is connected to the Internet, you 
may see a screen asking if you want to receive these Epson offers the first time you 
try to print when ink is low. Click 

Accept

 or 

Decline

.

Note: 

To disable checking for ink offers or updates from Epson, see the instructions in your 
on-screen 

User’s Guide

.

sprx680_qg.book  Page 33  Wednesday, June 6, 2007  8:40 AM

Содержание RX680 - Stylus Photo Color Inkjet

Страница 1: ...Quick Guide Basic Copying Printing and Scanning Maintaining Your All in One Solving Problems sprx680_qg book Page 1 Wednesday June 6 2007 8 40 AM ...

Страница 2: ...ing From a Memory Card Camera or Other Device 16 Printing From a Memory Card 16 Printing From a USB Flash Drive 19 Viewing and Selecting Photos 20 Automatically Correcting Photos 21 Printing Custom Photo Greeting Cards 21 Printing From a Digital Camera 23 Printing From Your Computer 24 Printing in Windows 24 Printing With a Macintosh 26 Selecting the Correct Paper Type 28 Scanning a Photo or Docum...

Страница 3: ...eaning the Print Head 32 Checking the Ink Cartridge Status 33 Replacing Ink Cartridges 35 Solving Problems 37 Checking for Software Updates 37 Display Screen Messages 37 Problems and Solutions 38 Where To Get Help 41 Notices 42 sprx680_qg book Page 3 Wednesday June 6 2007 8 40 AM ...

Страница 4: ...ide Print from a memory card flash drive or camera view your photos individually or by date preview auto correction and print from a camera See this Quick Guide for the basics See the on screen User s Guide for details Print custom photo greeting cards See this Quick Guide Print directly on a CD DVD print on discs with or without a computer See the on screen User s Guide Print from or scan to your...

Страница 5: ...ns Display screen Rear sheet feeder Front paper cassette Document cover Scanner glass Memory card slots EXT IF port for external devices Output tray and extensions Auto duplexer Power inlet for power cable Lower rear cover sprx680_qg book Page 5 Wednesday June 6 2007 8 40 AM ...

Страница 6: ...paper cassette and use the rear sheet feeder for various sizes of photo paper Loading in the Front Paper Cassette 1 Pull out the paper cassette and remove the cover 2 Press in the tab on the edge guides and slide them to fit the paper 3 Insert the paper with the glossy or printable side face down and the short edge against the back of the paper cassette sprx680_qg book Page 6 Wednesday June 6 2007...

Страница 7: ...oad paper face down with the short edge facing the back of the paper cassette Load letterhead or pre printed paper with the top edge facing the back of the cassette Do not load envelopes in the paper cassette Note For details on paper including the maximum number of sheets you can load see your on screen User s Guide sprx680_qg book Page 7 Wednesday June 6 2007 8 40 AM ...

Страница 8: ...e paper support and pull up the extension 2 Insert the paper glossy or printable side up short edge first against the right side 3 Slide the edge guide against the paper Letter size paper Smaller photo paper sprx680_qg book Page 8 Wednesday June 6 2007 8 40 AM ...

Страница 9: ...reen User s Guide Using Special Papers Epson offers a wide array of high quality papers making it easy to maximize the impact of your photos presentations and creative projects You can purchase genuine Epson ink and paper at Epson Supplies CentralSM at www epson com ink3 U S sales or ww epson ca Canadian sales You can also purchase supplies from an Epson authorized reseller To find the nearest one...

Страница 10: ...mium Photo Paper Semi gloss Borderless 4 6 inches S041982 40 Letter 8 5 11 inches S041331 20 Epson Photo Paper Glossy Borderless 4 6 inches S041809 S042038 50 100 Letter 8 5 11 inches S041141 S041649 S041271 20 50 100 Epson Bright White Paper Letter 8 5 11 inches S041586 500 Epson Premium Presentation Paper Matte Borderless 8 10 inches S041467 50 Letter 8 5 11 inches S041257 S042180 50 100 Epson P...

Страница 11: ...k jet printable CDs or DVDs see the on screen User s Guide Placing the Original on the Glass 1 Open the document cover and place your original face down on the scanner glass with the top against the back left corner 2 Close the cover gently so you don t move the original Caution Do not place anything on top of the document cover or use it as a writing surface sprx680_qg book Page 11 Wednesday June...

Страница 12: ...lect Text if your document has a colored background that you want to remove To copy at 100 size on letter size plain paper in the front paper cassette go to step 9 7 To make double sided copies or choose other special settings select Layout and press r 8 To print on paper in the rear sheet feeder or select other special settings press x Menu Select your settings and press OK See the on screen User...

Страница 13: ... the rear sheet feeder go to step 9 To change any of the settings go to the next step 7 Press d then press r to change the layout if necessary See your on screen User s Guide for details 8 To copy on a different type of paper or change any of the other settings press x Menu Following is a list of the Paper Type settings Select your settings and press OK For information about the various settings a...

Страница 14: ...ct Reprint Restore Photos and press OK 4 To turn on Color Restoration press r select On and press OK If your photo is not faded leave this setting off 5 Place your photo on the glass see page 11 and close the cover Note To copy multiple photos place them 1 4 inch apart as described on the display screen 6 Press OK You see a preview of your photo and the settings that will be used for printing Note...

Страница 15: ...il Reduce Red Eye is highlighted then press r select On and press OK 9 To crop your photos and enlarge the resulting image area to fit on your paper press the Display Crop button To resize the image area press or To move the image area press the arrow buttons To check the zoomed image press OK then press OK again or press y Back to adjust the crop Press r to preview the next photo and repeat step ...

Страница 16: ...memory card slots and you re ready to print If your digital camera supports DPOF Digital Print Order Format you can pre select the photos you want to print while the card is in the camera Then you can insert the card in the RX680 Series and print them See your on screen User s Guide for more information For instructions on transferring files between your all in one and a computer or printing photo...

Страница 17: ...els Number of files Up to 999 Top slot Memory card access light Adapter required Slot Type of card Top slot SDTM SDHC miniSDTM miniSDHC microSD microSDHC MultiMediaCard Memory StickTM Memory Stick DuoTM Memory Stick PROTM Memory Stick Pro DuoTM Memory Stick Micro MagicGateTM Memory Stick MagicGate Memory Stick Duo xD Picture Card xD Picture Card Type H xD Picture Card Type M Bottom slot CompactFla...

Страница 18: ...nsert your card into the correct slot see page 17 it won t go in all the way The memory card access light flashes then stays on When you want to remove the card make sure the memory card access light is not flashing then pull the card straight out of its slot Caution Do not remove the card or turn off the RX680 Series while the memory card access light is flashing you may lose data on the card Top...

Страница 19: ...slots Note If a memory card is inserted the RX580 Series will not recognize the external USB drive 2 Plug the flash drive directly into the EXT I F port on the front of the RX680 Series 3 If there are folders on the flash drive select the folder you want and press OK You can select and print your photos from the flash drive the same as from a memory card See the following sections for instructions...

Страница 20: ...inting press Press again if you want to print more than one copy 6 To crop the photo press the Display Crop button and see page 15 for instructions Note To display your photo without information or display 16 photos at a time continue pressing the Display Crop button 7 Press l or r to view other photos select the number of copies and crop if desired 8 To print borderless photos on 4 6 inch Epson P...

Страница 21: ...only your printed photos It does not change your original image files Print settings are applied to all photos until you turn off the settings To return all settings to their defaults press y Stop Clear Settings then press OK Printing Custom Photo Greeting Cards You can create custom greeting cards using photos on your memory card or a USB flash drive and add your own handwritten or printed text F...

Страница 22: ...ard message in the box next to your photo You can write it in print a message and paste it into the box or draw a picture Tip When adding text place it in the direction that your photo faces 3 Open the document cover place the template face down on the glass with the top against the upper left corner and close the cover 4 Load Epson photo paper in the rear sheet feeder either 4 6 or letter size pa...

Страница 23: ...a and the Epson Stylus Photo RX680 Series settings 1 Make sure the RX680 Series is turned on and there are no memory cards inserted in its memory card slots 2 Connect the USB cable that came with your camera to the EXT I F port on the front of your RX680 Series 3 Turn on your camera You see a message on the display screen 4 Load Epson photo paper See page 6 for instruction 5 Press the Setup button...

Страница 24: ...od idea to check for updates to your Epson Stylus Photo RX680 Series software See Checking for Software Updates on page 37 for instructions Printing in Windows 1 Open a photo or document in a printing program open the File menu and select Print 2 Select EPSON Stylus Photo RX680 Series and click the Preferences or Properties button Note If you see a Setup Printer or Options button click it Then cli...

Страница 25: ... and configure the front paper cassette See your on screen User s Guide for more information 5 To print double sided on plain paper or Epson Bright White Paper click the Page Layout tab then click Duplex Printing Select the type of document you re printing choose Photo or Best Photo for photos Select your document or photo Orientation Select your paper Source Type and Size Click here for borderles...

Страница 26: ...progress of your print job Printing With a Macintosh 1 Open a photo or document in a printing program open the File menu and select Page Setup 2 Select the basic page settings For borderless photos choose a Paper Size setting with a Sheet Feeder Borderless option 3 Click OK 4 Open the File menu and select Print Cancel printing Pause or resume printing Check ink cartridge status Select Stylus Photo...

Страница 27: ...ont paper cassette in the Epson Printer Utility Click and select Printer and Option Information 7 To print double sided on plain paper or Epson Bright White Paper select Auto Duplex Printing Settings from the pop up menu and click Auto Duplex Printing Select other settings as necessary 8 Choose any other printing options you may need from the pop up menu See the on screen User s Guide for details ...

Страница 28: ...hoto Paper Glossy Ultra Premium Photo Paper Glossy Epson Premium Photo Paper Glossy Premium Photo Paper Glossy Epson Photo Paper Glossy Photo Paper Glossy Epson Premium Photo Paper Semi gloss Premium Photo Paper Semi gloss Epson Ultra Premium Photo Paper Luster Ultra Premium Photo Paper Luster Epson Premium Presentation Paper Matte Epson Premium Presentation Paper Matte Double sided Epson Photo Qu...

Страница 29: ...ructions or instructions on scanning a photo or document to a memory card or USB flash drive see the on screen User s Guide Basic Scanning You can scan from any TWAIN compliant application such as ArcSoft PhotoImpression using Epson Scan Or you can start Epson Scan directly from your computer and save your image to a file 1 Open the document cover place your original face down on the glass see pag...

Страница 30: ...y exposed color photo into one with true to life color and sharpness as you scan Use the Color Restoration and Dust Removal options in Epson Scan s Full Auto mode In Home and Professional Mode you can also select Backlight Correction to remove shadows from images with too much background light Note For detailed instructions see the on screen User s Guide You can also click Help on the Epson Scan s...

Страница 31: ...Nozzles If your printouts are faint or have gaps in them the print head nozzles may be clogged or ink may be running low in an ink cartridge Follow these steps to check the print head nozzles 1 Load letter size paper in the rear sheet feeder 2 Press the Setup button 3 Select Maintenance and press OK 4 Select Nozzle Check and press OK 5 Press x Start 6 Check the nozzle check pattern that prints to ...

Страница 32: ... and press OK 4 Select Head Cleaning and press OK 5 Press x Start Cleaning lasts around 1 minute When it s finished you see a message on the display screen Caution Never turn off the RX680 Series during a cleaning cycle or you may damage it 6 Press x Start to run a nozzle check and confirm that the print head is clean Note If you don t see any improvement after cleaning the print head three times ...

Страница 33: ...on 2 Select Ink Levels and press OK A cartridge marked with an exclamation point is low on ink See page 35 to replace the cartridge if necessary A window may also appear on your computer screen if you print when ink is low This window can optionally display ink offers and other updates retrieved from an Epson website On a Windows computer that is connected to the Internet you may see a screen aski...

Страница 34: ...and do not refill them The use of other products may affect your print quality and could result in printer damage Yields vary considerably based on images printed print settings paper type frequency of use and temperature For print quality a small amount of ink remains in the cartridge after the replace cartridge indicator comes on The printer ships with full cartridges and part of the ink from th...

Страница 35: ...idges 1 Turn on your RX680 Series If a cartridge is low or expended you see a message on the display screen Note which cartridges need to be replaced and press OK If you re replacing a cartridge before you see a message on the display screen press Setup select Maintenance and press OK Then select Change Ink Cartridge and press OK 2 Open the scanner then open the cartridge cover 3 Squeeze the tab o...

Страница 36: ...at need replacing close the cartridge cover and push it down until it clicks into place 8 Close the scanner 9 Press OK to begin charging the ink This takes about 2 minutes When you see a completion message on the display screen ink charging is finished Caution To conserve ink never turn off the RX680 Series while ink is charging If you see an ink replacement message on the display screen press OK ...

Страница 37: ...Driver Update Also select EPSON Scan and click EPSON Stylus Photo RX680 Series Scanner Driver Update Display Screen Messages Display screen message Problem and solution A printer error has occurred Turn the RX680 Series off make sure no paper is jammed inside see page 39 and turn it back on If the error is not resolved contact Epson for help see page 41 A scanner error has occurred Turn the RX680 ...

Страница 38: ...Remove it and check the card Cannot recognize the device The memory card is not inserted correctly see page 18 or another device is not connected correctly or there is a problem with the card or media in the device Remove the card or device and check it Cannot create a folder on the memory card or disc Operation canceled Insert a new memory card see page 18 or another storage medium see the User s...

Страница 39: ...e jammed paper 2 If paper is still jammed press the P On button to turn off the all in one Then open the scanner remove the jammed paper and torn pieces close the scanner and turn the all in one back on If paper is jammed in the front paper cassette 1 Press x Start to eject the jammed paper 2 If paper is still jammed press the P On button to turn off the all in one 3 Close the output tray and remo...

Страница 40: ...you loaded matches the paper size and type settings on the control panel see page 13 and in your software see page 28 For the best print quality use Epson special paper see page 10 and genuine Epson ink cartridges see page 35 If you notice light or dark bands across your printouts or they are too faint you may need to clean the print head to unclog the nozzles Run a nozzle check see page 31 to see...

Страница 41: ... label in back Proof of purchase such as a store receipt and date of purchase Computer configuration Description of the problem Then call U S 562 276 4382 6 AM to 6 PM Pacific Time Monday through Friday Canada 905 709 3839 6 AM to 6 PM Pacific Time Monday through Friday Toll or long distance charges may apply Purchase Supplies and Accessories You can purchase genuine Epson ink and paper at Epson S...

Страница 42: ... Do not let the power cord become damaged or frayed If you use an extension cord with the RX680 Series make sure the total ampere rating of the devices plugged into the extension cord does not exceed the cord s ampere rating Also make sure the total ampere rating of all devices plugged into the wall outlet does not exceed the wall outlet s ampere rating Avoid locations that are subject to rapid ch...

Страница 43: ...and do not drink the ink Be careful when you handle used ink cartridges there may be ink remaining around the ink supply port If ink gets on your skin wash it off with soap and water If it gets in your eyes flush them immediately with water Do not put your hand inside the RX680 Series or touch any cartridges during printing Install a new ink cartridge immediately after removing an expended one Lea...

Страница 44: ...ed service center where the printer will be fixed and sent back to you You are responsible for packing the printer and for all costs to and from the Epson authorized service center When warranty service involves the exchange of the printer or a part the item replaced becomes Epson property The replacement printer or part may be new or refurbished to the Epson standard of quality and at Epson s opt...

Страница 45: ...D EXCEPT AS PROVIDED IN THIS WRITTEN WARRANTY NEITHER EPSON AMERICA INC NOR ITS AFFILIATES SHALL BE LIABLE FOR ANY LOSS INCONVENIENCE OR DAMAGE INCLUDING DIRECT SPECIAL INCIDENTAL OR CONSEQUENTIAL DAMAGES RESULTING FROM THE USE OR INABILITY TO USE THE EPSON PRODUCT WHETHER RESULTING FROM BREACH OF WARRANTY OR ANY OTHER LEGAL THEORY In Canada warranties include both warranties and conditions Some j...

Страница 46: ... Type of Product Multifunction printer Model C342A FCC Compliance Statement For United States Users This equipment has been tested and found to comply with the limits for a Class B digital device pursuant to Part 15 of the FCC Rules These limits are designed to provide reasonable protection against harmful interference in a residential installation This equipment generates uses and can radiate rad...

Страница 47: ...duct or third parties for damages losses costs or expenses incurred by purchaser or third parties as a result of accident misuse or abuse of this product or unauthorized modifications repairs or alterations to this product or excluding the U S failure to strictly comply with Seiko Epson Corporation s operating and maintenance instructions Seiko Epson Corporation shall not be liable for any damages...

Страница 48: ...CPD 23846 Printed in XXXXXX XX XX XX XXX sprx680_qg book Page 48 Wednesday June 6 2007 8 40 AM ...

Отзывы: