


64
VIDEO CLIPS
DELETING VIDEO CLIPS
Deleting VIDEO CLIPS from the SD memory card.(See page 36.)
The VIDEO CLIP information will be displayed on
the LCD monitor.
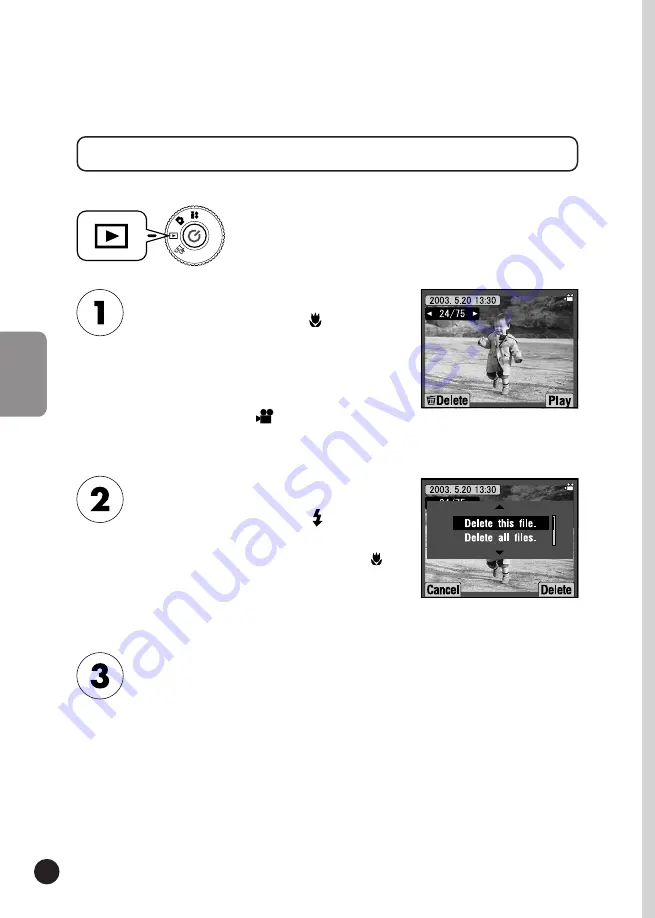
Turn the DIAL SWITCH to PLAYBACK MODE and
then turn the POWER ON.
Press
W
on the ZOOM button in order to view
6 images at a time. The
icon will appear for
VIDEO CLIPS.
Using the ▲▼ buttons choose
between "Delete this file." or "Delete
all files.". Then press the FLASH
button to confirm deletion.
If there is still data left on the
memory card, the monitor will return
to the PLAYBACK mode screen. If
there is no data "No images" will be
displayed.
If you do not wish to delete any files, press the
MACRO button.
If the data is protected the screen "This file cannot
be deleted because it is locked." or "Cannot be
deleted." will come up (See page 99.)
Find the VIDEO CLIP using the ▲
▼ buttons, then use the MACRO
button to select it.


