background image

Chapter 6

Connecting your HX-20 to other devices

You can connect your HX-20 to a number of other devices-for
example, to a cassette recorder, a printer, and a bar code reader, to

name but a few. In this chapter you’ll learn how to connect the
HX-20 to such 

peripherals.


 HX-20 


You can connect your HX-20 to any portable cassette recorder.

However, it’s best to avoid the cheapest cassette recorders, because

on these units the tape speed can fluctuate dramatically. Such fluctu-
ations in tape speed can make it impossible for you to recover pro-

grams and data you have stored on your cassettes. To ensure a con-
sistent tape speed, you should use fresh batteries if your cassette

recorder is powered only by batteries, as the tape speed on these
units will change as the batteries drain down. Even better, 

use 

an

AC-powered cassette recorder, or get an AC adapter for your bat-
tery-powered unit.

One very desirable feature is a 

digital tape counter, 

which makes

it easy to advance or rewind a cassette to the exact location of any
previously-saved program or data file. Without a digital tape
counter, you may only be able to save one program or data file on a
cassette.

Tone and volume controls are also useful. A REM jack is essen-

tial for all but the simplest applications. A good quality micro-
cassette recorder will serve as well as a unit that uses full-size
cassettes.

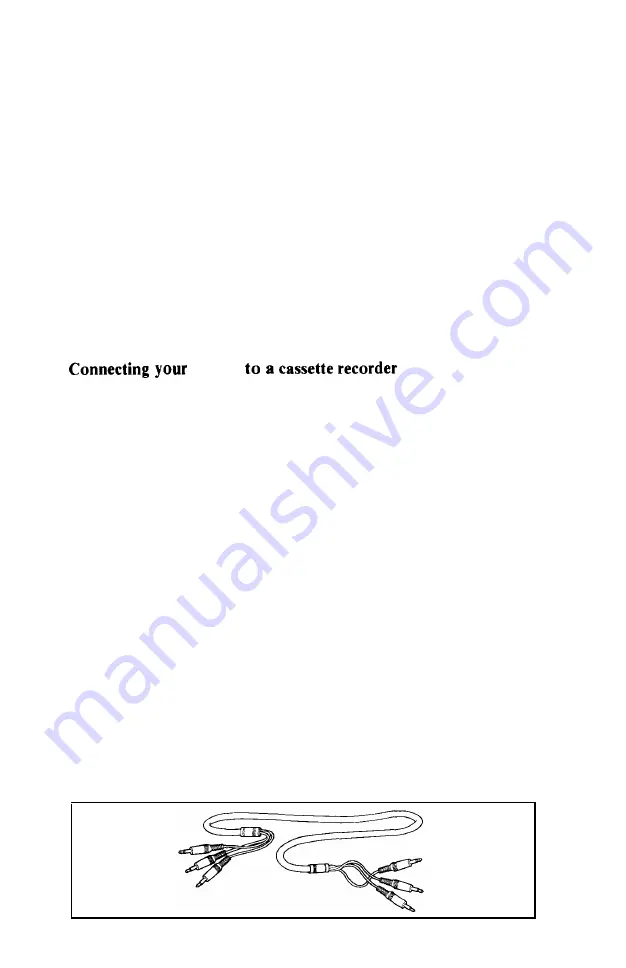
Once you have a cassette recorder, you will need a cable to con-

nect it to the HX-20. This cable, available from your Epson dealer as
part #702, looks like this:

55

Содержание HX-20

Страница 1: ...EPSON HX 20 OPERATIONS MANUAL BY Kenneth Skier President SkiSoft Inc Cambridge Massachusetts ...

Страница 2: ...the information contained herein While every precaution has been taken in the preparation of this book the publisher and author assume no responsibility for errors or omissions Neither is any liabilityassumed for damages resulting from the use of the information contained herein The Source is a service mark of Source Telecomputing Corporation a subsidiary of the Readers Digest Association Inc Comp...

Страница 3: ...f this equip ment does cause interference to radio or television reception which can be determined by turning the equipment off and on the user is encouraged to try to correct the interference by one or more of the following measures l Reorient the receiving antenna l Relocate the computer with respect to the receiver l Move the computer away from the receiver l Plug the computer into a different ...

Страница 4: ...nserting the paper roll Inserting the ribbon cartridge Replacing the printer cover Adjusting the viewing angle initializing memory and the calendar clock Selecting a different character set 4 Using the HX 20 Turning it on Viewing the menu Choosing an item from the menu 5 The screen editor The virtual screen Thecursor Scrolling Homing the cursor Clearing the screen Typing on the virtual screen Auto...

Страница 5: ...cting your HX 20 to other devices 55 to a cassette recorder 55 to an RS 232 device 57 to a bar code reader 58 7 What if you have problems 61 If you can t turn off your HX 20 61 If the menu displays garbage 62 If you encounter other problems 62 8 Storing your HX 20 63 for a few minutes to a few hours 63 for a few hours to a few weeks 63 for a few weeks to a few months 63 9 Specifications 65 Archite...

Страница 6: ...o dan gling cords or external parapher nalia the HX 20 is a compact and uncluttered system at home in the classroom or the confer ence room on your desk or in your lap Unlike most other personal computers the HX 20 can store up to seventeen programs in its memory Five of these may be BASIC programs When you turn on the HX 20 a menu ap pears on the screen listing the names of these programs You can...

Страница 7: ... will take you from a computer novice to an accomplished com puter programmer in only a few evenings J When you use the HX 20 you ll notice that its full size full stroke keyboard has the feel of a fine piece of office equip ment and that its program mable special function keys make it a snap to develop pro grams that are extremely easy to use You ll also appreciate its built in screen and printer...

Страница 8: ...s a complete microcassette recorder suitable for storing programs and data files If your applications require more memory than the HX 20 features just attach an expan sion unit which virtually dou bles the read write memory and permanent memory of the system Should you decide to expand the capabilities of your HX 20 even further you may connect it to such external devices as an ordinary cassette r...

Страница 9: ...lly instant access As you can see the HX 20 is powerful portable easy to use and expandable Whether you wish to use it for school for busi ness or just for fun you could hardly choose a more personal personal computer So once again Congratulations a bar code reader to scan bar coded programs songs and data sheets 4 ...

Страница 10: ...gs contained within the documentation for those peripherals Note failure to observe the following cautions may void the warranty on your HX 20 Never disassemble the case There are no parts inside your HX 20 that you can service or replace by yourself If you remove the screws that hold the case together you will risk damaging the static sensitive circuitry and or the batteries I Never disassemble t...

Страница 11: ...ting this con nector can damage the HX 20 s circuitry By covering up this connector the dummy cartridge prevents such mishaps Do not remove the system bus cover On the left side of your HX 20 you will notice a small strip of dark plastic This covers up a connector called the system bus system bus cover Do not remove the system bus cover When the system bus is exposed you will run the risk of dam a...

Страница 12: ...HX 20 with the circuit cover removed Doing so increases the chance of damage to the circuit and may cause the HX 20 to interfere with television or radio reception nearby Use only the HX 20 AC adapter to charge HX 20 batteries Your HX 20 comes with a device labelled AC ADAPTER This unit is designed to charge the batteries in your HX 20 It is not designed to run your HX 20 directly from AC current ...

Страница 13: ... 20 batteries Don t overcharge the batteries If you operate the HX 20 with the battery charger connected even tually you will overcharge the batteries Do not operate the HX 20 with the battery charger connected When its batteries need to be recharged the HX 20 will flash CHARGE BATTERY on the screen sixty times and then shut off When you see the CHARGE BATTERY warning turn off the power switch and...

Страница 14: ...ter is active You may damage the HX 20 s built in microprinter if you pull on the paper while the printer is working Don t pull on the paper when the printer is active You may however pull on the paper when the printer is inactive this will cause no damage to the printer Connect the HX 20 only to appropriate peripherals The sockets on the back of the HX 20 enable you to connect it to an Epson disk...

Страница 15: ...ctronic product the HX 20 can be damaged by such treatment Pack it in its original box using the original packing materials whenever you ship it Protect the HX 20 from physical shock Protect the HX 20 from extreme humidity The HX 20 is designed for use in conditions where the humidity does not exceed 80 Exposure to humidity exceeding this level can impair the performance of the HX 20 or damage it ...

Страница 16: ... in conditions where the temperature is below 95 F 35 C and above 41 F 5 C The HX 20 will not work reliably outside of this temperature range Protect the HX 20 from extreme heat and cold Storing the HX 20 in conditions that are too hot or too cold may damage it permanently 11 ...

Страница 17: ...N 1 I 1 ...

Страница 18: ...eed to work with special symbols you might also wish to select a different character set See page 27 Unpacking the HX 20 Remove the HX 20 the battery charger and all packing materials from the box Check the packing materials for small parts and papers DO NOT DISCARD THE PACKING MATERIALS You will need them if you ever ship the HX 20 to protect it during shipment You should have the following 1 The...

Страница 19: ... Epson With your registration card on file Epson can provide continuing software and hardware support to help you in using your HX 20 Charging the batteries The nickel cadmium batteries in your HX 20 hold very little charge when they are new So charge them now before using the HX 20 A full charge is necessary to maintain maximum battery efficiency For optimum battery life only recharge the batteri...

Страница 20: ... not be fully charged at the end of eight hours The batteries in the HX 20 are now charging Allow them to obtain a full charge for eight 8 hours Then disconnect the battery charger from the AC outlet and unplug it from the HX 20 Preparing the printer for use The HX 20 features a built in microprinter which can print text and graphics The printer mechanism and controls are located in the upper left...

Страница 21: ...er 2 Insert the paper roll 3 Insert the ribbon cartridge 4 Replace the printer cover The only tools you will need are your fingers Removing the printer cover Four small grooves and the word PUSH are embossed on the printer cover With the index finger of your left hand push gently on these grooves The printer cover will tilt Using the thumb of your left hand pull up on the printer cover 16 ...

Страница 22: ...n you may lift it completely from the HX 20 I I Now you can look directly into the printer compartment Inserting the paper roll Note the ON OFF switch on the right side of the HX 20 Turn the HX 20 on by sliding this switch away from you towards the back of the HX 20 17 ...

Страница 23: ...active Now with your thumb on the front of the paper cover and your other fingers on the back pull the paper cover up rotating it towards the back of the HX 20 Unlike the printer cover which is removable the paper cover may not be removed from the HX 20 You may now look into the paper compartment which is empty except for a strip of fabric 18 ...

Страница 24: ...kind of paper available at your Epson dealer Do not use any other paper as it may jam or otherwise damage the printer Unroll several inches of this paper Slide the paper through the slot connecting the paper compart ment and the printer compartment You can slide it in about one quarter inch before it stops 19 ...

Страница 25: ...ton down until the paper emerges from the top of the printer mech anism When an inch of paper has emerged from the top of the printer release the PAPER FEED button Now pull the paper through the printer until several inches are exposed Put the roll of paper into the paper compartment on top of the strip of fabric If you ever wish to remove the paper roll lift the fabric strip 20 ...

Страница 26: ...se the paper cover on the free end of the paper roll Inserting the ribbon cartridge Packaged with your HX 20 is an L shaped ink ribbon cartridge Holding it as shown you may slide it over the paper and into the printer compartment Be sure the paper goes between the ribbon cartridge and the ink ribbon 21 ...

Страница 27: ...ll produce very faint copy and you will need to replace the ribbon To remove a ribbon from your HX 20 press on the word PUSH embossed on the right side of the ribbon The left side of the ribbon will pop up and you can remove it Then install a new one which you may purchase at your Epson dealer 1 Note If you get ribbon ink on the case of the HX 20 wipe it off immediately Once it dries it s hard to ...

Страница 28: ...ce Adjusting the viewing angle The HX 20 uses an LCD Liquid Crystal Display screen Unlike a television or movie screen an LCD screen can only be viewed from within a narrow range of angles You can prove this to yourself by looking at the HX 20 screen and moving your head forward and backward to view the screen from various angles 23 ...

Страница 29: ...le using the HX 20 To adjust the LCD screen to your position place your finger on the VIEW ANGLE adjustment knob located on the right side of the HX 20 Turn the VIEW ANGLE adjustment knob until the screen shows you crisp black characters against a light gray background If you view the LCD screen from a different angle you may need to adjust the viewing angle again You might also have to adjust the...

Страница 30: ...and the calendar clock or you may decide that you don t wish to do so Your choice will depend on how long you ve been using the HX 20 If your HX 20 is new then of course you will want to initialize the system But if you ve been using the HX 20 for a while and only pressed m m by mistake while looking at the menu then you will not want to initialize the system To do so would cause the HX 20 to lose...

Страница 31: ...nd time The date is 1 3 83 The time is 2 09 35 PM So you should type 010383 q 140935 010383140935 and press the m key Press H or m at any time before pressing m and you will abort the initialization process Note that no spaces slashes or colons separate the numbers representing month day year hour minute and second The numbers just run together So you must be very careful entering them If you make...

Страница 32: ... will void your war ranty You may select special character sets by using HX 20 soft ware see The HX 20 BASIC Tutorial and Reference Manual The HX 20 can display and print special characters required by users in a number of different countries See Table 3 1 TABLE 3 1 International Character Sets To use any non USA character set touch a grounded surface such as a cold water pipe and then remove the ...

Страница 33: ...ent called a DIP switch looks like this enlarged to show detail The DIP switch is actually a set of four switches To specify the character set of a given country look up the appropriate switch settings in Table 3 2 and set the individual switches with a ball point pen or similar object 28 ...

Страница 34: ...n Spain Off Sweden Off USA On Switch 2 On Off On Off Off Off On On Switch 3 Off On On On Off Off Off On Switch 4 has no effect on the HX 20 s character set Leave it in the off position When you have adjusted the DIP switch for the desired character set let the shiny flap fall back into place and put the circuitry cover back into position 29 ...

Страница 35: ......

Страница 36: ...F switch on the right side of the HX 20 and push it towards the back of the HX 20 A menu will appear on the screen If you can t see the menu clearly don t be concerned this only means that you must adjust the screen angle See page 23 Viewing the menu Each time you turn on the HX 20 a menu appears on the screen This menu lists a number of jobs the HX 20 may perform for you The menu may be very shor...

Страница 37: ...ext down down the screen press the q key located near the upper right corner of the keyboard To understand what s going on here imagine that the menu is a long list written on a scroll of paper This scroll is mounted on rollers in a box A window in this box allows you to view a portion of the scroll To view another part of the scroll turn one of the wooden rollers In a similar fashion your HX 20 a...

Страница 38: ... the key has no effect that means you are looking at the top of the menu Text on the screen will scroll up by four lines I f m m has no effect that means you are looking at the bottom of the menu The built in printer will print a copy of what s on the screen if the printer is switched ON If you press and a microcassette cartridge is in place then the menu will disappear You may then control the mi...

Страница 39: ...ms See the Epson HX 20 BASIC Tutorial and Reference Manual Your menu may list other jobs as well For example one or more jobs will be listed in your menu if you have installed option ROM for word processing telecommunications or some other applica tion The menu may also list BASIC and machine language pro grams that you have stored in memory When you press the key for a given item the menu will di...

Страница 40: ...ry large virtual screen The virtual screen doesn t have a physical existence like the LCD screen but is rather an imaginary screen You can think of it as lying just behind the LCD screen The dimensions of the virtual screen can vary according to the program you run but in most cases the virtual screen will be eight lines high and forty characters wide twice as high and twice as wide as the LCD scr...

Страница 41: ...can see it or not In addition to letting you view any desired portion of the virtual screen the screen editor will let you place words numbers and character graphics on the virtual screen and make it easy for you to insert and delete text at any point Turn on your HX 20 now and select BASIC from the menu You won t actually learn any BASIC programming in the following pages but you must enter BASIC...

Страница 42: ......

Страница 43: ... keyboard have this automatic repeating action the cursor keys the letter number and punctuation keys the space bar and the IRETURI key This repeating action is a great convenience but it also means that you must not rest your hands on the keys for doing so will have the same effect as striking those keys repeatedly Now press this cursor key The cursor moves one space to the left Use it to move th...

Страница 44: ... cursor in view You can also scroll text with the q key Press the q key and text moves down the screen Hold down am key and press q and text scrolls up the screen Whether you use q or m m you will note that the cursor remains in its position on the LCD screen However because q and m I ISCRWJ scroll the text vertically they each move the cursor to a new line in the virtual screen If you keep pressi...

Страница 45: ...ssion press the I key Two things will happen first an N will appear on the screen at the cursor location and the cursor will move one space to the right So the screen will change from this to this The cursor shows you where the next character will appear Each time you press a letter number or punctuation key the correspond ing character appears on the screen at the cursor location and the cursor m...

Страница 46: ...the cursor far enough to the left and the LCD window will move to the left too because the LCD window scrolls auto matically to keep the cursor in view Thus as the cursor moves to the left through the virtual screen the LCD window will follow it so that once again you will see the missing characters Virtual screen width Using the cursor keys place the cursor just to the right of the last character...

Страница 47: ... suddenly displaying a completely different portion of the virtual screen Logical lines vs physical lines When you finish typing NOW IS THE TIME FOR ALL GOOD MEN TO COME TO THE AID OF THEIR PARTY the screen will look like this TIME FOR ALL GOOD M D OF THEIR PARTY 1 The text you typed occupies all of the first line and most of the second line of the virtual screen Your cursor moved automatically to...

Страница 48: ...ou want to make a change and type the text you desire When you type over existing text in this way you replace the old text with the new text For example let s say you want to change the expression you had typed from NOW IS THE TIME FOR ALL GOOD MEN TO COME TO THE AID OF THEIR PARTY to NOW IS THE TIME FOR ALL GOOD MEN TO COME TO THE AID OF THEIR FRIENDS To make this change use the cursor keys to l...

Страница 49: ...DS The screen editor makes it very easy for you to insert such text into a logical line Using the cursor keys move the cursor to the point in your text where you want to insert new characters When you ve done so the screen will look like this Now you must enter insert mode To do so hold down a m key and tap the q key Just tap it if you hold it down for more than a moment you may find that you ve e...

Страница 50: ...ER CASE letter on the screen For example press the q key An UPPER CASE A will appear on the screen When the screen editor is in upper case mode you can use the SHIFT key to produce lower case letters To see how this works press the q key while you are holding down amkey You ll place a lower case a on the screen If you are accustomed to using a typewriter this behavior may strike you as backwards A...

Страница 51: ...t awkward to use these keys You might prefer the pattern of keys that you find on your calculator 7 8 9 4 5 6 1 2 3 0 If so do not despair You won t have to teach your fingers a whole new pattern of numeric keys Instead just press the q key Nothing will change on the screen but the HX 20 is now innumeric mode which changes the behavior of many keys For example press the q key Instead of placing a ...

Страница 52: ...y when the HX 20 is in numeric mode If you don t press a m key the following keys will generate the indicated characters when the HX 20 is in numeric mode TABLE 5 1 Non Numeric Characters Available in Numeric Mode Press To Create This This KEY CHARACTER Description I Minus sign Plus sign Asterisk Comma Period Slash Question Mark The above keys will not function if used in conjunction with a SHIFT ...

Страница 53: ...orner of the HX 20 keyboard For example hold down the q key and while holding it down press the q key Instead of seeing a K or a k on the screen you ll see a little musical note Now hold down q and press the letter V A tiny telephone appears q i puts a small person on the screen q m yields a subcompact car Figure 5 2 shows the graphic characters available from the key board There are 32 graphic ch...

Страница 54: ...ition Once you ve printed the screen you may pull on the paper to bring your printout into view Or you may hold down the PAPER key for this purpose but that s slow and uses battery power Pulling on the paper will harm nothing as long as the printer is inactive Note that m m causes the printer to print a copy of the LCD screen not the entire virtual screen If you want hard copy of the entire virtua...

Страница 55: ... or numeric mode to lower case If cursor is at beginning of a logical line delete character at cursor Otherwise delete character to left of cursor Enter insert mode or exit from insert mode Enter numeric mode or exit from numeric mode to upper case mode In conjunction with any key but a letter key Iyields the upper character or function on the given key In conjunction with a let ter key m yields a...

Страница 56: ...the cursor Clear virtual screen and home the cursor Carriage return Scroll text down by four lines or by amount set with BASIC SCROLL command Scroll text up by four lines or by amount set with BASIC SCROLL command Enter insert mode or exit from insert mode Scroll left Make cursor visible Make cursor invisible Delete from cursor to end of virtual screen Using the special function keys Your HX 20 co...

Страница 57: ... through q are programmable special function keys This means that you can change the functions associated with these keys See the Epson HX 20 BASIC Tutorial and Reference Manual mjlcauses the microprinter to print a hard copy of the LCD screen display q m enables you to control a microcassette manually This works only when a microcassette is installed When you press q i the LCD screen displays the...

Страница 58: ......

Страница 59: ...resh batteries if your cassette recorder is powered only by batteries as the tape speed on these units will change as the batteries drain down Even better use an AC powered cassette recorder or get an AC adapter for your bat tery powered unit One very desirable feature is a digital tape counter which makes it easy to advance or rewind a cassette to the exact location of any previously saved progra...

Страница 60: ... HX 20 P l u g HX 20 Socket WHITE EAR RED MIC BLACK REM Now take the three plugs at the other end of the cassette cable and plug them into the corresponding sockets on your cassette recorder P l u g WHITE RED BLACK Cassette Recorder Socket EAR MIC REM If you wish you may use separate patch cords to connect your cassette recorder to your HX 20 just connect REM to REM MIC to MIC and EAR to EAR 56 ...

Страница 61: ... 20 enables it to com municate with an external printer modem or other RS 232 compatible device Note that you cannot connect the HX 20 to a printer or other device that features only a parallel interface You can only connect the HX 20 to one RS 232 device at a time To connect such a device purchase the appropriate HX 20 RS 232 cable from your Epson dealer Then consult the documentation that came w...

Страница 62: ...X 20 as defined in Table 6 2 TABLE 6 2 HX 20 Default Protocol for RS 232 Port Data rate 4800 Baud Word length 8 bits Parity none Stop bits 2 CD Carrier Detect ignored RTS Request to Send held high by HX 20 DSR Data Set Ready controlled by external device high means HX 20 may transmit data low causes HX 20 to wait CTS Clear to Send ignored If you configure the RS 232 device according to this protoc...

Страница 63: ...ines and so many other products today As of this printing Epson has provided only the hardware inter face for a bar code reader But when you read this a bar code reader might be available Contact your Epson dealer If you purchase a bar code reader be sure to see what software is available for use with it 59 ...

Страница 64: ...m 0 ...

Страница 65: ...can t turn off your HX 20 Symptom Text and or graphics remain on the screen even when the ON OFF switch is in the OFF position Cause The ON OFF switch does not shut off power but merely suggests to the HX 20 that it stop pro cessing If the ON OFF switch did shut off power turning it off would make the HX 20 for get every program in its memory For some rea son the HX 20 is so busy processing that i...

Страница 66: ...f any program is intact take this opportunity to save it on a cassette See the Epson HX 20 BASIC Tutorial and Reference Manual Unfortunately whatever garbled your menu may have garbled your programs too If the listings of your pro grams look like garbage there s no point in saving them Now to clean up your menu you must re initialize memory and the calendar clock as described on page 25 This will ...

Страница 67: ...acceptable temperature and humidity Remember your car in the summer is likely to be much too hot for the HX 20 If you must store an HX 20 in your car during hot weather put it in the trunk which is likely to be cooler than the interior of the car itself Storing your HX 20 for a few weeks to a few months If you know that you won t be using your HX 20 for more than a few weeks you must take certain ...

Страница 68: ...also be prudent to save on a cassette any programs you have stored in memory Then store the HX 20 in its original box and packaging materials in a place with acceptable temperature and humidity 64 ...

Страница 69: ...BASIC Tutorial and Reference Manual and learn how to program your HX 20 For detailed specifications see the Epson HX 20 Technical Reference Manual All specifications are subject to change without notice Architecture The HX 20 has two microprocessors for distributed and concurrent I O processing The microprocessors both 630l s communicate with each other through their serial communications ports 65...

Страница 70: ...clock The slave microprocessor controls the micro printer speaker and external cassette The cartridge interface has ports for both the main and slave microprocessors Figure 9 1 HX 20 Architecture ROM I I SOCKET 8KB 6301 MAIN CPU BARCODE READER INTERFACE CARTRIDGE INTERFACE El 6301 SLAVE CPU CASSETTE TAPE INTERFACE POWER SUPPLY 66 ...

Страница 71: ...ternally An option ROM or microcassette cartridge may be installed in place of the dummy cartridge Connectors located at the back of the HX 20 enable it to be connected to a printer with a serial interface a computer or a modem and to a floppy disk unit and display controller via a serial bus A bar code reader and external cassette recorder may be plugged into connectors located on the right side ...

Страница 72: ...tandard 32K standard 8 K in option ROM for a total of 40 K 16K See Options 32K See Options Liquid Crystal Display 120 x 32 dot addressable matrix 5 x 7 font virtual width to 255 characters by BASIC WIDTH command 24 column dot matrix impact microprinter graphic print rate 42 lines per minute bit addressable graphics full ASCII upper and lower case character set cartridge ribbon plain paper 55mm wid...

Страница 73: ... DIN EIA RS 232C standard 150 600 4800 38400 I GND 2 TXD 3 RXD 4 O U T 5 I N C G G r o u n d Special Epson TTL 1 SII 2 SI 01l 3 S01 4 SI 02 5 SI 03 6 SI 04 7 VB Battery 8 MII 9 M02 10 M01 II GND 12 5V Switched MI1 SI1 S 0 1 0 0 0 0 0 1 0 1 0 0 1 1 1 Doesn t matter Miniature phone jack Miniature phone jack Subminiature phone jack HSJ0861 01 440 Seidenki TTL 40 Pin 16 bit 8 bit and control lines Fou...

Страница 74: ...Microcassette Cartridge ROM Cartridge Expansion Unit RAM Capacity ROM Capacity 115V AC lO 49 5 60 5 Hz 8 Watts 8 Megaohms case to AC 1 KV 1 min case to AC 4 Bit DIP 3 bits for international character set selection 1 bit for selecting Disk or ROM BASIC Main Power Printer On Off Reset ASCII Interruptible 68 5 13 Function locked in by N U M key 32 special graphic characters Selectable by DIP switch o...

Страница 75: ...High Speed External Cassette Cable support AC Adapter Battery Charger Roll Paper Ribbon Cartridge Full half duplex selectable ORIG ANS mode selectable Up to 300 BPS Standard RS 232C 4 NiCad batteries AC adapter charger 1 15V 10 60 Hz F l o a t i n g c h a r g e w i t h A C adapter H00DC IA H00SB JA H 702 H00AAA H00RP H00CR BA See your Epson Dealer 71 ...

Отзывы: