


59
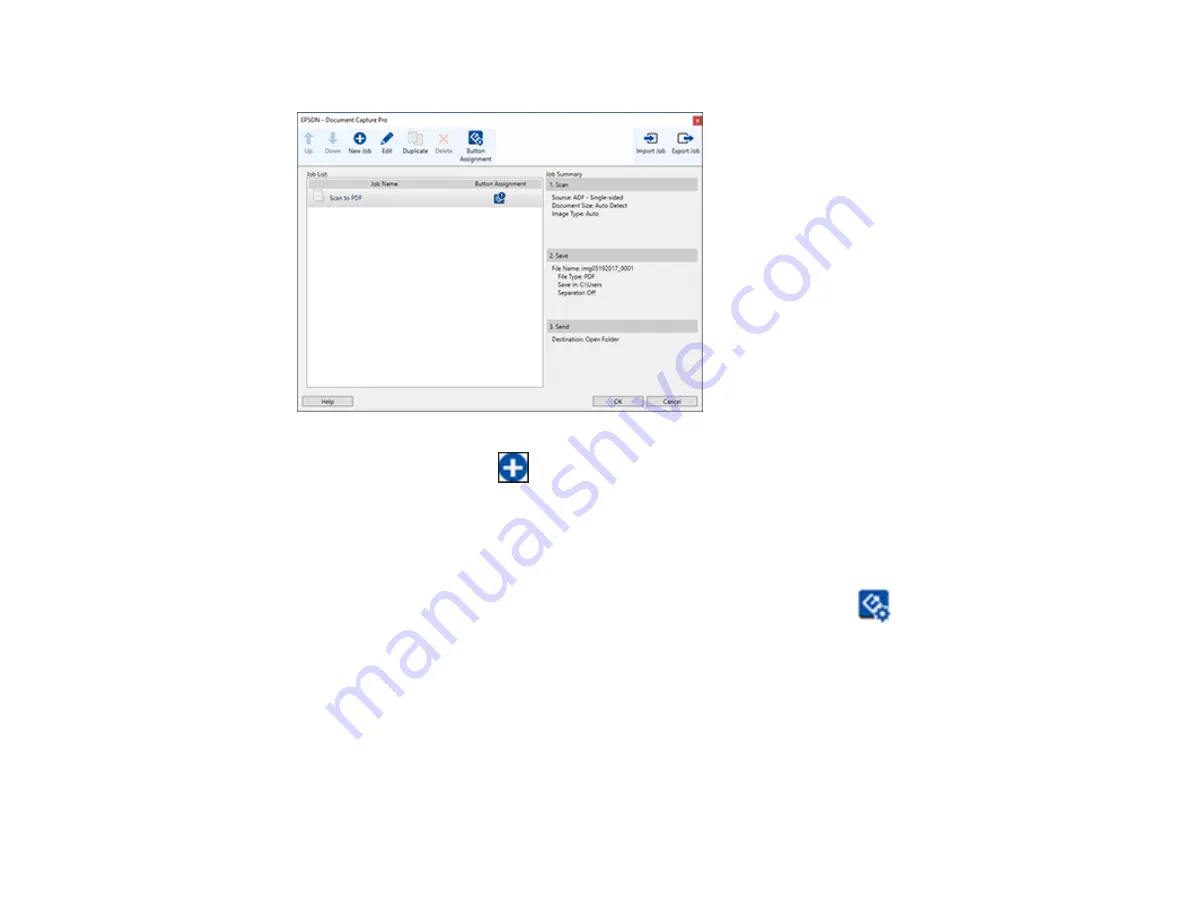
You see a screen like this:
3.
To add a scan job, click the
New Job
icon, enter a name for the new job, select settings as
necessary, and click
OK
.
You can now use the new scan job when you scan with Document Capture Pro.
Note:
See the Help information in Document Capture Pro for details.
4.
To assign scan jobs to the selection list on the product control panel, click the
Button
Assignment
icon.
Содержание DS-780N
Страница 1: ...DS 780N User s Guide ...
Страница 2: ......
Страница 21: ...21 8 Stopper 1 Kensington security slot 2 Service USB port do not use 3 USB 3 0 port 4 LAN port 5 Power inlet ...
Страница 29: ...29 ...
Страница 31: ...31 7 Slide the edge guides against the edges of the original ...
Страница 34: ...34 3 Slide the input tray edge guides all the way out ...
Страница 40: ...40 Note Do not load plastic cards vertically ...
Страница 46: ...46 6 Load the carrier sheet in the input tray as shown until it meets resistance Folded original ...
Страница 47: ...47 Photo or irregularly shaped original ...
Страница 63: ...63 You see an Epson Scan 2 window like this ...
Страница 65: ...65 You see an Epson Scan 2 window like this ...
Страница 68: ...68 You see a window like this 5 Select any displayed scan settings you want to use and click OK 6 Click Scan ...
Страница 74: ...74 You see this window ...


