15
Projecting Images
Bas
ic
Ope
ra
ti
o
n
s
When the expected images are not projected
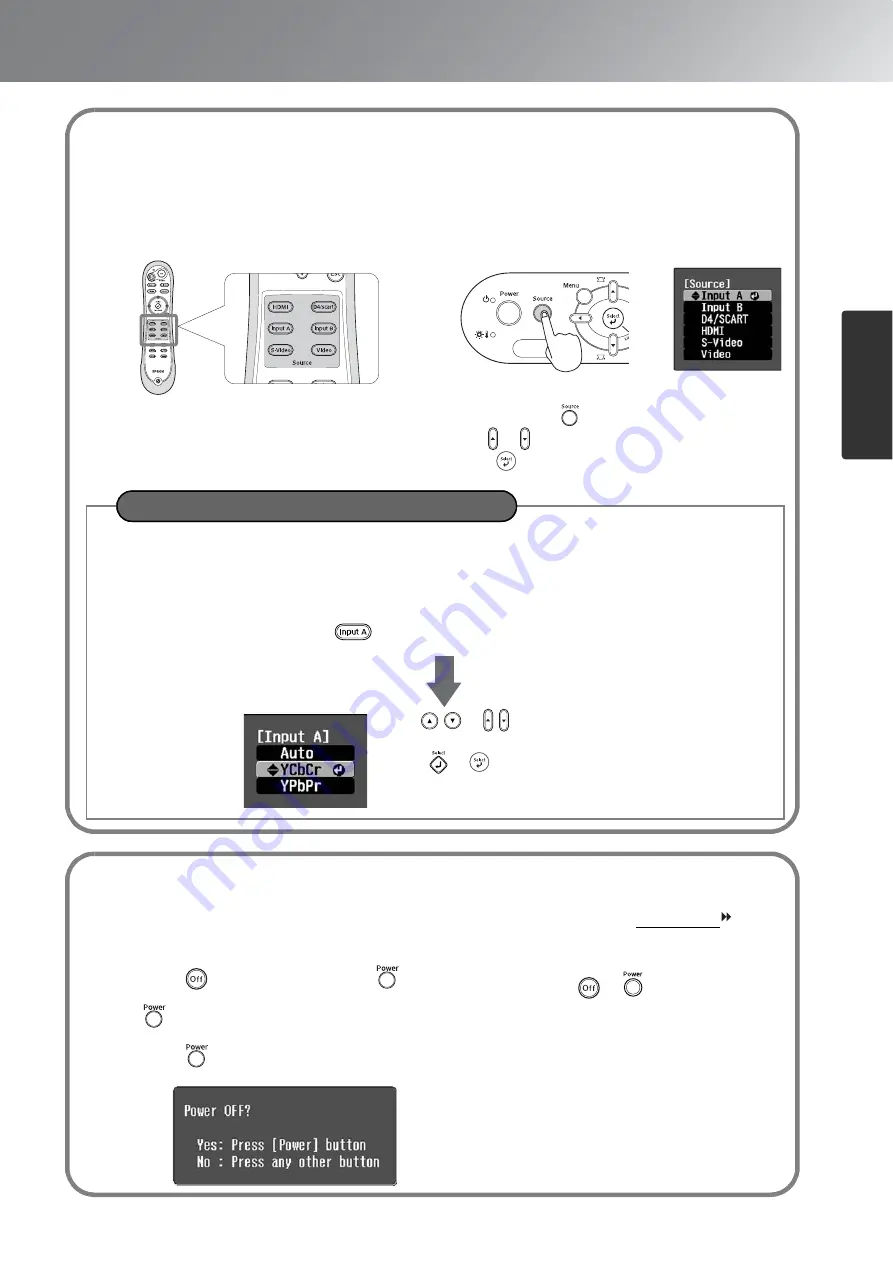
If more than one signal source has been connected, or if no images are projected, use the remote control or the
projector's control panel buttons to select the signal source. For video devices, press the [Play] button on the video
equipment first, then select the signal source.
Using the remote control
Using the control panel
Press the button that has the name of the port on it that
the desired signal source is connected to.
When you press
, the menu is displayed.
Use or to select the signal source.
Press
to accept.
Using the remote control
While projecting an image from equipment
connected to the [InputA] port, press
to
display the menu.
Using the control panel
While projecting an image from equipment
connected to the [InputA] port, select "InputA"
and confirm to display the menu.
The default setting is set to "Auto" to select appropriate signals automatically. However, if the colours appear unnatural,
switch the image signal to match the equipment.
Use
or to select the correct signal to
match the equipment.
Press
or
to
accept.
When projecting an image from the [Input A] port
Turning the power off
1
2
4
3
Turn the power off for the signal sources
that are connected to the projector.
When the projector has cooled down (takes
about 30 seconds), turn off the main power
switch.
Simply pressing
or
does not stop
electricity consumption.
Press
on the remote control or
on
the projector's control panel. If you press
on the projector's control panel, the
following message will be displayed.
Press
again to continue.
Attach the lens cover.


