How to Scan
51
Windows 98
Follow these steps to assign an application to the
]
Start button:
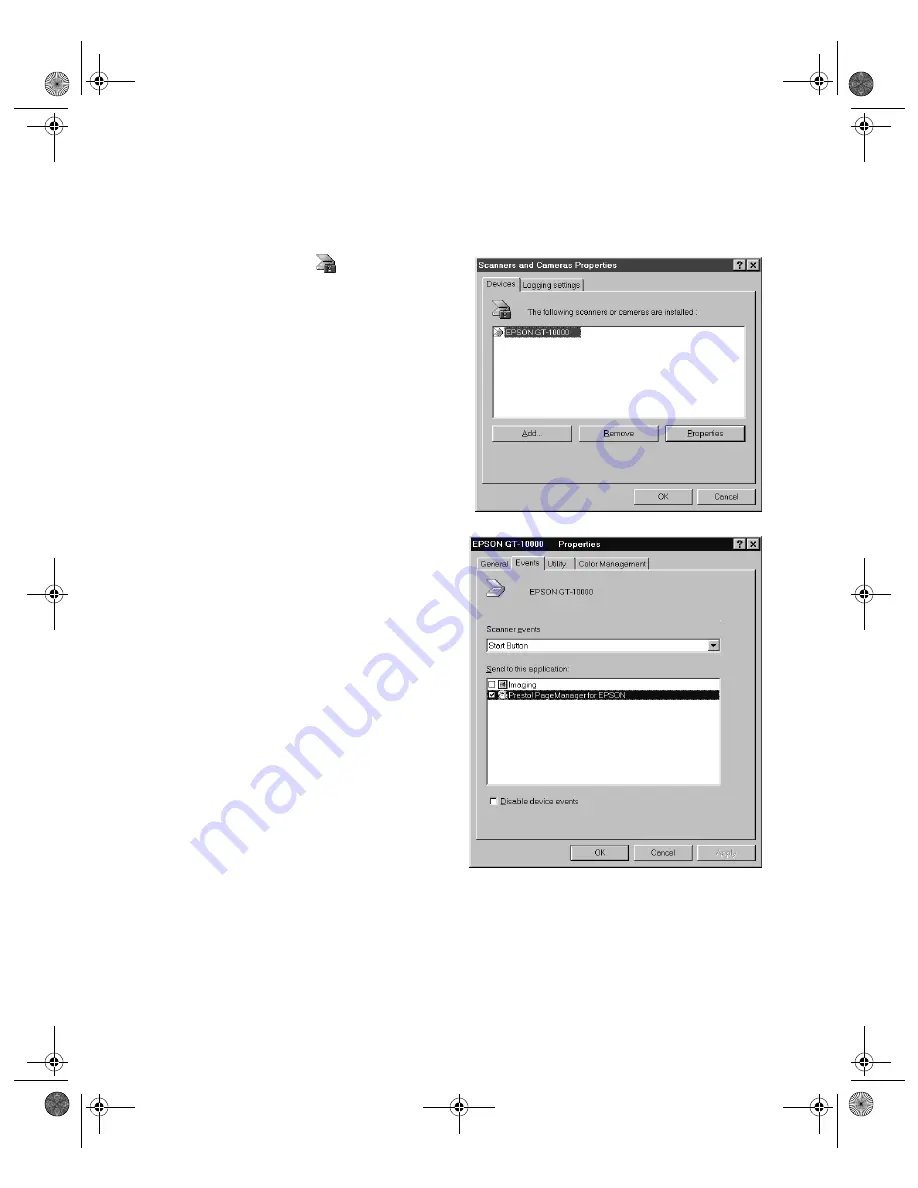
1. Double-click the
Scanners
and Cameras
icon in the
Windows Control Panel. The
window on the right appears.
2. Select
EPSON GT-10000
, if
necessary, and click
Properties
.
3. Click the
Events
tab.
4. Make sure
Start Button
appears
in the Scanner events box, then
deselect any applications you
don’t want to use in the Send to
this application list. When you
finish, a check mark should appear
only beside the application that
you want to assign to the
]
Start
button.
5. Click
OK
to close the EPSON
GT-10000 Properties window,
then click
OK
again to close the
Scanners and Cameras Properties
window.
6. Follow the instructions in “Setting Up Presto! PageManager for One-Touch
Scanning” on page 53 to set up Presto! PageManager for one-touch scanning.
shallot.book Page 51 Thursday, January 27, 2000 9:59 PM
Содержание B107011F - GT 10000
Страница 1: ...COLOR SCANNER USER S GUIDE shallot book Page i Thursday January 27 2000 9 59 PM ...
Страница 40: ...34 Setting Up Your Scanner shallot book Page 34 Thursday January 27 2000 9 59 PM ...
Страница 86: ...80 Network Scanning shallot book Page 80 Thursday January 27 2000 9 59 PM ...
Страница 104: ...98 Solving Problems shallot book Page 98 Thursday January 27 2000 9 59 PM ...
Страница 112: ...106 Installing the TCP IP Protocol shallot book Page 106 Thursday January 27 2000 9 59 PM ...
Страница 128: ...122 Notices shallot book Page 122 Thursday January 27 2000 9 59 PM ...