This section includes steps for the following procedures:
Removing the mounting frames from the hard disk drive
(if necessary)
Installing the hard disk drive in the mounting bracket
Replacing the mounting bracket in the computer
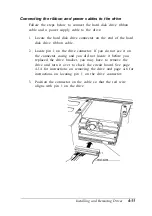
Connecting the drive cables.
Be sure to check the jumper settings on the hard disk drive
before you install it. If you have two hard disk drives, one must
be configured as the master (which contains the operating
system) and the other as the slave. A table of jumper settings
for high-capacity EPSON drives is included in Appendix A.
Also, you may need to know the number of cylinders, heads,
sectors, etc., if the hard disk drive auto-sensing feature in
SETUP is unable to correctly identify your drive. The hard disk
drive table used in the SETUP program is included in
Appendix A. If your drive is not listed or you need more
information, see the documentation that came with your drive
or contact the manufacturer.
4-1
Installing and Removing Drives
Содержание ActionPC 3000
Страница 110: ...Video Resolutions and Colors Specifications A 7 ...
Страница 118: ...System I O address map continued Specifications A 15 ...


