


33
Using the Print Mode Settings
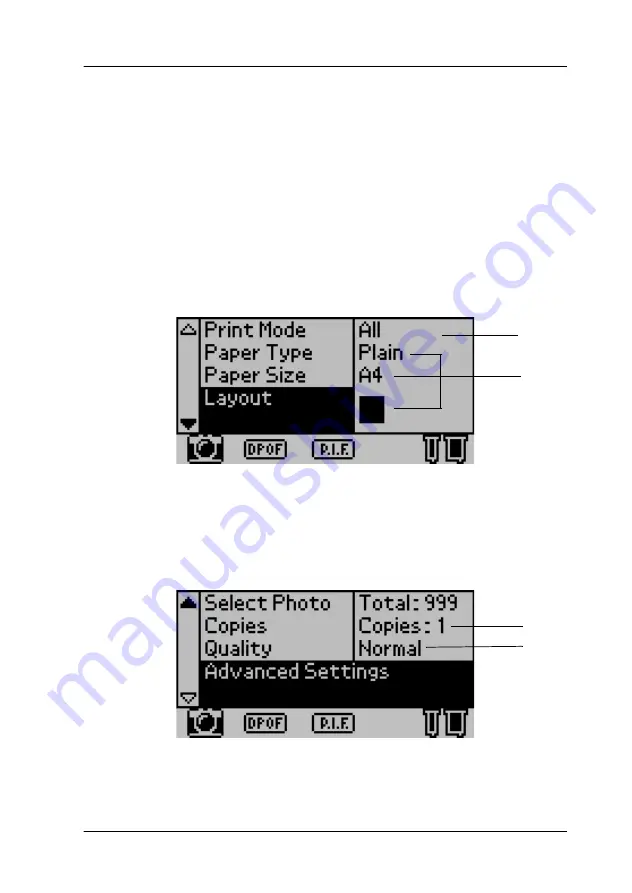
Print all photographs on the memory card
All: Print all photographs on the memory card.
1. Select
All
as the Print Mode.
2. Select the desired setting for
Paper Type
,
Paper Size
, and
Layout
for printing.
3. Scroll down the LCD panel settings, then specify how many
times to print all photos.
4. Select the Quality for printing.
5. Press the
button to print all photographs on the memory
card.
1
2
3
4


