Clip Tuner
Intended use
The clip tuner is designed for tuning electric and acoustic string instruments. The device is approved for bat-
tery operation only. Do not use any other power supply. The correct battery type is speci
fi
ed in the “Technical
Data” section.
Do not expose to moisture, for example in bathrooms or similar spaces.
Any other use than the one described above may cause damage to the product and involves other risks,
such as short-circuits,
fi
re, etc.
The safety instructions must be observed at all times!
This product complies with the applicable national and European requirements
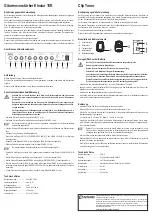
Controls and Parts
(1) Function
button
(2) Battery
compartment
(3) Tuning
display
(4) Notes
display
(5) Mode
display
Inserting/Replacing the Battery
The clip tuner must be switched off during battery replacement.
Batteries should be kept out of the reach of children.
Make sure that the polarity is correct when inserting the battery.
Remove the battery when the device will not be used for a while.
Leaking or damaged batteries can cause burns if they come into contact with the skin.
You should therefore wear suitable protective gloves.
Make sure that the battery is neither short-circuited nor thrown into a
fi
re. Furthermore,
the battery cannot be recharged. There is a risk of explosion.
• Slide off the battery compartment cover (2) on the back of the tuner.
• Insert one 3V CR2032 Lithium button cell battery into the battery compartment, observing the correct
polarity. The positive pole on the button cell battery must point outwards.
• Slide the battery compartment cover back into place.
• If the device is no longer working or the display contrast is getting weak, the battery is
fl
at and should be
changed as described above.
Operation
• Clip the Clip Tuner onto your instrument’s headstock.
• Switch the Clip Tuner on by brie
fl
y pressing the function key (1).
• Select the desired operating mode by brie
fl
y pressing the function key (1). It will appear in the operating
mode display (5):
C = chromatic/ G = guitar/ B = bass / V = violin / U = ukulele
• Play one string. The note will appear in the note display (4). Tune your instrument until the note display
matches the string you are playing and the indicator is in the centre of the tuning display (3).
Play only one string at a time. Do not hit the string too hard and do not use a pick. Striking the
string too hard can lead to reverberation noise. This reverberation noise overwhelms the actual
tone and leads to inaccurate measurements.
Tune all the remaining strings of your instrument as described above.
• After use, turn off the Clip Tuner by holding down the function key (1) until the device switches off.
• To save battery, the clip tuner also switches itself off automatically after it has not been used (no sound has
been registered) for approx. one to two minutes.
Technical Data
Operating voltage ........................3 V/DC
Battery .........................................3V-Lithium button cell CR2032
Battery life ....................................approx. 17 hours of operation
Operating modes .........................chromatic / guitar / bass / violin / ukulele
Tuning range................................B0 - B7
Precision ......................................±1 cent
Calibration ...................................A4 = 440 Hz
These operating instructions are a publication by Conrad Electronic SE, Klaus-Conrad-Str. 1,
D-92240 Hirschau (www.conrad.com).
All rights including translation reserved. Reproduction by any method, e.g. photocopy, micro
fi
lming,
or the capture in electronic data processing systems require the prior written approval by the editor.
Reprinting, also in part, is prohibited.
These operating instructions represent the technical status at the time of printing. Changes in
technology and equipment reserved.
© Copyright 2013 by Conrad Electronic SE.
Guitar ampli
fi
er Electar 15R
Intended use
The guitar ampli
fi
er is used for amplifying and reproducing the low-level electric output signals of electric
guitars.
This product may only be powered using the enclosed wall plug transformer. The wall plug transformer has
only been approved for connection to 230 V/AC 50 Hz mains sockets of the public grid.
The product may be used only in enclosed indoor locations, never outdoors. Contact with moisture, for
example in bathrooms, must be avoided.
Any use other than that described above could lead to damage to this product and involves the risk of short
circuits,
fi
re, electric shock, etc. No part of the product may be modi
fi
ed or converted!
The safety instructions must be observed at all times!
The product complies with the applicable national and European requirements. All names of companies and
products are the trademarks of the respective owners. All rights reserved.
Connections and Control Elements
Set-up
Select a level,
fl
at and stable mounting location.
Protect valuable furniture surfaces by using an appropriate underlay; otherwise, it may cause scratches.
Set up the guitar ampli
fi
er in such a way that it cannot fall.
Connection/Getting Started/Operation
Before connecting the guitar, switch off the guitar ampli
fi
er and all the other devices that
are to be connected and disconnect them from the power supply network.
To connect the guitar, use only the enclosed or other shielded jack-plug cables suitable
for this purpose. The use of other lines may cause interference.
To avoid distortion or mismatching that may damage the device, connect only electric
guitars with a suitable jack output to the input.
• Connect your guitar to the INPUT terminal (1).
• Connect your headphones to the PHONES socket (10) if needed.
The integrated loudspeaker of the guitar ampli
fi
er will automatically be switched off when the
headphones are connected.
• Plug the small plug of the power pack into the connection socket on the rear of the guitar ampli
fi
er.
• Plug the power unit into the mains socket.
• Turn the controls DRIVE (2), OVERDRIVE VOLUME (3) and CLEAN VOLUME (5) to the minimum setting
(left stop).
• Bring the CLEAN (4) switch to the CLEAN position (switch not pressed).
• Switch on the guitar ampli
fi
er using the POWER (12) switch.
When the guitar ampli
fi
er is switched on, the power indicator (11) lights up.
• Play the guitar and set the desired volume using the CLEAN VOLUME (5) control.
• Adjust the sound as desired using the controls of the equalizers (6, 7 and 8).
• Set the effect ratio of the REVERB as desired using the REVERB LEVEL (9) control.
• Press the CLEAN (4) switch and set the desired distortion level using the DRIVE (2) control and the
desired volume of the overdrive channel using the OVERDRIVE VOLUME (3) control.
• If you do not want any distortions, do not press the CLEAN (4) switch.
Technical Data
Operating voltage ........................230 V/AC, 50 Hz
Power consumption .....................max. 32 W
Output performance .....................15 W
Input sensitivity ............................43 mV (for 1 kHz)
Input impedance ..........................470 kOhm
Loudspeaker ................................20 cm (8”) / 4 ohm


