background image

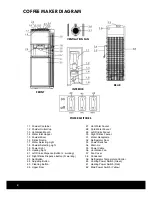
COFFEE MAKER DIAGRAM 


REAR 

INTERIOR 

VENTILATION FAN 


FRONT 


POWER SWITCHES 


1.1   Powder Container 

2.7   Hot Water Faucet 

1.2   Powder Outlet Cup 

2.8   Cold Water Faucet 

1.3   Ventilation Mouth 

2.9   Left Drinks Faucet 

1.4   Water Inlet Hopper 

3.0   Right Drinks Faucet 

1.5   Powder Mixer 

3.1   Water Receptacle 

1.6   Drinks Nozzle 

3.2   Refrigerator Door 

1.7   Water Selecting Light 

3.3   Power Switches 

1.8   Powder Selecting Light 

3.4   Drain Lid 

1.9   Power Light 

3.5   Power Cable 

2.0   Heating Light 

3.6   Ventilation Fan 

2.1   Left Drinks Dispense Button (L. working) 

3.7   Fan Cover 

2.2   Right Drinks Dispense Button (R. working) 

3.8   Condenser 

2.3   Set Button 

3.9   Refrigerator Temperature Control 

2.4   Adjusting Button 

4.0   Cooling Power Switch (Green) 

2.5   Cleaning Button 

4.1   Heating Power Switch (Red) 

2.6   Upper Door 

4.2   Main Power Switch (Yellow) 


4 


Содержание EP-COFCOM1

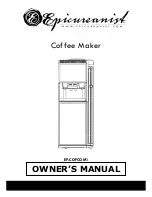
Страница 1: ...Coffee Maker EP COFCOM1 OWNER S MANUAL...

Страница 2: ...f refrigerated appliances special handling is often required It is the consumer s responsibility to comply with federal and local regulations when disposing of this product Locate the unit away from d...

Страница 3: ...his appliance must be properly grounded The cord should be secured behind the unit and not left exposed or dangling to prevent accidental injury A standard electrical supply 110V AC only 60Hz properly...

Страница 4: ...Nozzle 3 2 Refrigerator Door 1 7 Water Selecting Light 3 3 Power Switches 1 8 Powder Selecting Light 3 4 Drain Lid 1 9 Power Light 3 5 Power Cable 2 0 Heating Light 3 6 Ventilation Fan 2 1 Left Drinks...

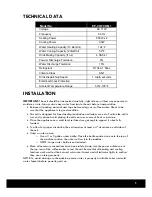
Страница 5: ...designed for free standing installation and indoor use only Position the unit in a cool dry place Avoid placing the unit near any source of heat or moisture Place the appliance on a solid level surfa...

Страница 6: ...han once within 5 seconds to alternate between the left water column left powder column right water column and right powder column Press the Adjusting button to choose a level in each column 1 Powder...

Страница 7: ...m cold to hot drinks and 30 minutes when switching from hot to cold DISPENSING DRINKS Once the desired level of powder and water is set press the L working or R working button to dispense a drink REFR...

Страница 8: ...and remove it from the Powder Container b Remove the protective cover c Pull down the Ventilation Mouth d Remove the Water Inlet Hopper e Remove the Powder Mixer and all joints and couplings f Remove...

Страница 9: ...a Too many hot or cold drinks have been dispensed in a short time b Heating or Cooling switch is not on c Not enough time for heating or cooling to take place a Allow some time for the unit to proper...

Страница 10: ...s warranty on entire product Three years limited parts warranty covering the stainless burner and a thirty day limited parts warranty on grill accessories Wine Accessories and Racking Systems are not...

Страница 11: ...11 11...

Страница 12: ...fications without notice WARNING Please do not place the unit within reach of children For adult use only Epicureanist is a trademark of Epicureanist LLC All products features and services are subject...

Отзывы: