4
GB
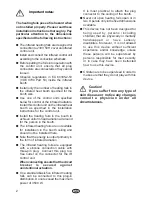
Caution! Never drive fastening
elements (staples, pins, nails or
screws) through the aluminum
heating filaments
If the heating filament is interrupted, the
heating foil no longer heats up!
When installing the silicone housing always
ensure that the protective thermostat points
up.
Never screw in screws in the area of the
heating foils during final installation.
Caution! Observe maximum
switching power for control unit.
Electrical connection
Feed line
Control unit
Plug
IR heating foils
max. 3500 W
distribution
650 W
650 W
550 W
550 W
Take appropriate measures for pull relief on
the feed lines for the foils (cable clamps). Plug
the connection plugs for the IR heating foils into
the distribution block on the control unit.
When installing route the connection leads
through the empty conduit or take other
suitable measures to prevent damage.
Use the control unit 60 IR, 48 IR or EMOTEC
HIC75.
Start-up
Start up with the associated control unit.
Note that this heating system has a certain
"time delay". It is first necessary for the foils
to heat up the channeled boards in front,
before they can radiate heat into the booth.
It is quite possible for the temperature at the
surface of the wood on the inside of the
booth to be higher than the room
temperature inside the booth.
The primary effect of the infrared heat booth
is its capability of radiating (infrared) heat to
humans; the heat resulting in the room is a
secondary, ancillary effect, which is,
however, experienced as pleasant and
does not have any negative effect on the
treatment.
Please observe, that the IR heat booth is
not a sauna with typical hot / cold treatments
and that the temperatures present in a
sauna cannot be achieved!
Possible connection schematic


